In this post, you will learn how you can speed up your WordPress blog using a content delivery network or CDN as they’re normally called. A content delivery helps in speeding up any website by serving its assets such as images, videos, JavaScript, CSS and more from the closest servers located to their location instead of just one central location. The data is replicated on each of the servers throughout the world so that every user will be served the same but data from their closest server. Hence, using a CDN speeds up the delivery of content on your website considerably.
Now that Google takes into account website loading times for search engine rankings, it’s very important for webmasters to make sure that their websites stay fast so they rank well. Here at iTD, we use MaxCDN and so far we’re very pleased with the speed boost it has given to the website. Using a CDN such as MaxCDN is way easier than many might think. MaxCDN costs $39.95 for 1TB per month so it’s highly economical for the amount of data transfer it offers.
Here’s walkthrough so that you can easily get it up and running.
- First of all, you need to install W3 Total Cache plugin. It’ll be great if you have APC (OpCode Cache) installed on your server as that really makes installing W3 Total Cache more useful than competing plugins. W3 Total Cache simplifies the steps needed to get MaxCDN up and running.
- Now you need to create an account on MaxCDN. It’ll cost you $39.95 per month for 1TB data transfer.
 Once you’ve done that, log in to your account, and go to Manage Zones. here, you’ll be creating a new Pull Zone. Click on + Create Pull Zone.
- You’ll have to fill in information about your new Pull Zone here. Give your Pull Zone any name such as your blog’s name. Insert your blog’s address in Origin Server URL. Leave custom CDN Domain alone and compression alone.

- Click on Save Changes and you’re done here. Just remember to note the Temporary URL that is made for the Pull Zone you just created. You’ll need to use it later.
- Now go to your WordPress Dashboard and go to W3 Total Cache plugin page. Navigate to Content Delivery Network, enable it and select Mirror: NetDNA / MaxCDN in the drop down in CDN type.

- Now go to Content Delivery Network Settings and in configuration, where it says ‘Replace site’s hostname with:’ add your temporary URL for CSS and JS. You might need to do that 4 times. After that, click on Test NetDNA to make sure everything’s working.


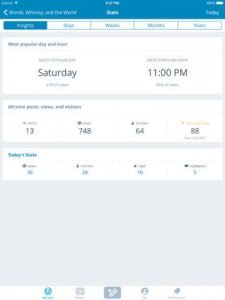
That’s it. Your visitors should see a speed boost when loading your website from now on. You can see the statistics of how much data you’re using per day and which locations get the most hits for your website.
We’ll be covering more WordPress tips and tricks regularly. Subscribe to our RSS feed, like our Facebook Page and follow our Twitter account !
I don’t believe your reference to MaxCDN’s pricing scheme is correct. The $39.95 is for the purchase of 1TB to be used over the course of 12 months. At least that is how I understand their terms. Please correct me if I’m wrong.
Cheers.
I don’t believe your reference to MaxCDN’s pricing scheme is correct. The $39.95 is for the purchase of 1TB to be used over the course of 12 months. At least that is how I understand their terms. Please correct me if I’m wrong.
Cheers.