Whether under the same roof or separated by distance, Mac users can easily share screen with another Mac user. This feature allows users to talk to other Mac users while sharing their work, give presentations, fix an issue, or get recommendations right from their desktop. Users can initiate the process of sharing through the Finder app if they are on the same network, and by iMessage, if they are working remotely, like from home due to COVID-19 precautionary health measures these days.
We have listed down the steps to follow for screen sharing on Mac. Before you begin, make sure that iMessage service is activated to use this feature.
Enable screen sharing feature on Mac
When on the same network, users must enable screen sharing from settings first:
- Go to System Preferences > Sharing

- Enable ‘Screen sharing’ from the menu on the left side of the window. On selection, the user’s Mac name will automatically be converted into an IP address as well, so that users can keep their Mac’s name private.
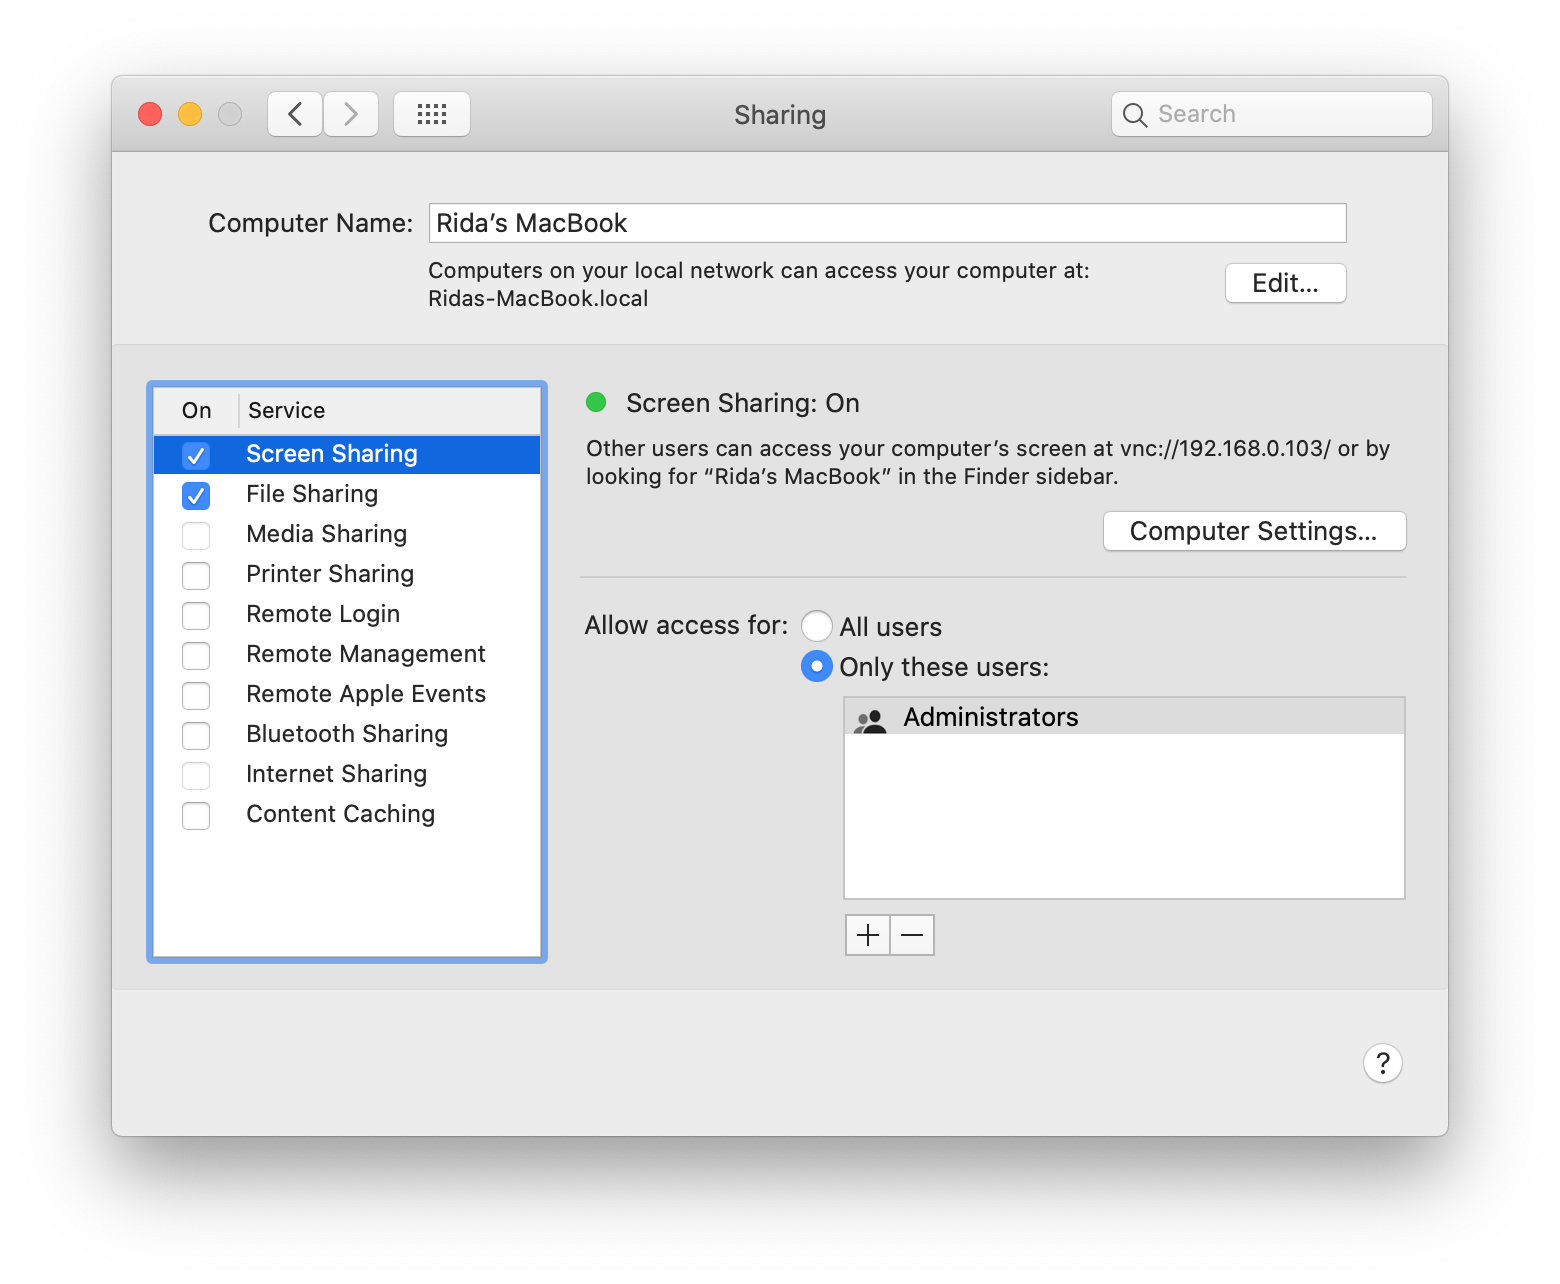
- For additional options, tap on ‘computer settings’ to turn on the following: users would need permission before sharing or to set a password to allow screen sharing.
- In the same window, users can change their Mac’s name, allow all users or only specific users the access their computer.
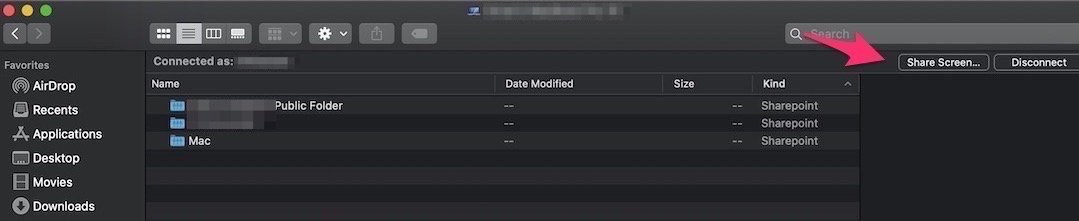
Select network via Finder app Sharing
- Open Finder, and click on network in the left sidebar.
- A list of available Mac names will be displayed which are connected to the same network.
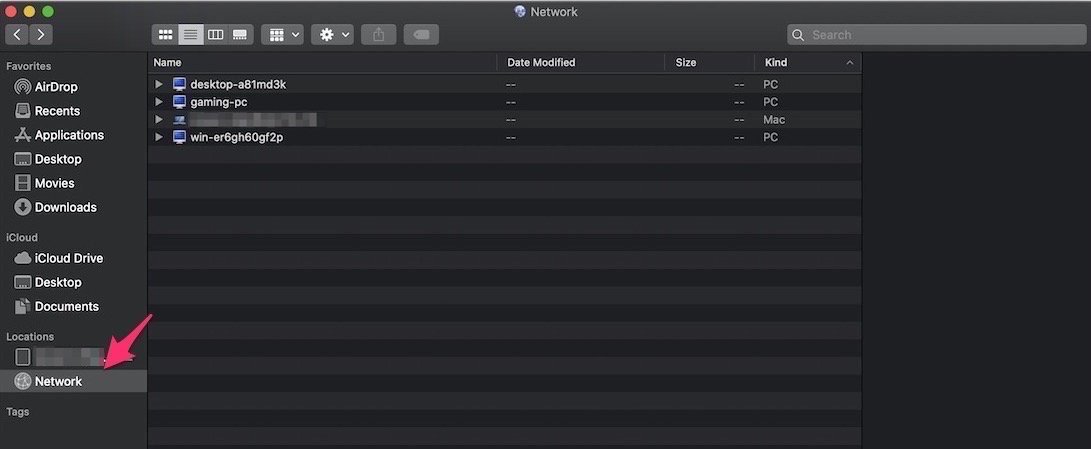
- Simply double click the Mac, and click on the ‘share screen’ option the top right of the screen to begin.
Sharing screen via iMessage
- When messaging on Mac via iMessage service, open the chatbox of the person with who you want to share the screen with.
- In the chatbox, click on the ‘details’ option on the top right of the screen to open the contact’s information to access options for FaceTime call and screen sharing.
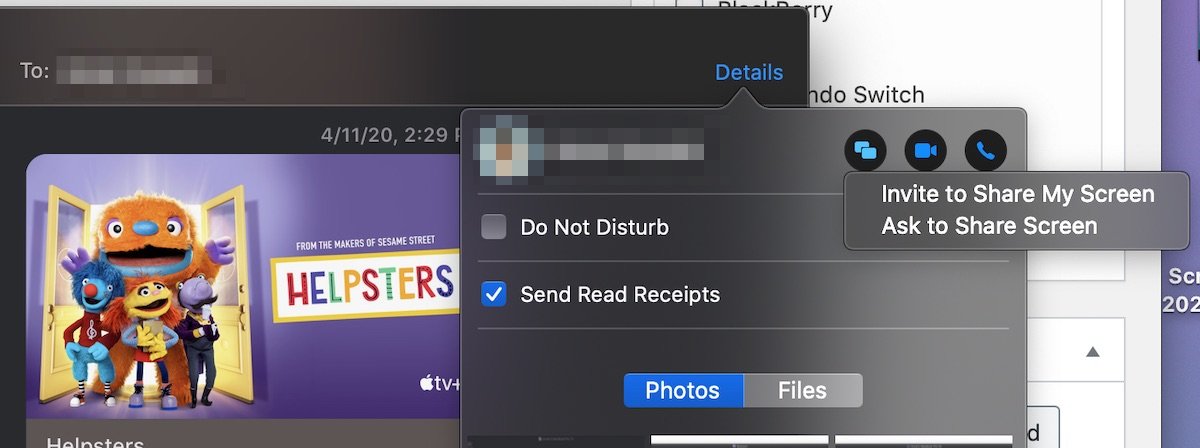
- Tap on the
 icon to being the sharing options.
 - Users will be given two options: if they want to invite another person to view their screen or to ask to view someone else’s screen.
- After selecting the desired option, the other person will get a notification to accept or reject the screen sharing request.
Receiver screen sharing settings
The person who is requested to either view or to share their own screen can enable a few settings before initiating the process.
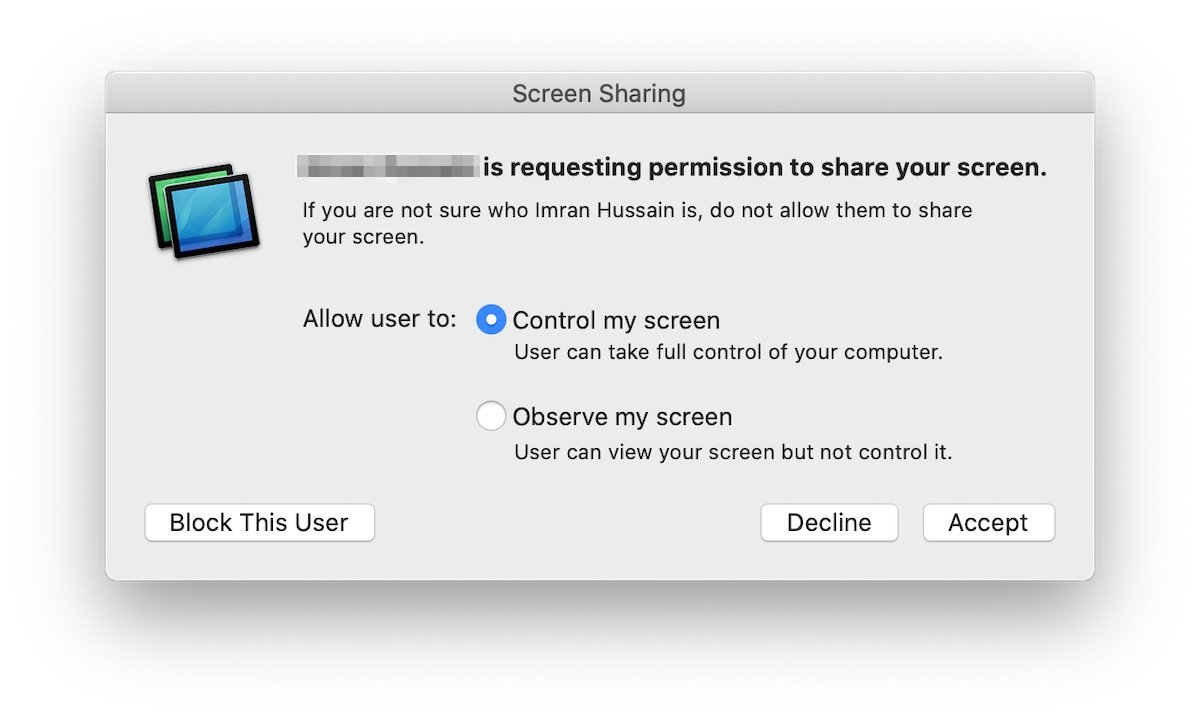
- The receiver can either allow the other person to control their Mac or just observe.
- If the request is from an unknown person, the receiver can block the person by selecting ‘Block this User’ on the bottom left of the request window.
Stop Sharing
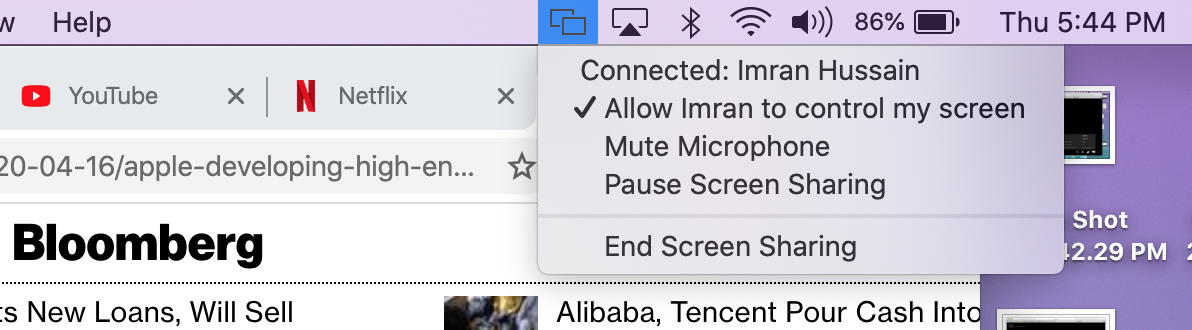
- To stop sharing their screen, users can tap on the icon and select End Screen sharing. If a user wants to pause sharing for some time, he/she can select ‘Pause Screen sharing’ via the same UI.
- If users want to stop viewing, select screen sharing > quit screen sharing.
System requirements
Macs running on the following OS versions can use this feature, via iMessage and Finder.
- macOS High Sierra
- macOS Mojave 10.4
- macOS Catalina 10.14
From experience, it is an easy and safe way for two Mac users to share work in progress, ask for settings, seek help, and much more. However, it is restricted to screen sharing between two people at a time. If Mac users want to share their screen with multiple people on other devices like Windows PC, they can do so via third-party apps like Zoom.


1 comment