Here is how you can create screenshots with Apple product frames using the iFrames shortcut. This shortcut supports iPhone, iPad, Mac, Apple Watch, Apple Displays, and even Apple TV, and works on both iOS and macOS. This shortcut also lets you combine screenshots, which makes it great for blogging.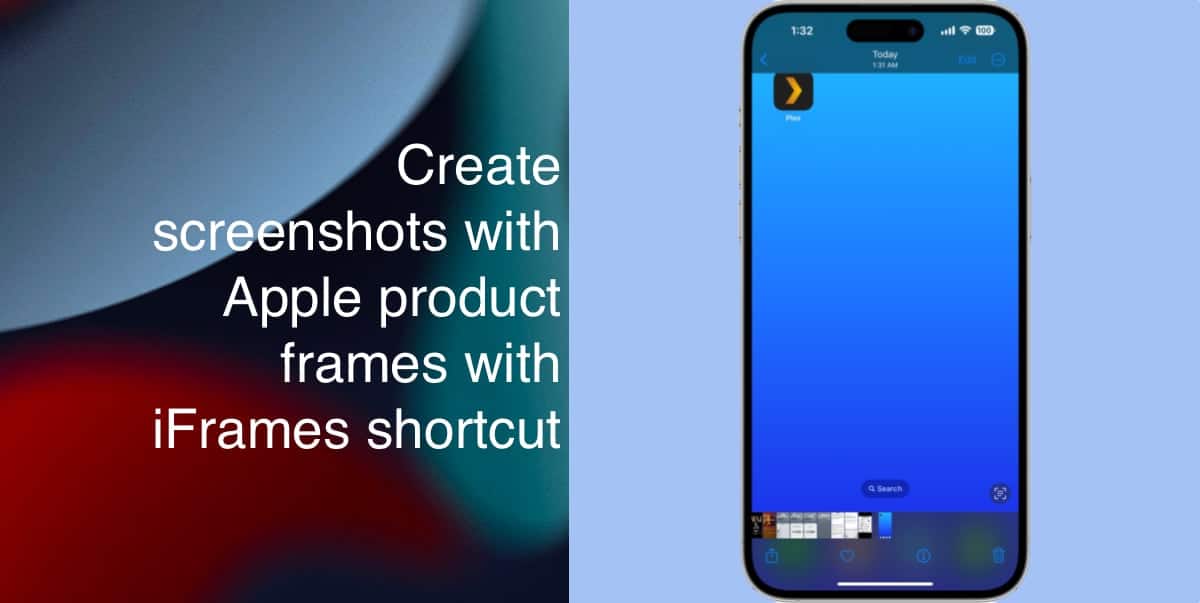
Shortcuts app on iOS and macOS is a powerful tool and allows for automating different types of tasks. Apple provides support for actions from apps, as well as complex scripting, which enables shortcuts like iFrames to exist.
Created by Om Chachad, iFrames is an amazing shortcut that allows users to add Apple product frames to their screenshots. These screenshots can originate from any Apple device and can be used via the Photos or Files apps, as well as Finder in macOS. The app supports a variety of Apple products and is even smart enough to detect your current device.
Auto-detection for the device is supported for the following devices:
- All Apple Displays
- iMac (2015 and later)
- MacBook Pro (2016 and later)
- MacBook Air (2018 and later)
- iPad Pro (2018 and later)
- iPad Air (fourth generation and later)
- iPad (7th generation and later)
- iPhone 6 and later
Once run, the shortcut can create an output image in just 10 seconds, which makes it the fastest solution available for creating framed screenshots. One of the best features of this shortcut is that it can also allow you to combine multiple images into one, which is extremely useful, specially if you are a blogger.
iFrames can be installed by going to the website using Safari on iPhone, iPad, or Mac, and tapping on the “Add to Shortcuts” button. If you are on Mac, make sure to enable “Allow Running Scripts” in Shortcuts Preferences, otherwise, the shortcut will not work.
Use iFrames to create screenshots with Apple product frames
Here is how iFrames can be used:
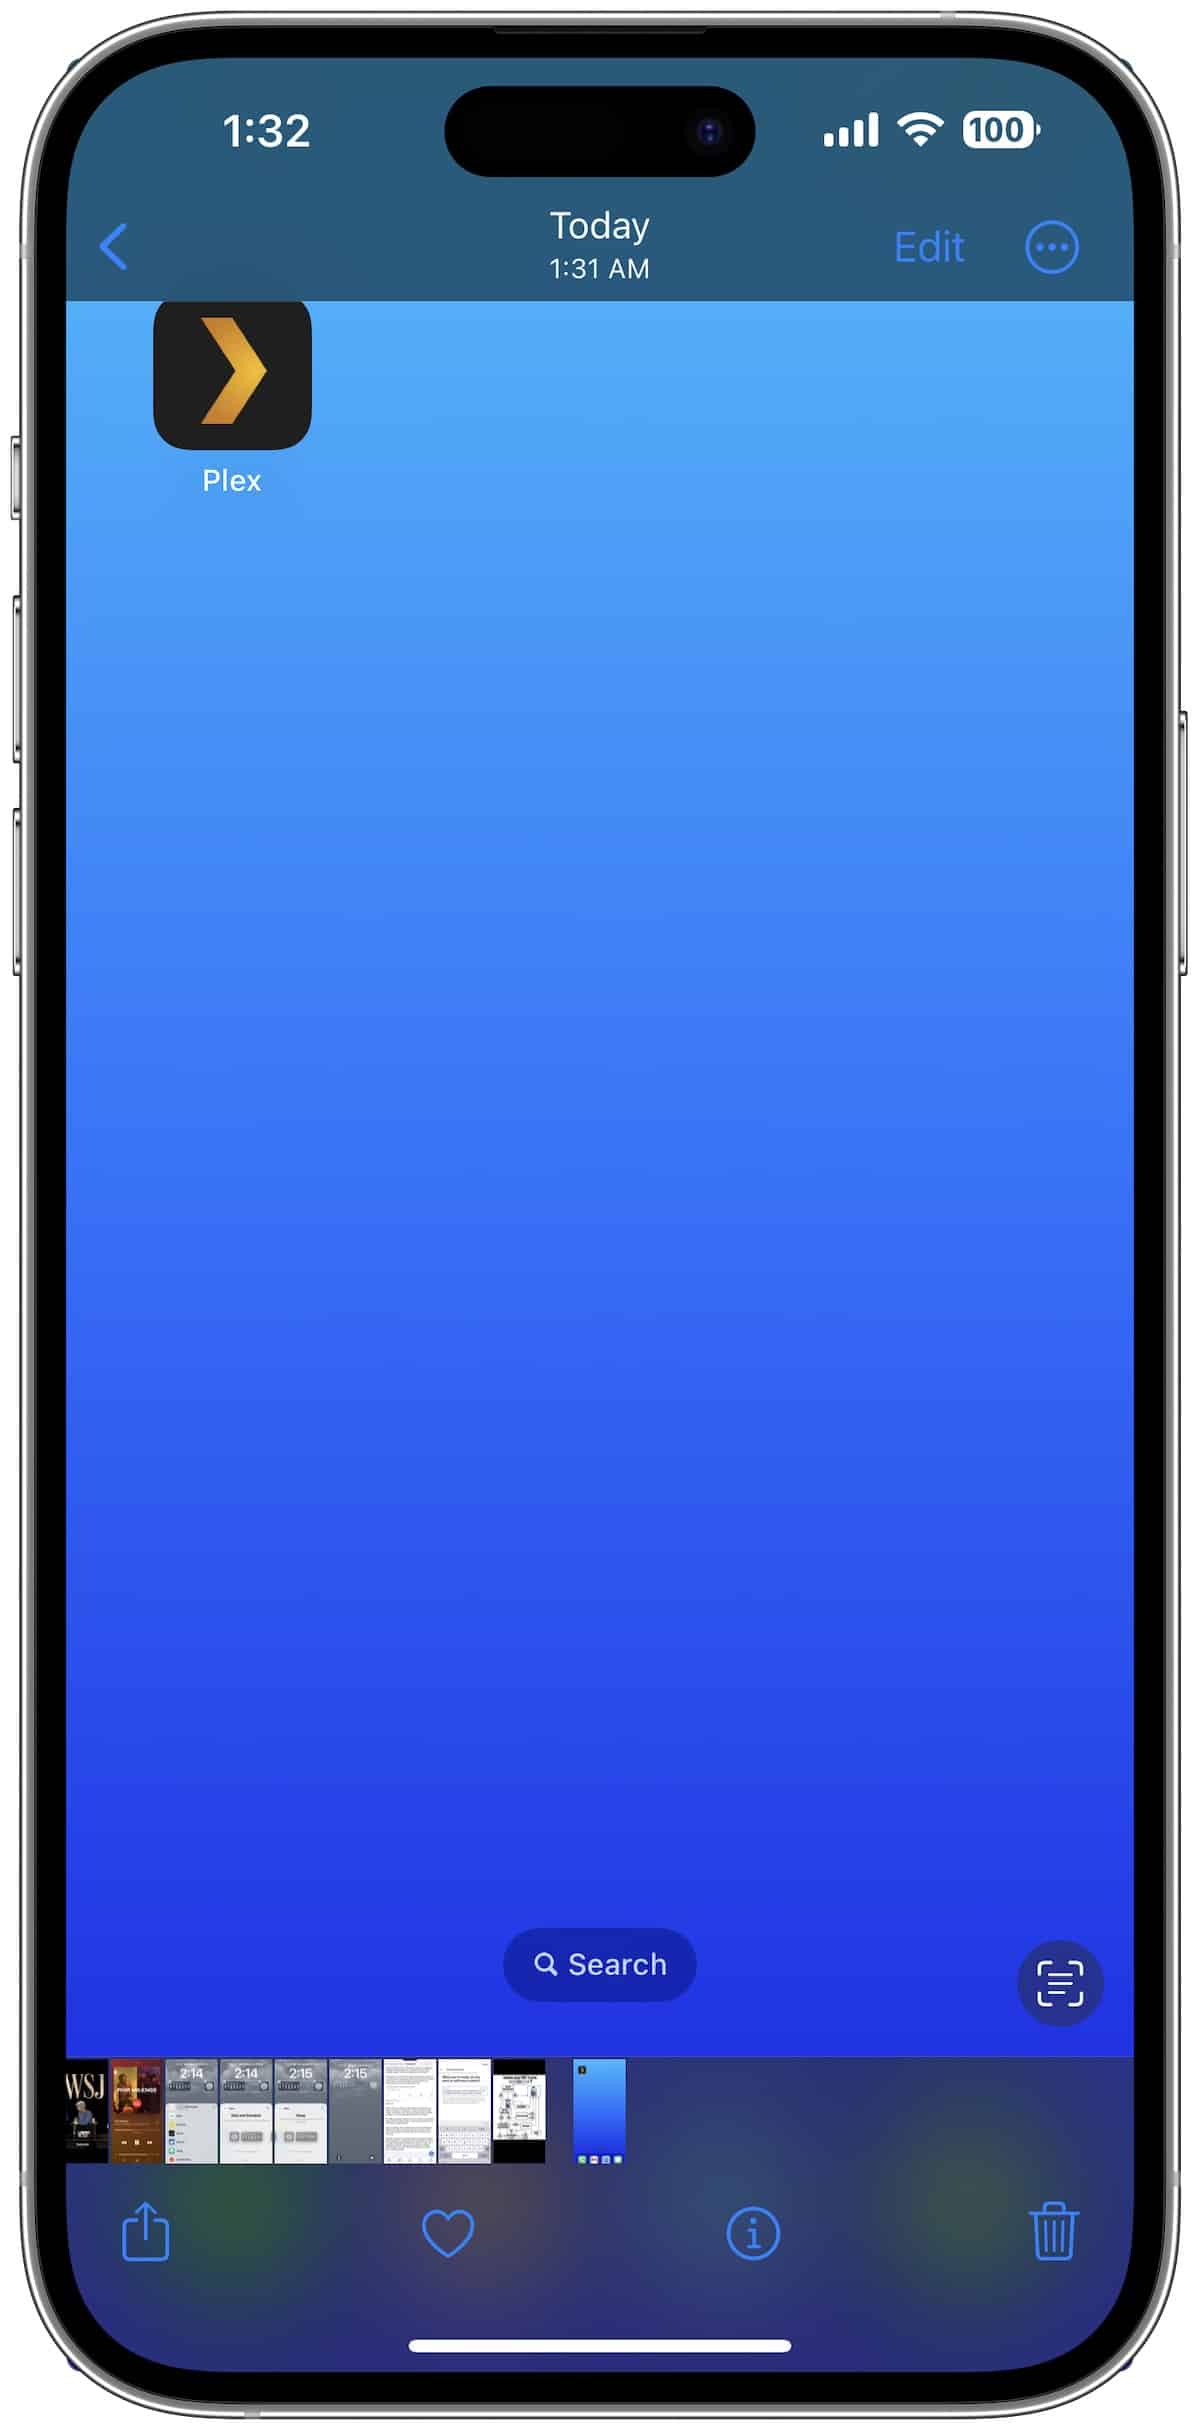
- Go to the Photos app and open any screenshot. Make sure that it is a screenshot taken on an Apple device as it will have the correct resolution.
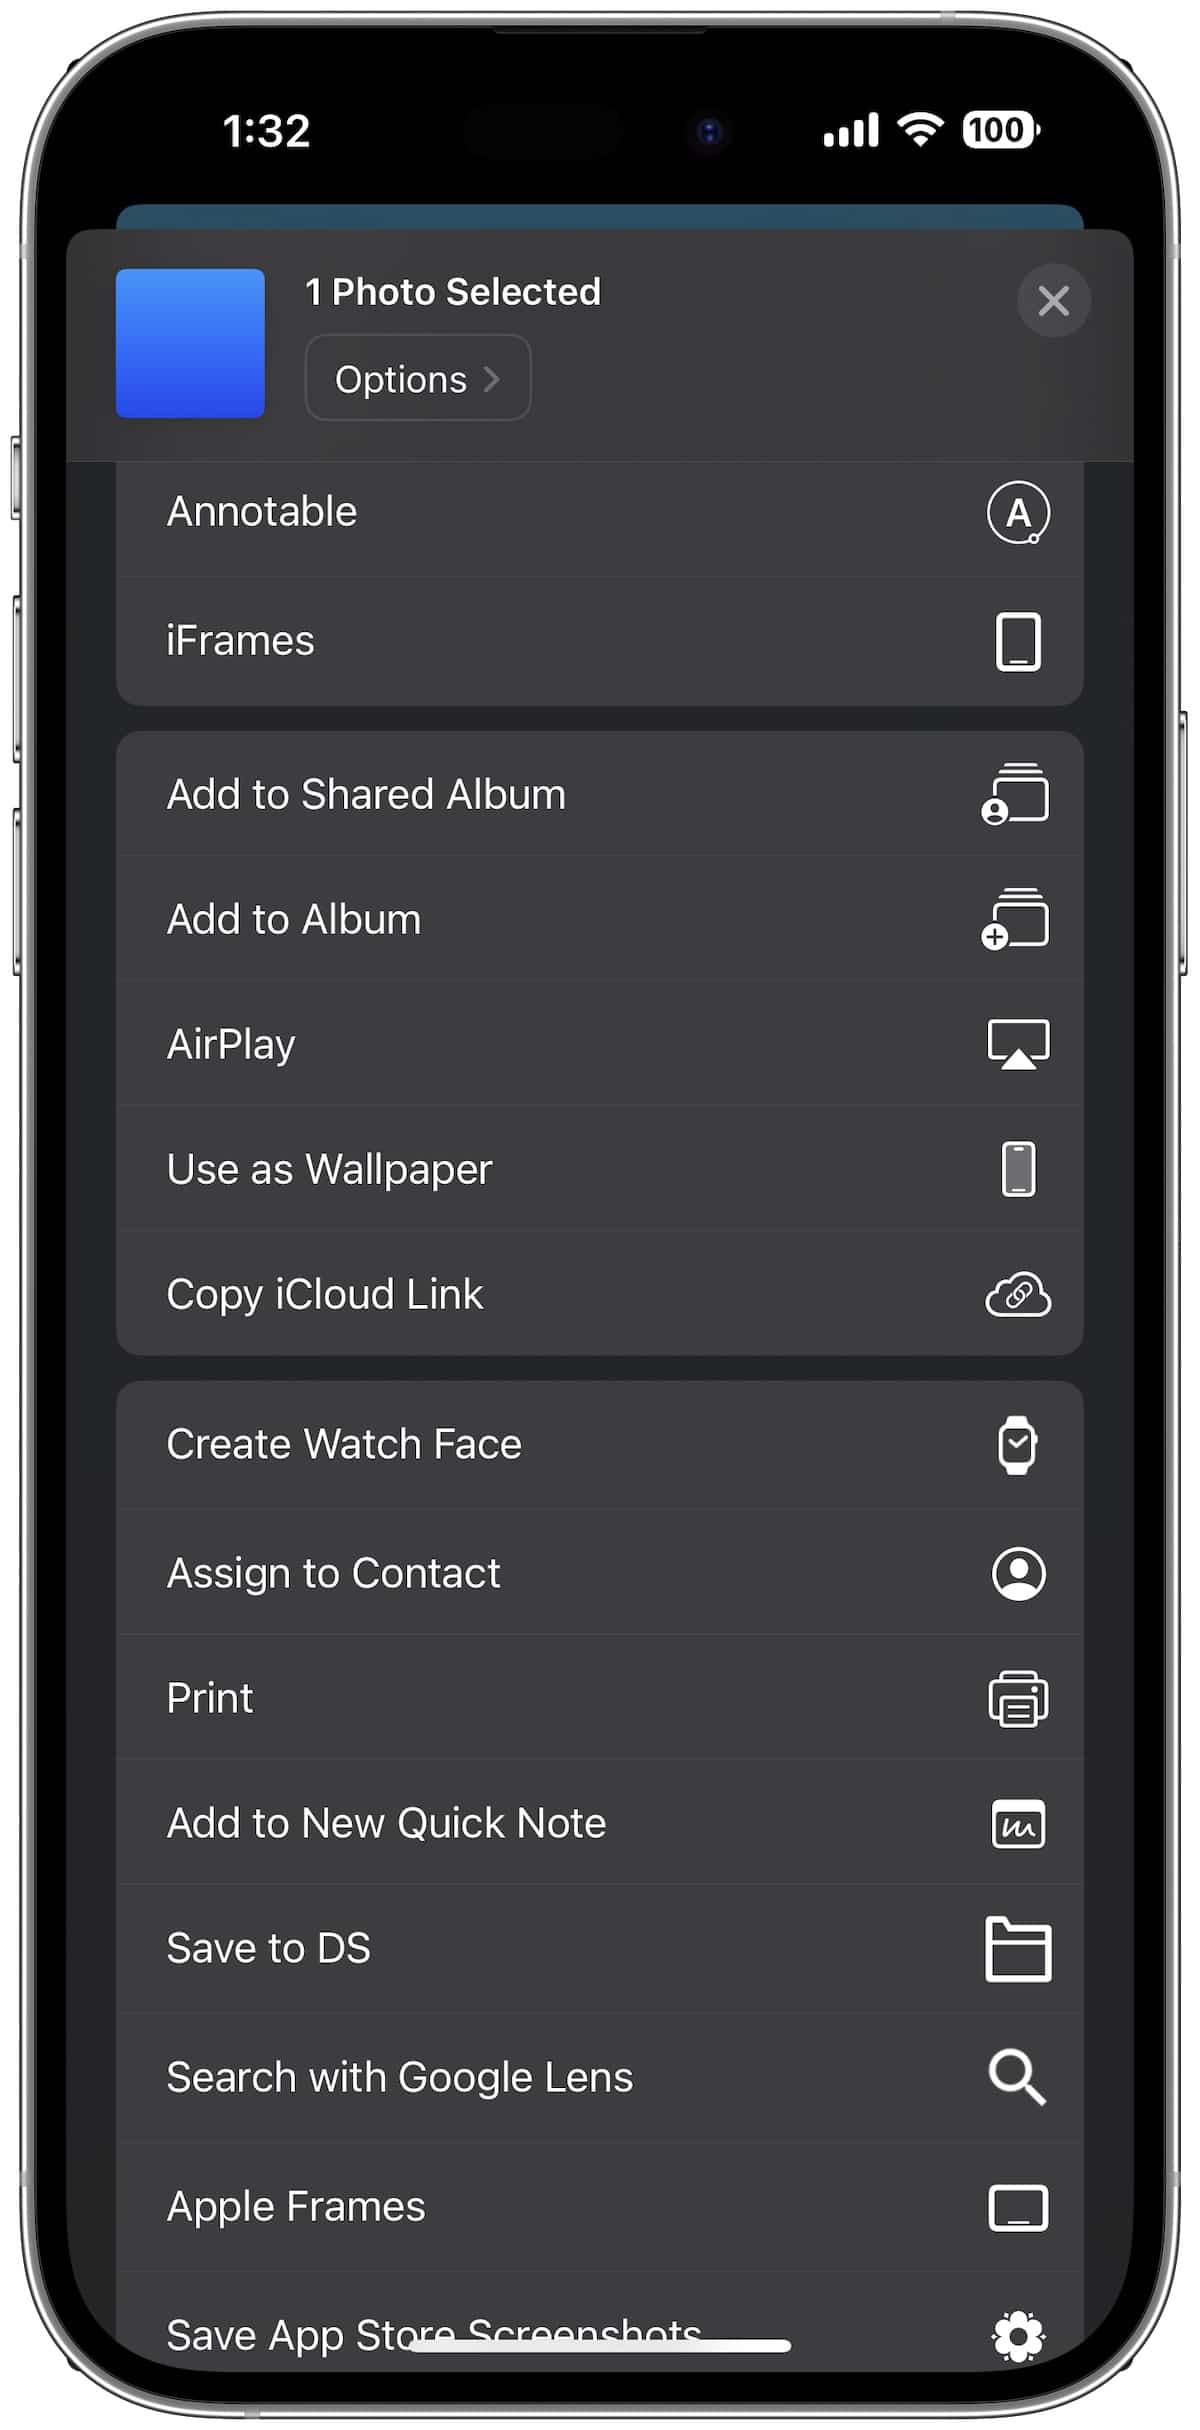
- Tap on the share icon and tap on the iFrames entry in the menu.
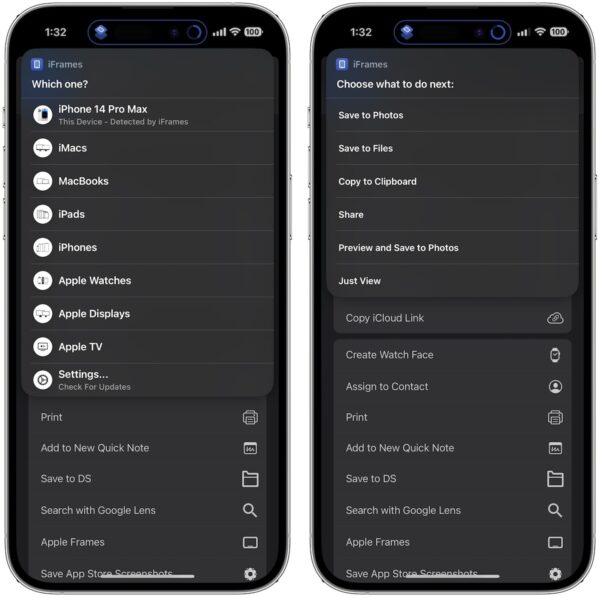
- You will see a menu asking which device frame you want to use for the screenshot. If it is a screenshot is taken on your current device, iFrames will auto-detect it and show the option at the top of the menu. Alternatively, you can dig deep into the list of devices and select the right one for your image. Next, you will be given the option to either save the output image to your Photos or Files apps, copy to clipboard, share it, or preview it and save it to Photos.
If you use the iFrames option by selecting multiple images, you will be given the option to combine them, just like the image we have used above. Here’s how you can do so:
- Select multiple images in the Photos app, Files app, or Finder.
- Open the share menu and use the iFrames option.
- You will be given an option to first select the frame for your screenshot.
- Next, you will be asked if you want to combine the screenshots or output them as separate images. Select the combine screenshots option.
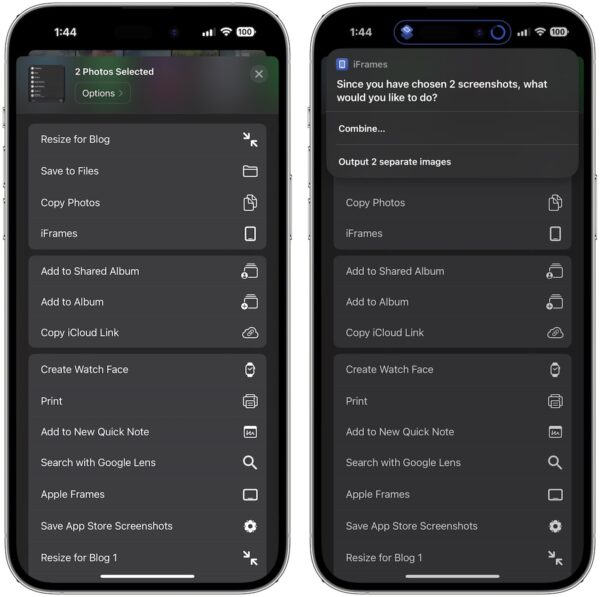
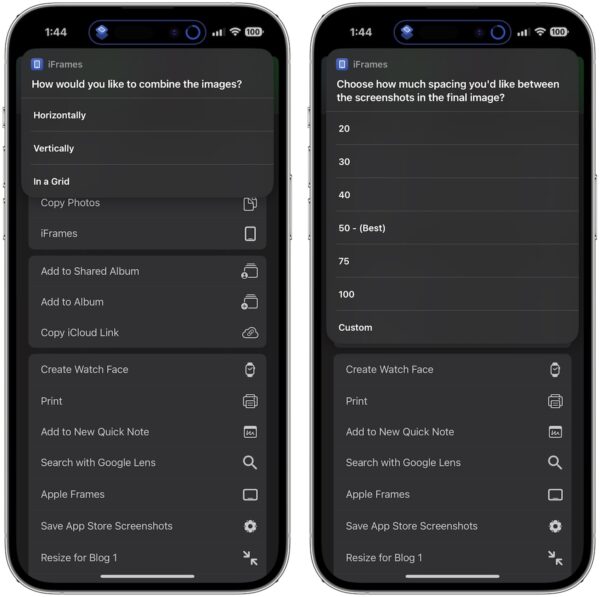
- Afterwards, you will be asked how you want to combine the images. If you want to show images like how we have done in this guide, select the “Horizontally” option. In the next screen, select the spacing that you want between the screenshots in the final image. Use the 50% option, which works the best.
- Next, you will be asked where to save the image, just like it does with single screenshots.
You don’t need to buy and install any app from the App Store and can get this functionality for free. Without this tool, adding frames to screenshots would be a tedious process. If you like iFrames, make sure to let the developer know on their website.