BitLocker is a full disk encryption feature available on Windows 11 Pro, Enterprise, and Education editions. It uses a Trusted Platform Module (TPM) chip to encrypt the entire contents of your hard drive, including your operating system, personal files, and applications.
BitLocker helps protect your data from unauthorized access, even if your computer is lost or stolen. It also helps to prevent data breaches caused by malware or unauthorized software modifications.
Here are some of the benefits of using BitLocker in Windows 11:
- Data protection: BitLocker encrypts the entire contents of your hard drive, including your operating system, personal files, and applications. This makes it very difficult for unauthorized users to access your data, even if they have physical possession of your computer.
- Prevents data breaches: BitLocker can help to prevent data breaches caused by malware or unauthorized software modifications. If an attacker tries to tamper with your computer, BitLocker will prevent them from accessing your data.
- Meets compliance requirements: BitLocker can help you to meet compliance requirements for data protection. For example, many organizations require that their data be encrypted to protect it from unauthorized access.
- Reduces risk of data loss: BitLocker can help to reduce the risk of data loss if your computer is lost or stolen. Even if someone else gets your computer, they will not be able to access your data without the BitLocker key.
- Improves security posture: BitLocker is a valuable addition to any organization’s security posture. It can help to protect your data from a variety of threats, and it can help you to meet compliance requirements.
If you are concerned about the security of your data, then I recommend enabling BitLocker on your Windows 11 computer. It is a simple way to add an extra layer of protection to your data.
In this guide, we will show you the easiest way to enable BitLocker in Windows 11.

Here is the easiest way to enable BitLocker in Windows 11
It’s important to note that, to enable BitLocker, you will need to have a TPM chip on your computer. You can check if your computer has a TPM chip by opening Settings and clicking on Privacy & Security. Under Device Security, look for the Trusted Platform Module (TPM) status section. If the status says “Ready,” then your computer has a TPM chip.
Once you have confirmed that your computer has a TPM chip, you can enable BitLocker by following these steps:
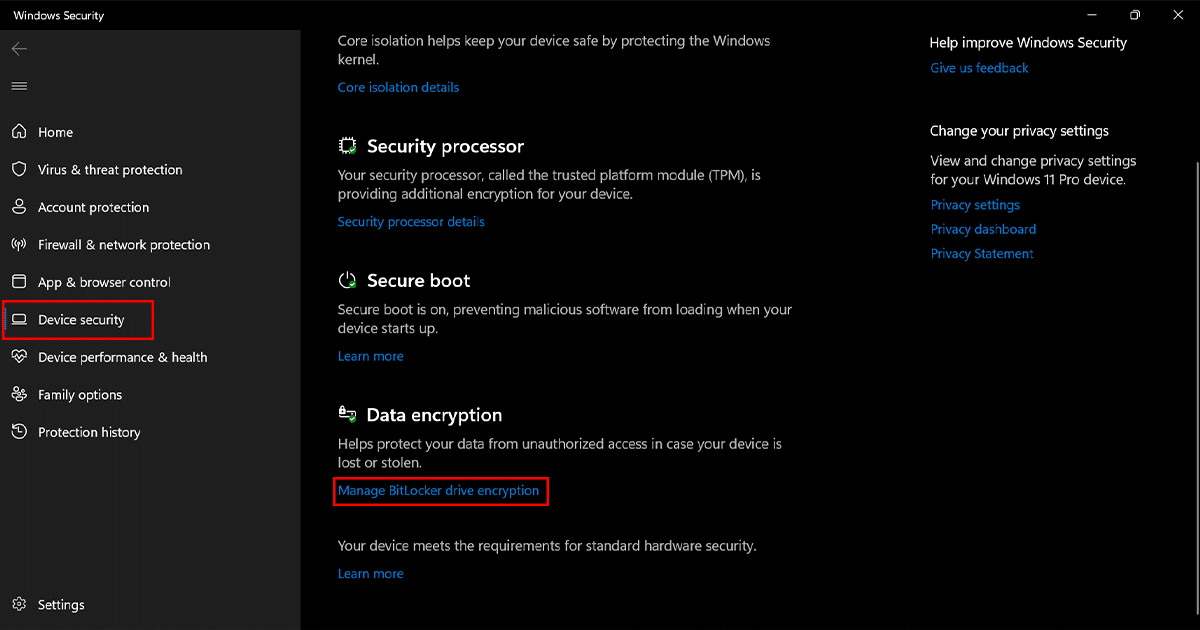
- Open Windows Security.
- Click the Device Security tab and under the Data encryption, click on “Manage BitLocker drive encryption“.
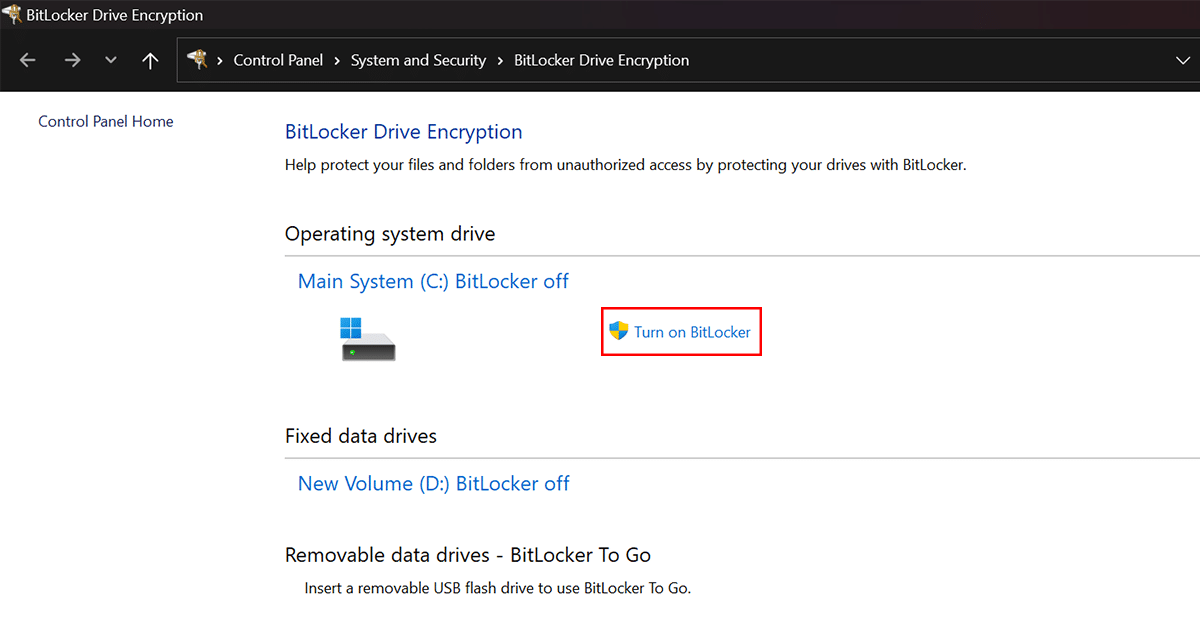
- Under the “Operating system drive” section, click the “Turn on BitLocker” option.
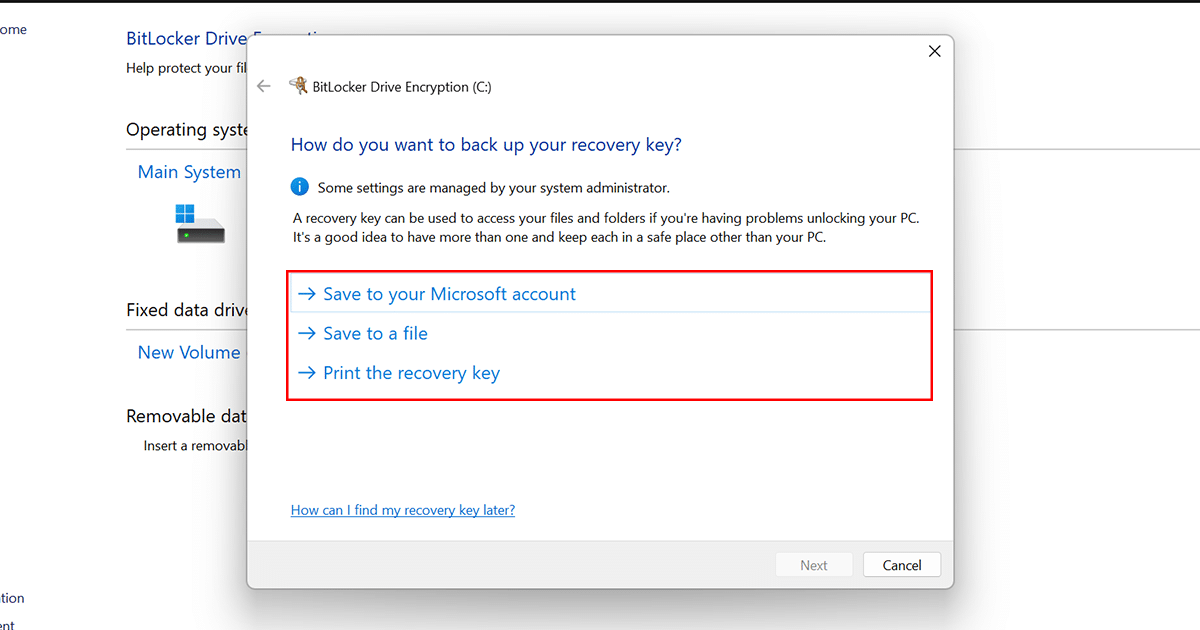
- Select the option to back up the recovery key.
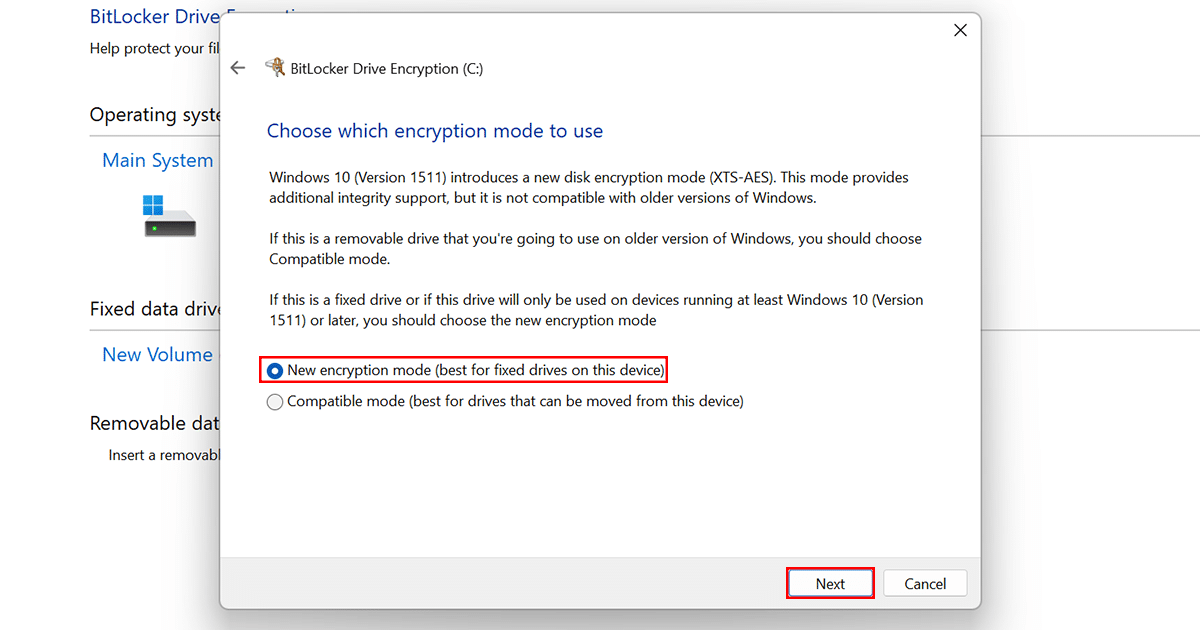
- Click the Next button.
- Select the “Encrypt used disk space only” option and click Next.
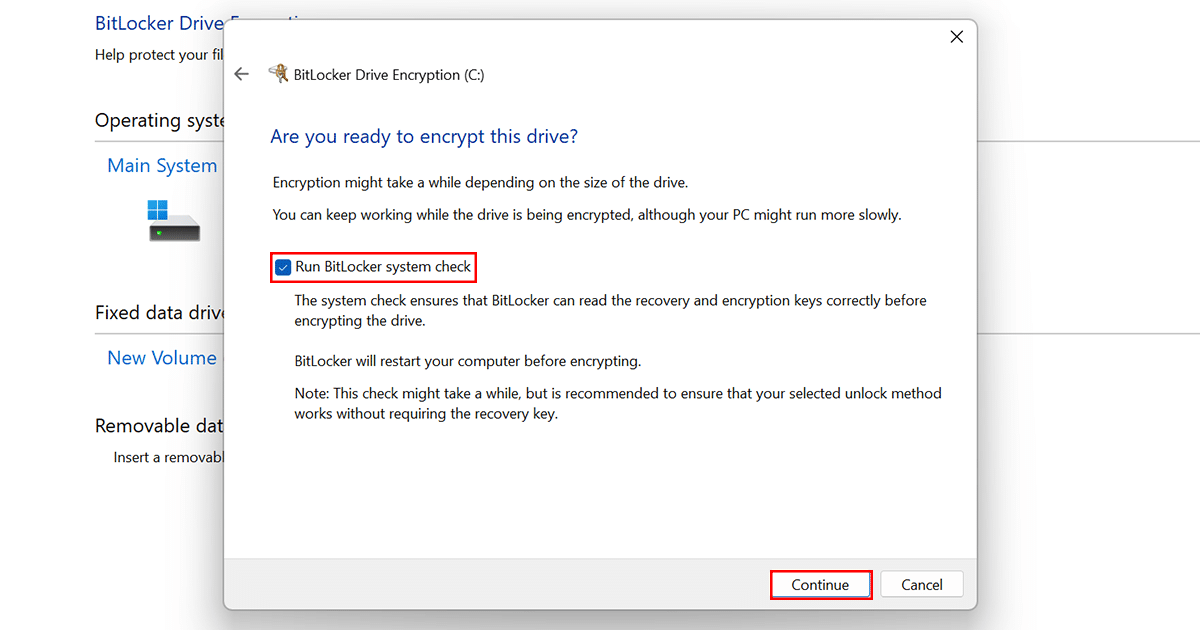
- Check the “Run BitLocker system check” option and click Next.
- Click the Restart Now button.
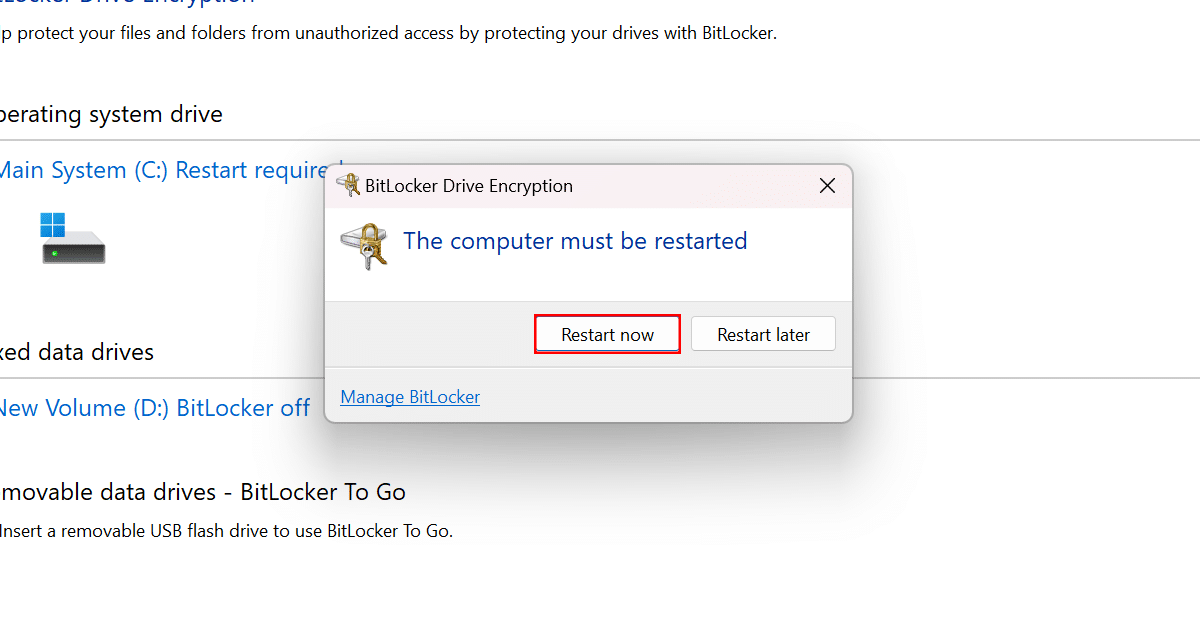
- When done, the computer will restart to enable BitLocker. However, depending on the amount of data available on the drive, BitLocker will continue to encrypt the used space in the background.


Read more:


