Here is how you can change your Zoom background during a video call on Mac, iPhone, iPad, and other devices.
The whole world is using Zoom during the COVID-19 pandemic to stay in touch and get work done from home. During these tough times, here is a Zoom feature that can make your conference calls with colleagues and friends more entertaining. Virtual background in Zoom lets users use any image as their background, during a video call. Not only is the feature fun, but it can also hide a messy room from your call participants.
How to change Zoom Background
This guide will help you enable the Zoom background on Mac, iPhone, iPad, iPod touch, and Windows PC. Note that virtual backgrounds are not available on Zoom for Android yet.
On Mac
The minimum system requirements to use Zoom backgrounds on Mac are macOS 10.13 and above, and an Intel Core i5 processor. If your Mac does not meet the minimum requirements, you can still enable virtual background by selecting ‘I have a green screen’.
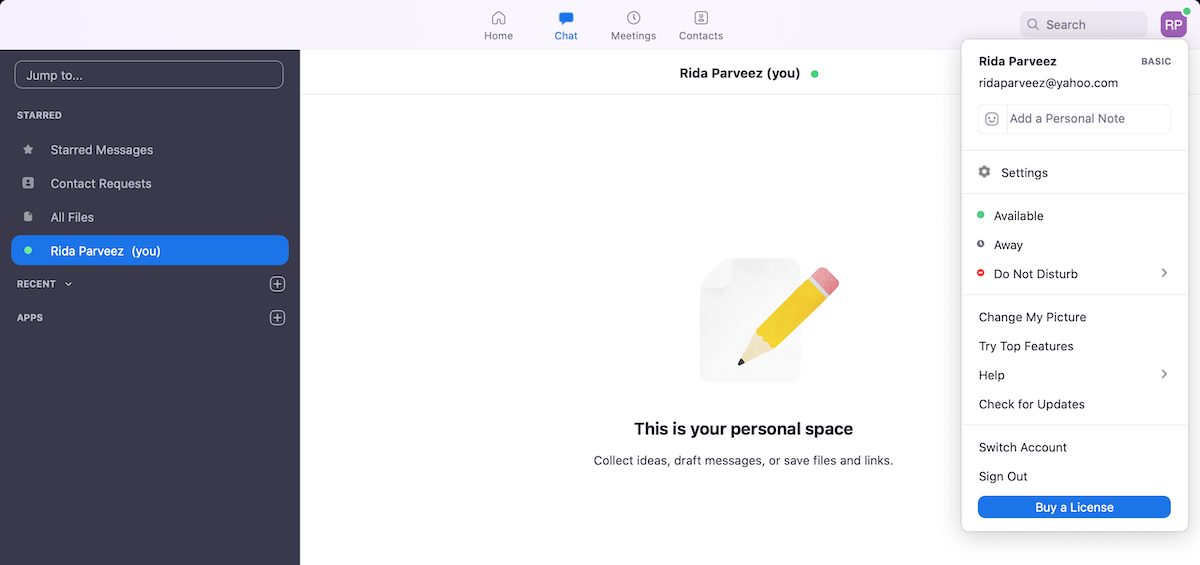
- Log-in to your Zoom account and tap on ‘chat’ to open your personal space section.

- On the menu bar, tap on your user profile picture, or logo, to open the Settings menu.

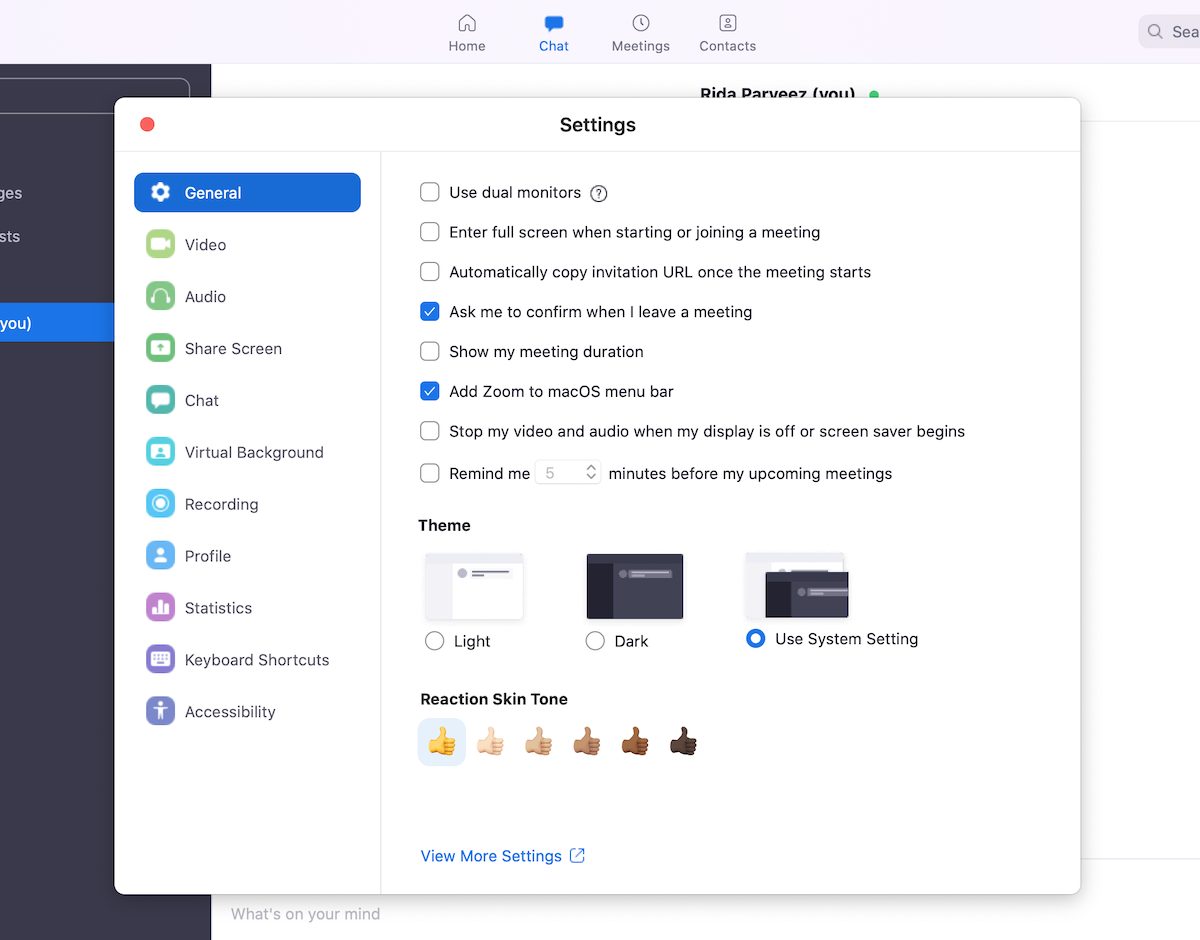
- In the settings menu, click on virtual background.

- Users can either choose from the three available options for their Zoom background: Golden Gate in San Fransisco, Green blades of grass, and an astronomic view of Earth from space. Alternatively, to add an image from your own photos, tap on the plus sign on the top right corner.
On iPhone
You must have an iPhone 8 and above to use Zoom’s virtual background feature.
- Open the app, and start a new video meeting.
- When in session, tap on ‘more’ and enable virtual background. The app has one default background and allows users to add more from their photos app.
- Tap on the ‘+’ icon to open Photos. Select the desired image, and double tap on it or select ‘preview’ to see its larger preview. Select ‘Done’ to apply the image as your background.
You can select 3 backgrounds at a time. To delete backgrounds, tap on the ‘remove’ option on the left corner of the screen.
Read more:
1 comment
Comments are closed.