In Windows 11, Temporary files are files that are created by programs and then stored on a computer’s hard drive. They are used to store data that is not currently being used, such as files that are being downloaded, files that are being edited, or files that are being used by a program that is not currently running. Temporary files can be deleted when they are no longer needed, and doing so can free up space on your hard drive.
Normally, temp files do not cause any problems, but over time they can take up a lot of space on the hard drive, which can be why the laptop or desktop computer is running out of storage or preventing you from upgrading to a new version.
In Windows 11, you have 3 easiest ways to safely remove temporary files to free up space using the Settings app, the Disk Cleanup tool, and Temp Folder.
In this guide, we will show you how to quickly delete temporary files in Windows 11 in 3 simplest methods.

Here are 3 most straightforward ways to delete temporary files in Windows 11
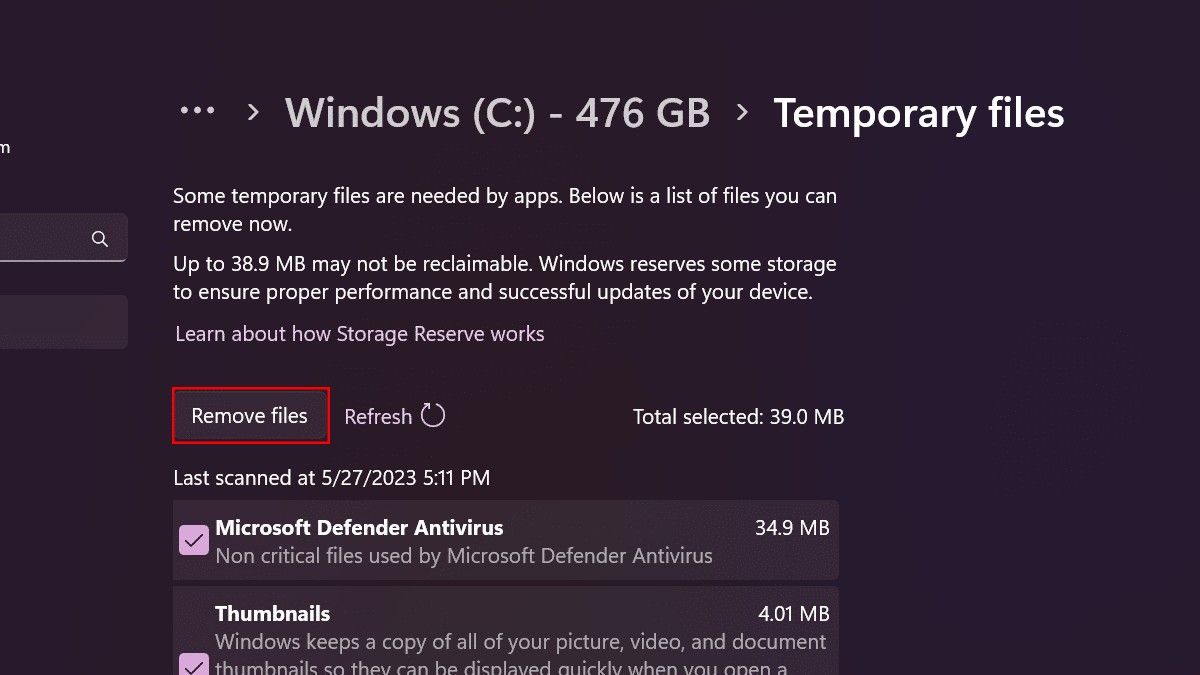
How to delete temporary files using Settings
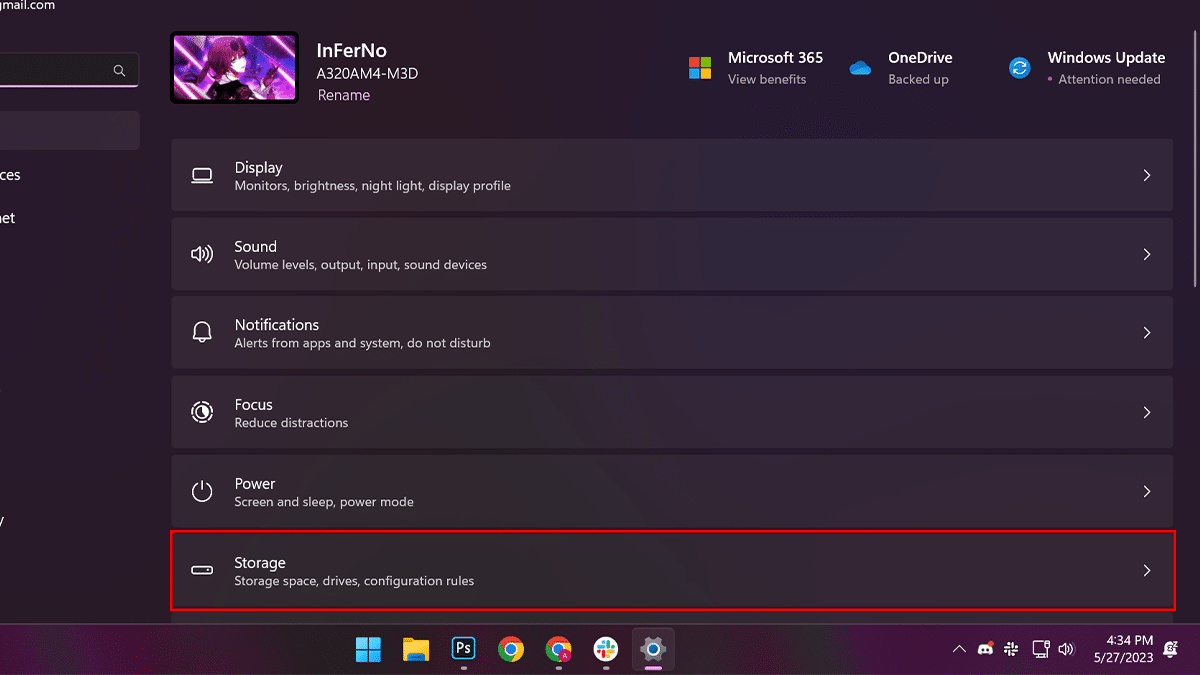
- Open Settings > click on System > click the Storage page on the right side.
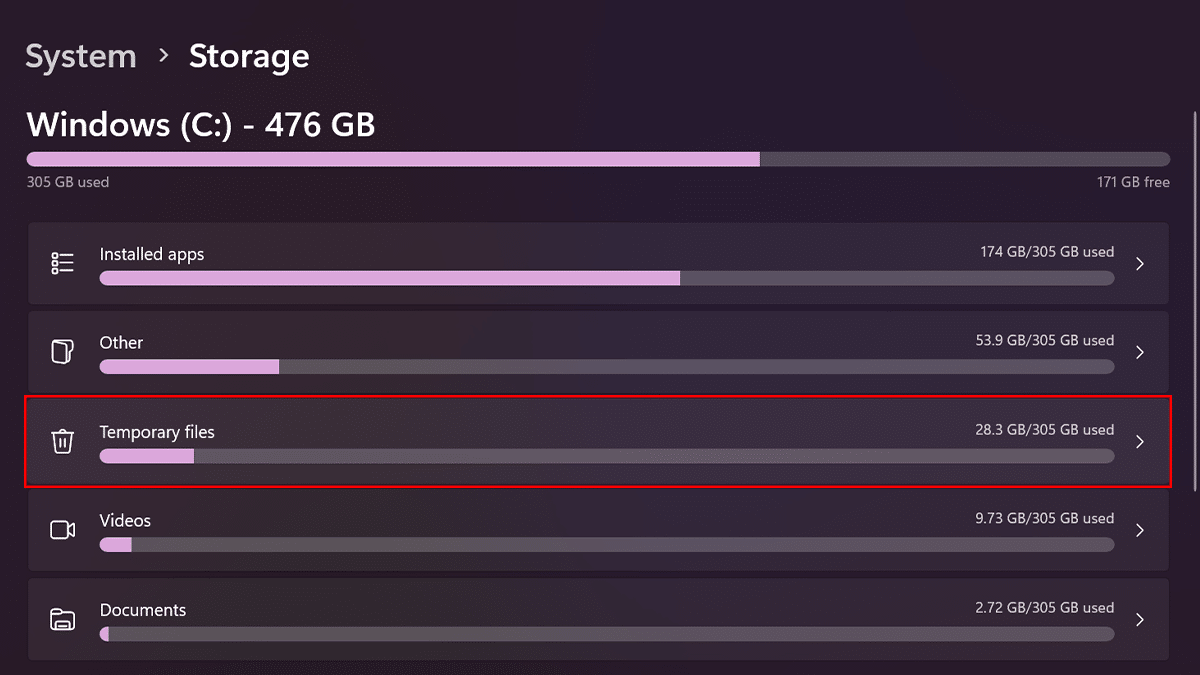
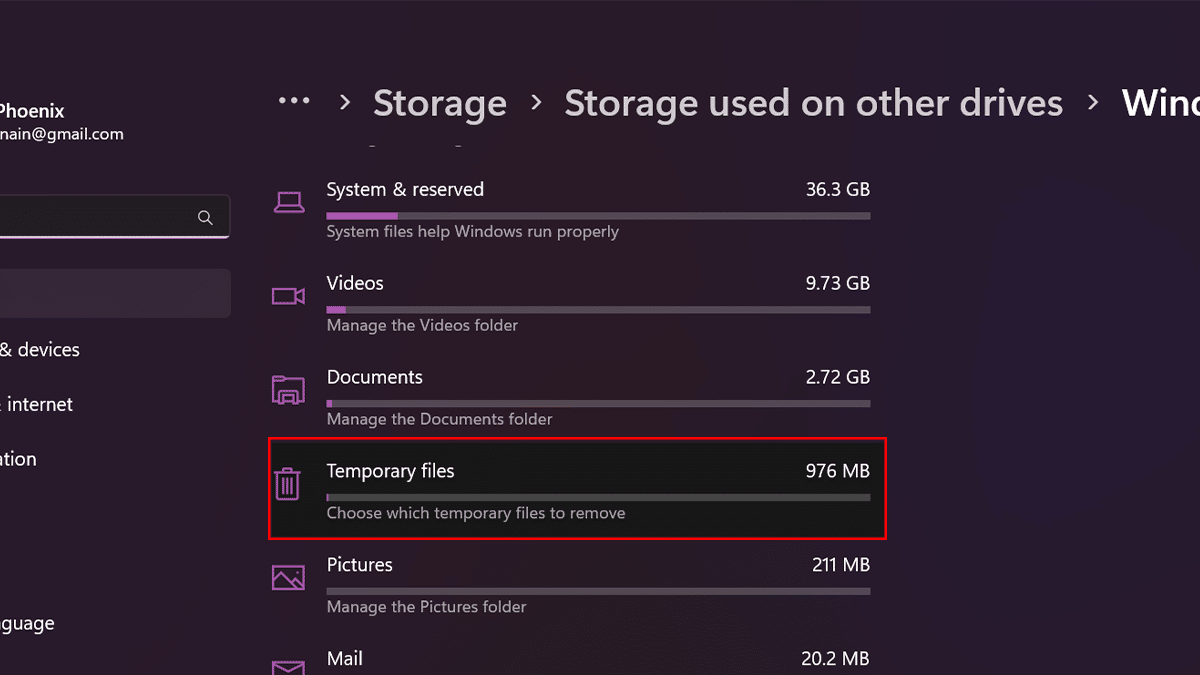
- Under the “Local Disk” section > click the Temporary Files setting.
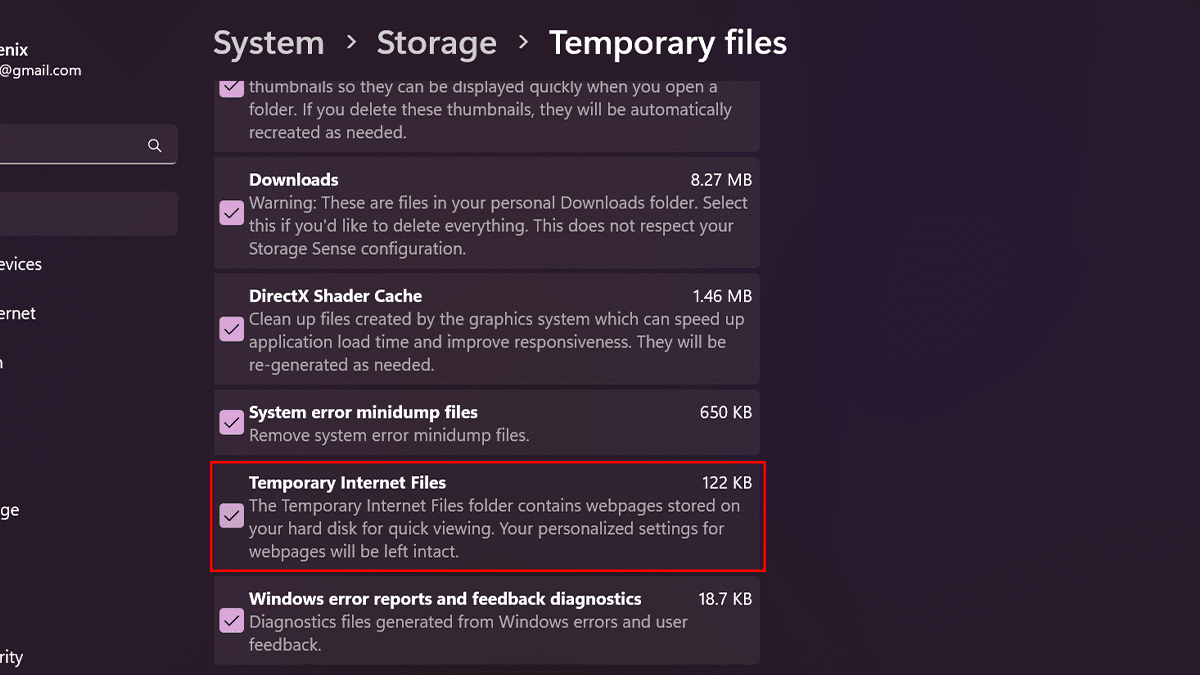
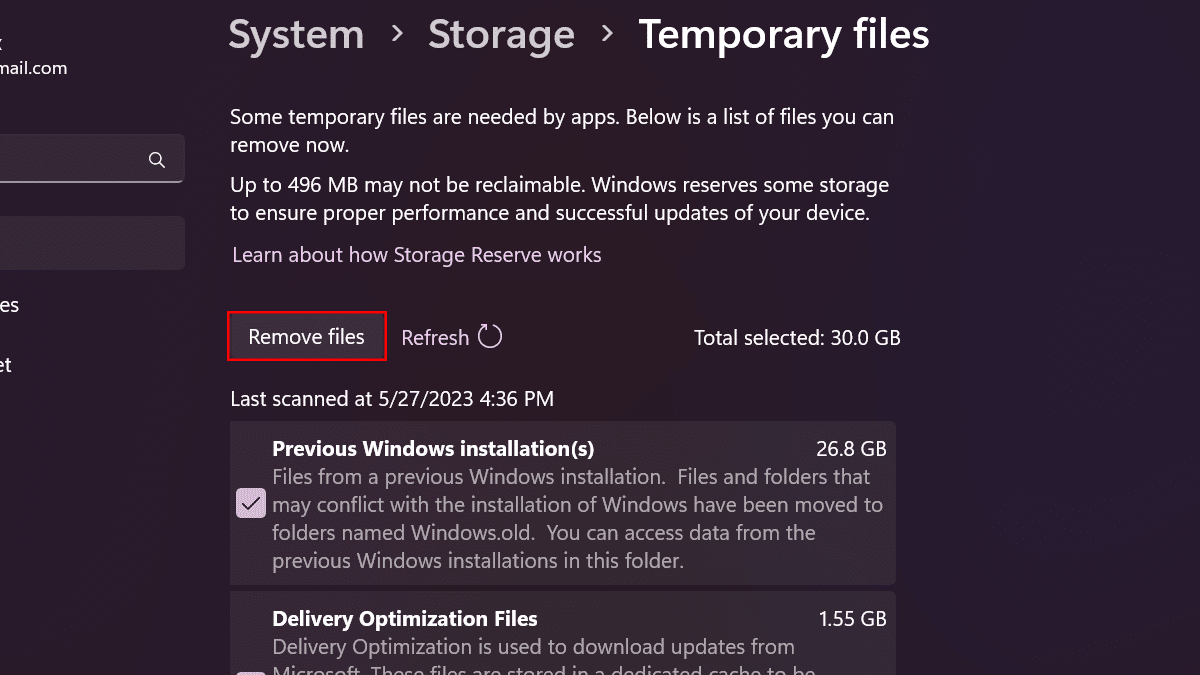
- Select the temporary files to remove.
- Click the Remove Files button.
- When done, junk files will be removed from your computer, freeing up space for more important files.


How to delete temporary files using Disk Cleanup
- Open File Explorer > click on This PC from the left pane.
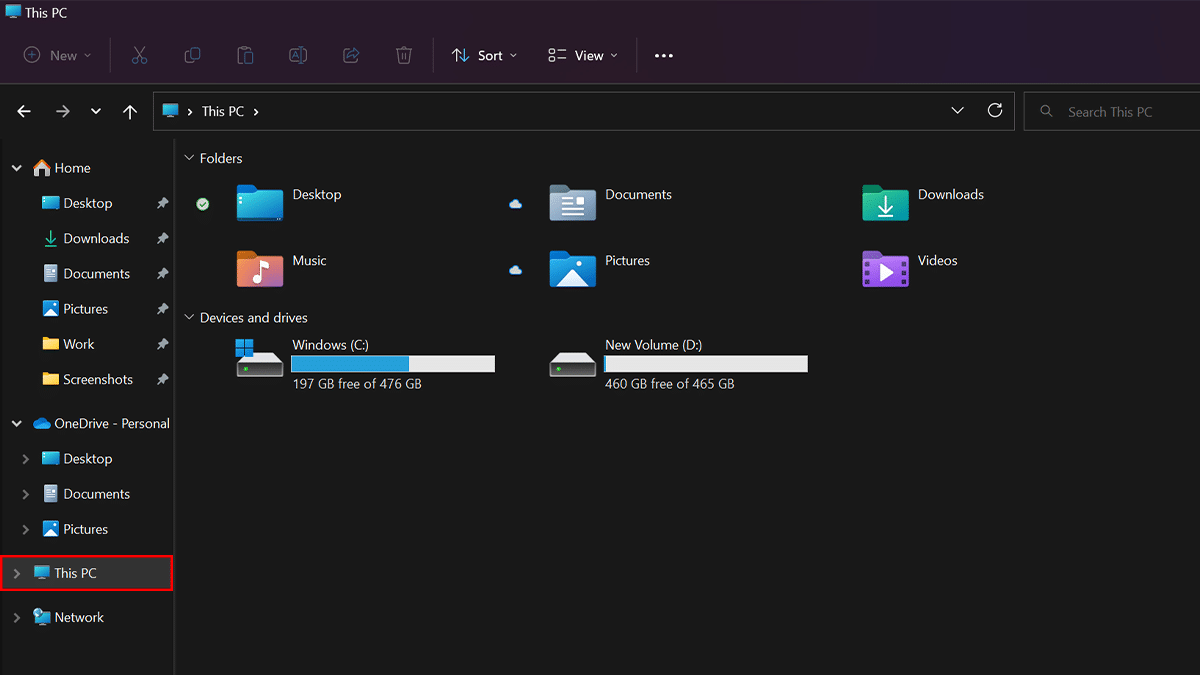
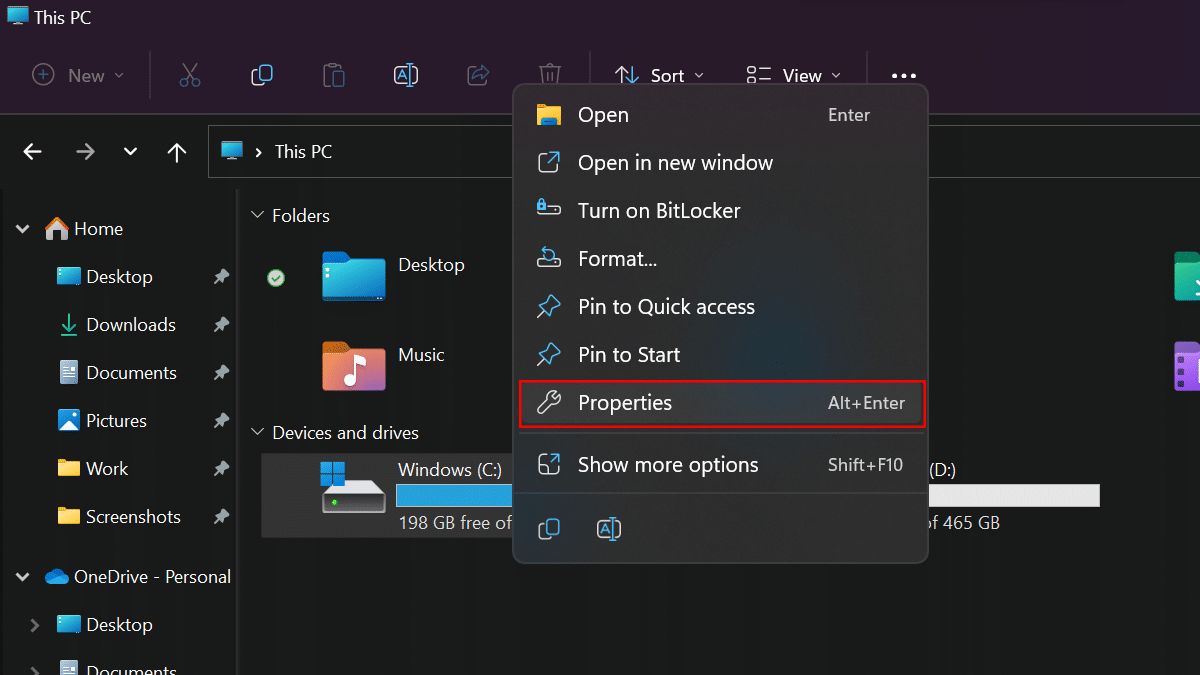
- Right-click the Windows 11 installation drive > select the Properties option.
- Click the Details button.
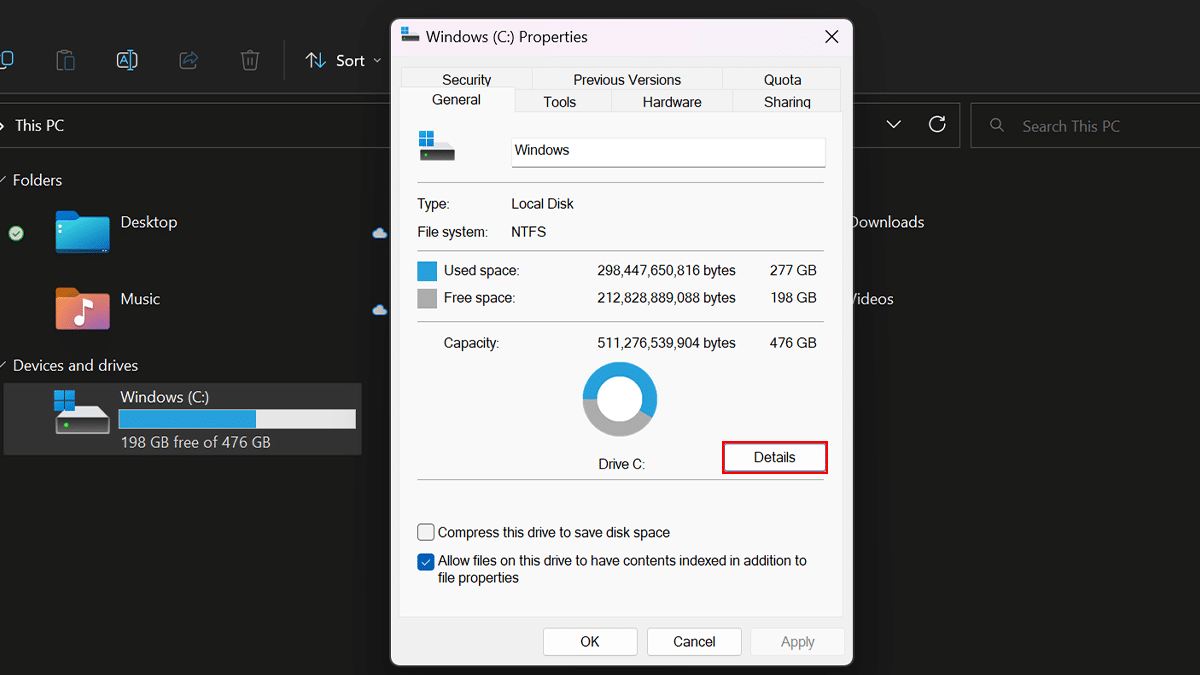
- Scroll down > click the “Temporary Files” button.
- Check the items you want to delete. For example, Temporary Windows Installation Files, Windows upgrade log files, Recycle Bin, Temporary Files, and System created Windows Error Reporting.
- Click the Remove Files button.
- When done, temporary files will permanently be deleted from your computer, making room for new files.


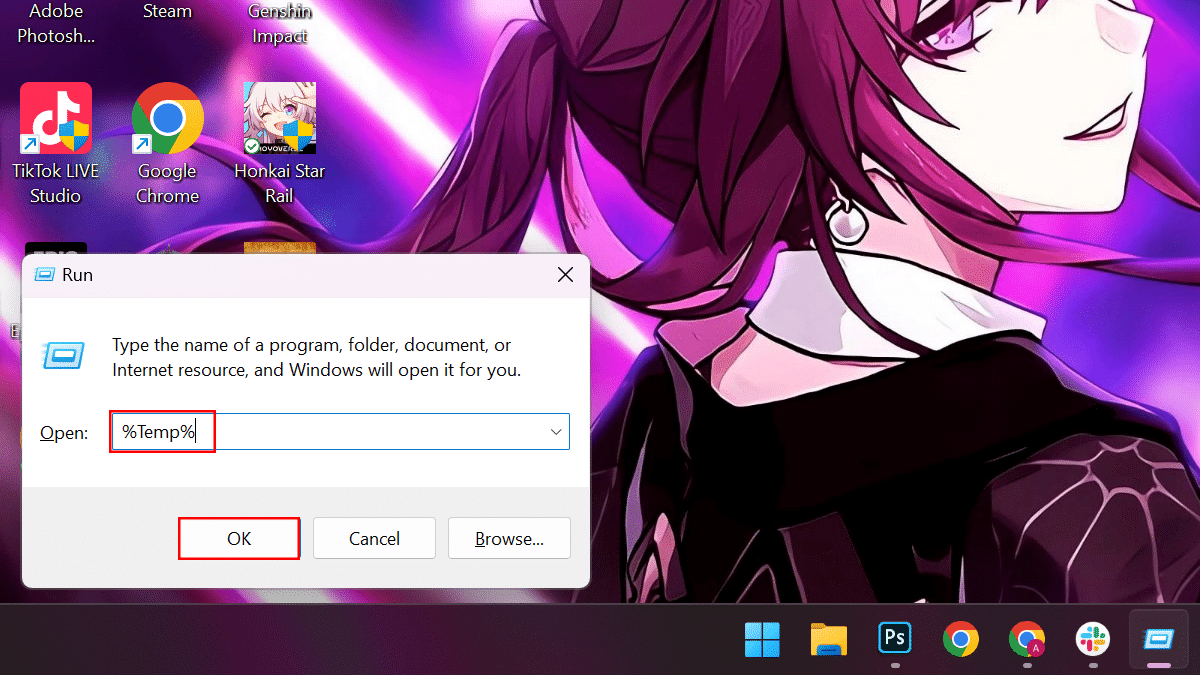
How to delete temporary files using Temp Folder
- Use the keyboard shortcut Windows key + R to open the Run dialog > type in %Temp% > click the OK.
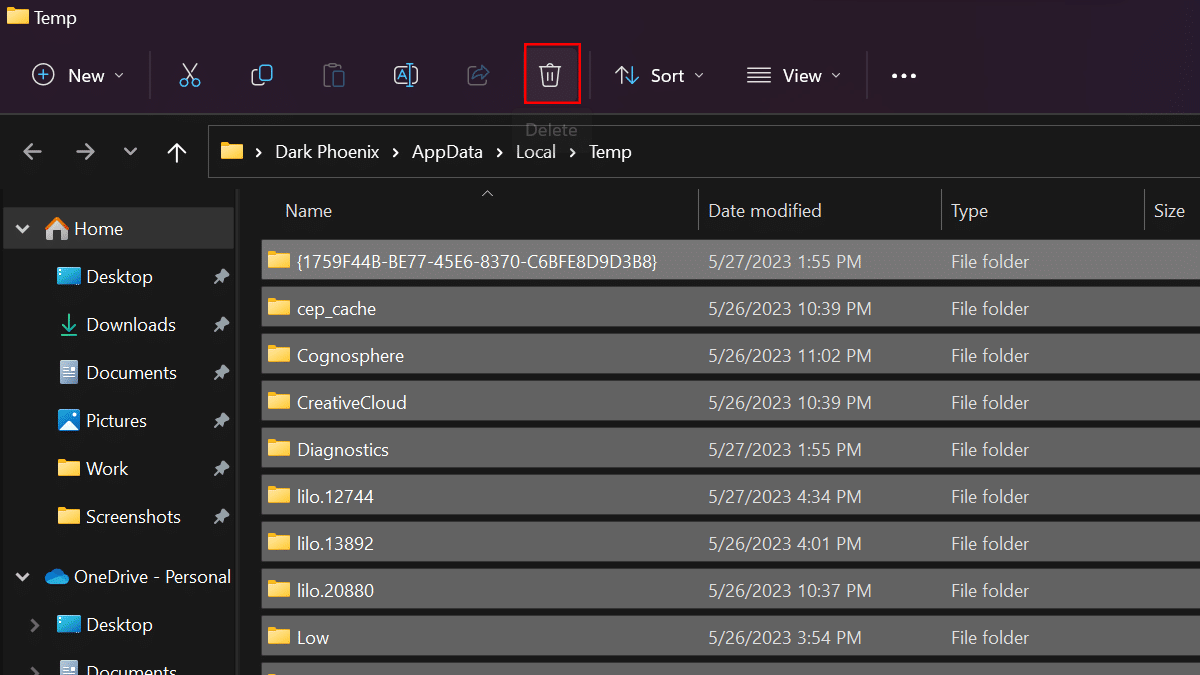
- In the Temp folder, click one item in the folder > hit the keyboard shortcut Ctrl + A to select everything > click the Delete icon (trash can) on the Command bar.
- When a File in Use warning screen appears > check “Do this for all current items” > click Skip.
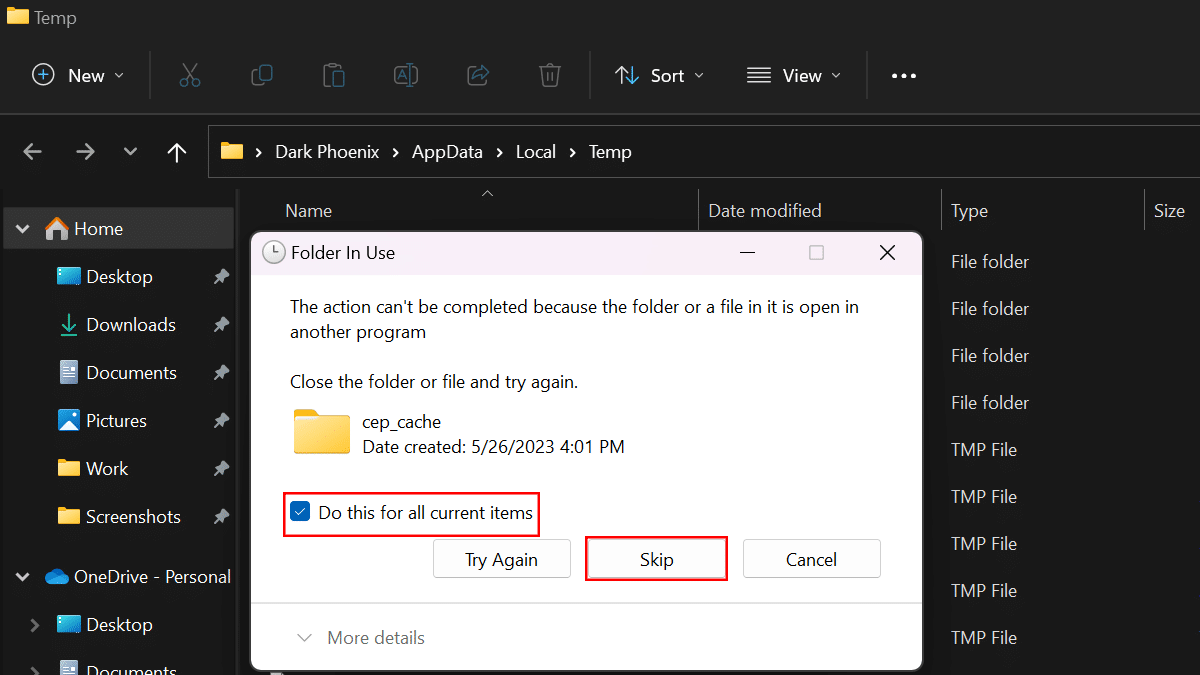
- When done, temporary files will permanently be deleted from your computer, making room for new files.


Read more:


