The Microsoft Photos app in Windows 11 is a built-in application that allows you to view, edit, and share your photos and videos. It is an amazing tool that offers a variety of features, including:
- Viewing photos and videos: It can display your photos and videos in a variety of ways, including as a grid, a list, or a slideshow. You can also use the app to zoom in and out of your photos and rotate them.
- Editing photos and videos: It includes a variety of editing tools that you can use to improve your photos and videos, including filters, effects, and adjustments to brightness, contrast, and color.
- Sharing photos and videos: It makes it easier to share your photos and videos with others. You can share them via email, social media, or by uploading them to a cloud storage service.
The Microsoft Photos app is a great way to manage your photos and videos. It is easy to use and offers a variety of features that can help you improve your photos and videos.
By default, the Photos app only includes the Pictures folders, but if you keep your media files on external storage or in the network, you can use the “Folders” settings to add or remove any location. Users can even hide the OneDrive and iCloud Photos integrations if they don’t have or use those services.
In this guide, we will show you the steps to add and remove folder locations on the Photos app for Windows 11 and even hide the OneDrive and iCloud Photos integrations if they don’t need them.

Here is how to add and remove folder locations in Photos in Windows 11
How to add folder location to the Photos app
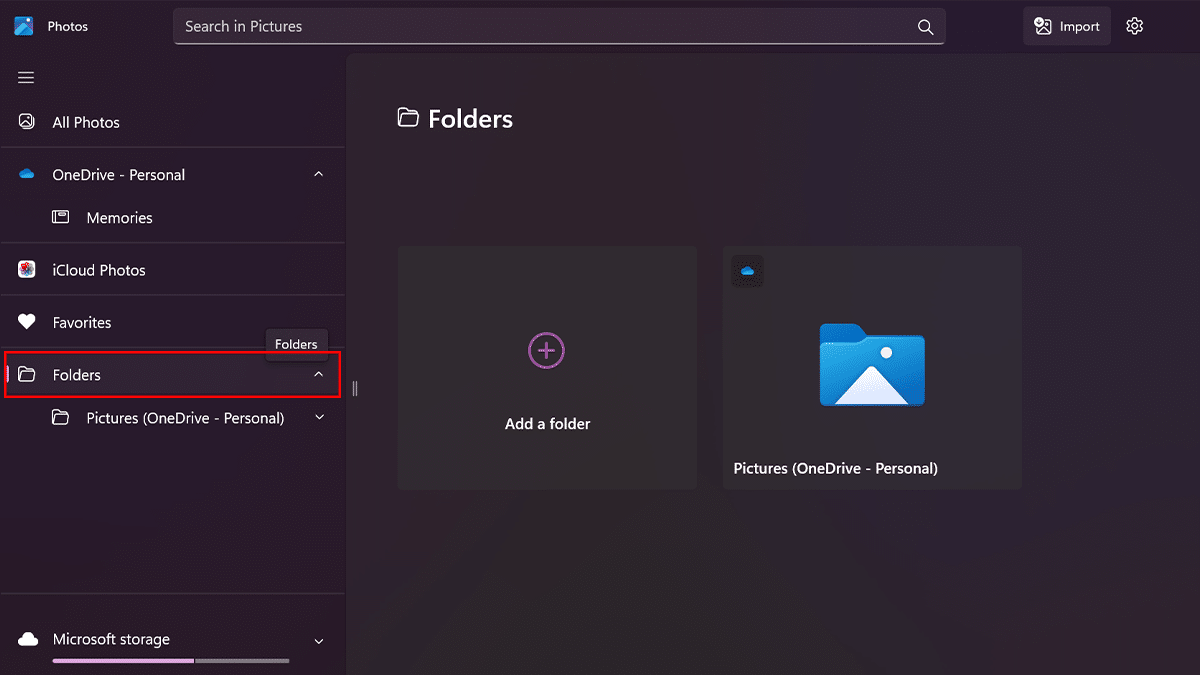
- Open the Photos app > click on Folders on the left pane.
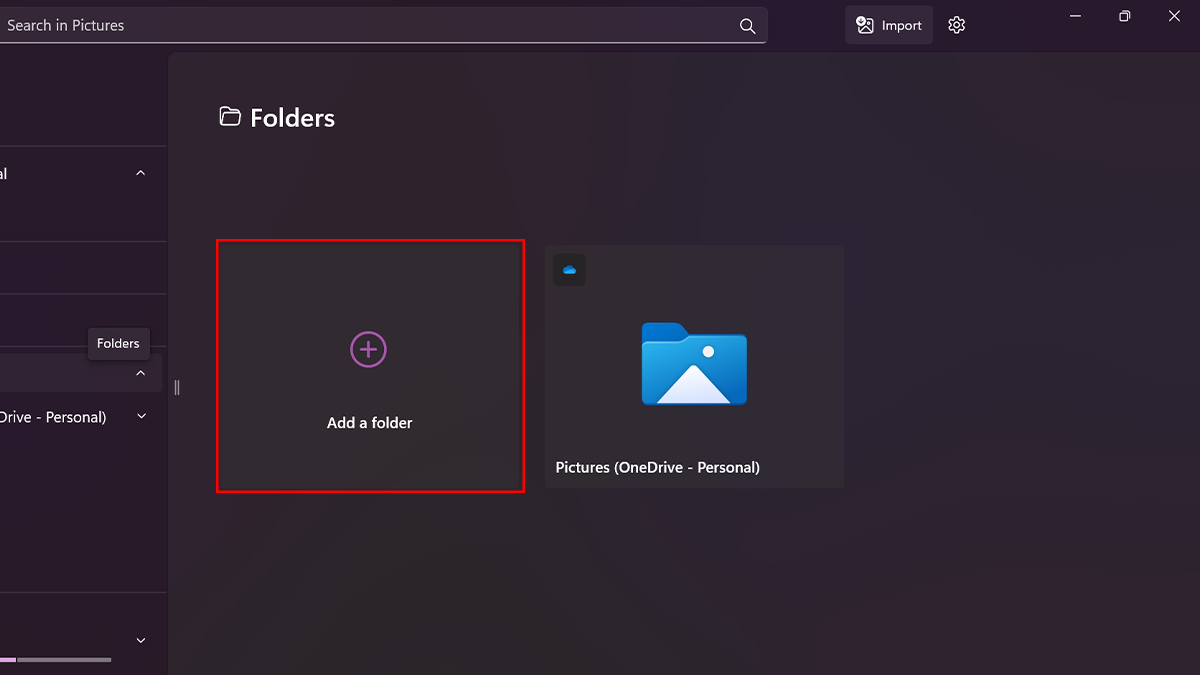
- Click the “Add a folder” button.
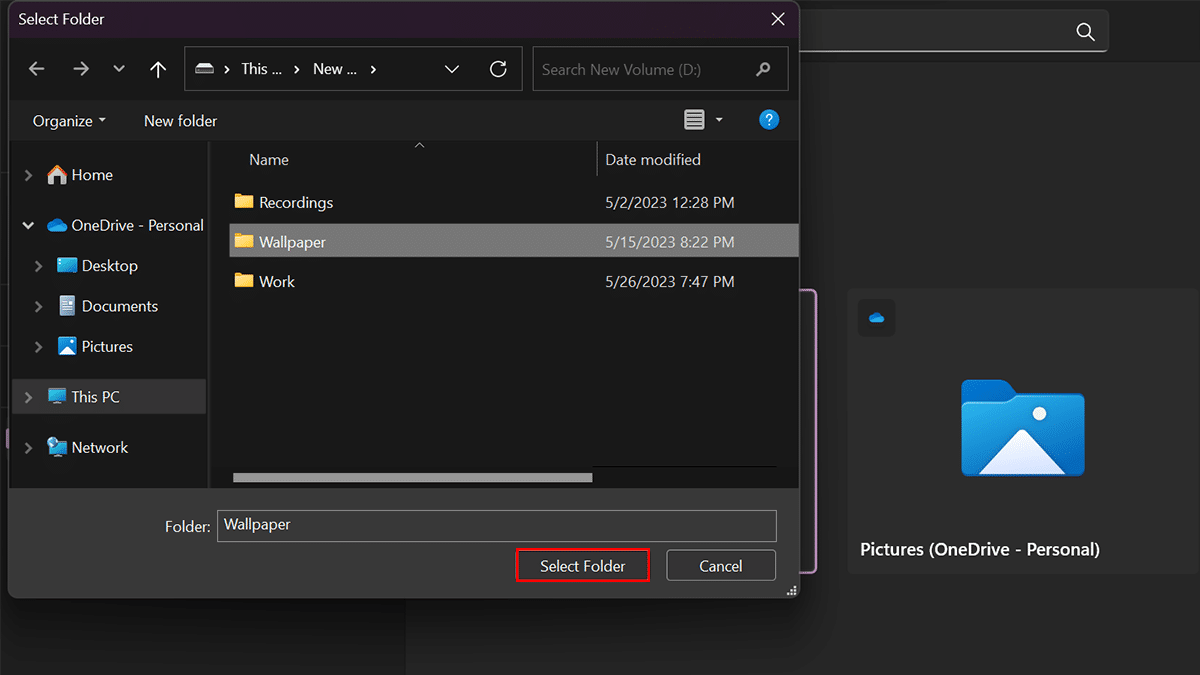
- Choose the folder location to include in the Photos apps > click the Select Folder button.
- When done, the app will show the media files from all the locations.


How to remove folder location from the Photos app
- Open the Photos app > click on Folders on the left pane.
- Right-click the location > select the Remove folder option.
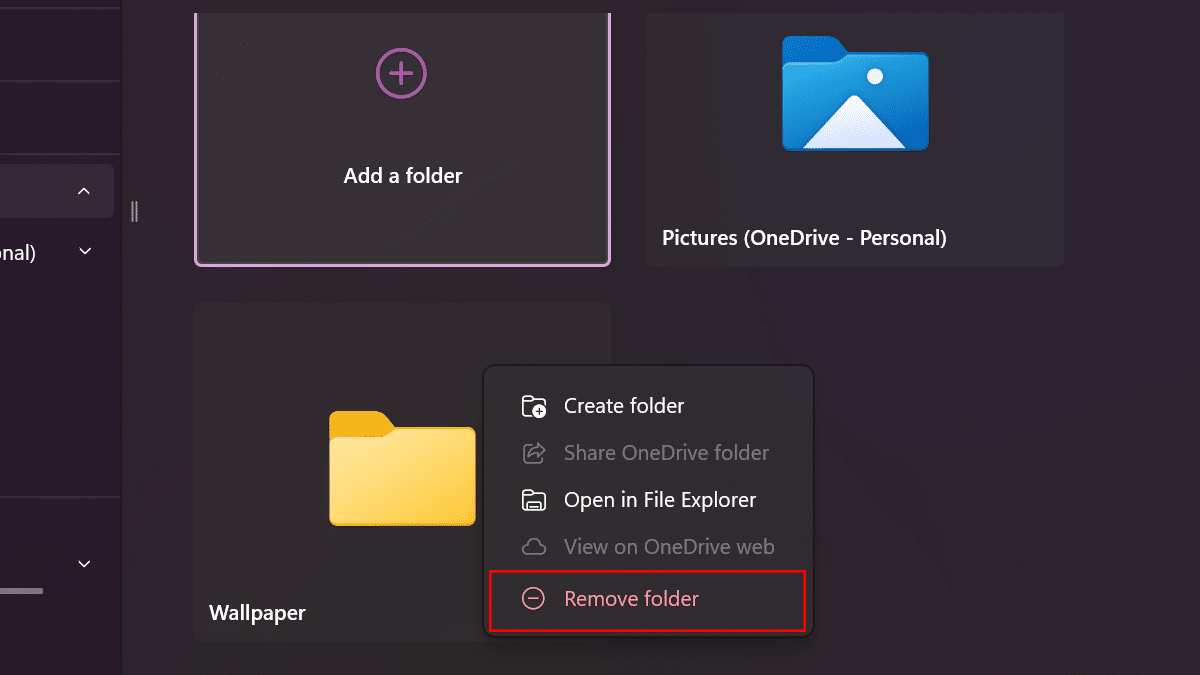
- Click the Remove button.
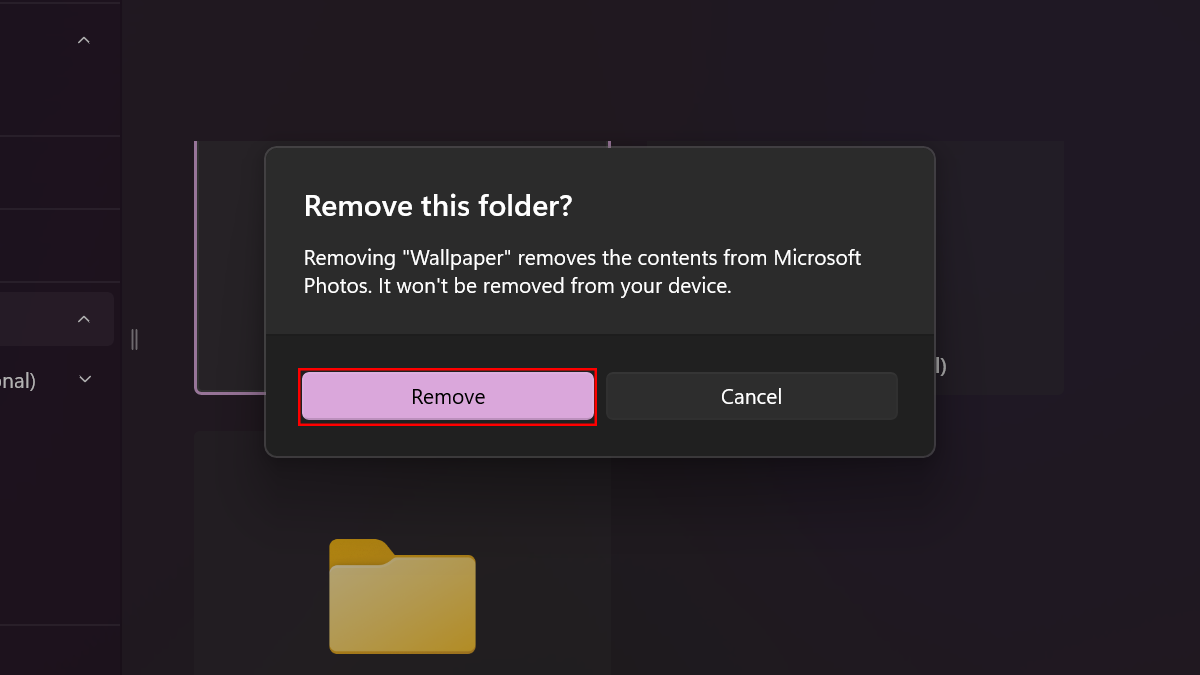
- When done, the folder will continue to be available on your computer, but its content will no longer be available through the Photos app.


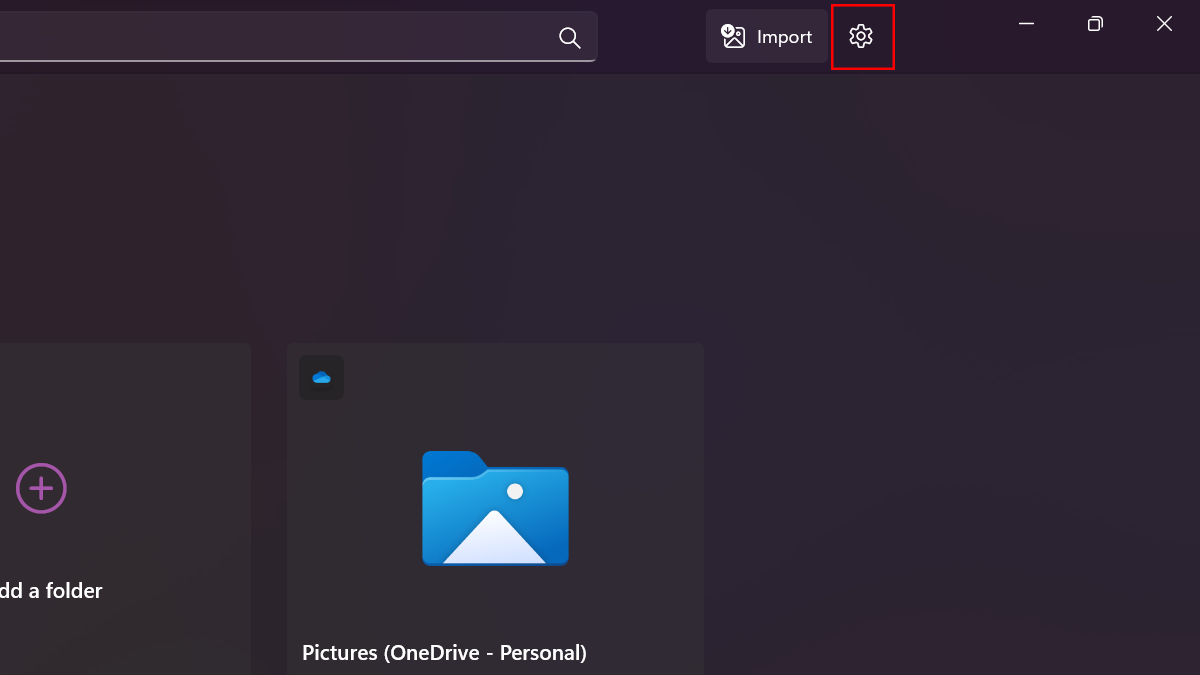
How to hide OneDrive or iCloud Photos locations
- Open the Photos app > click the Settings (gear) button on the top-right.
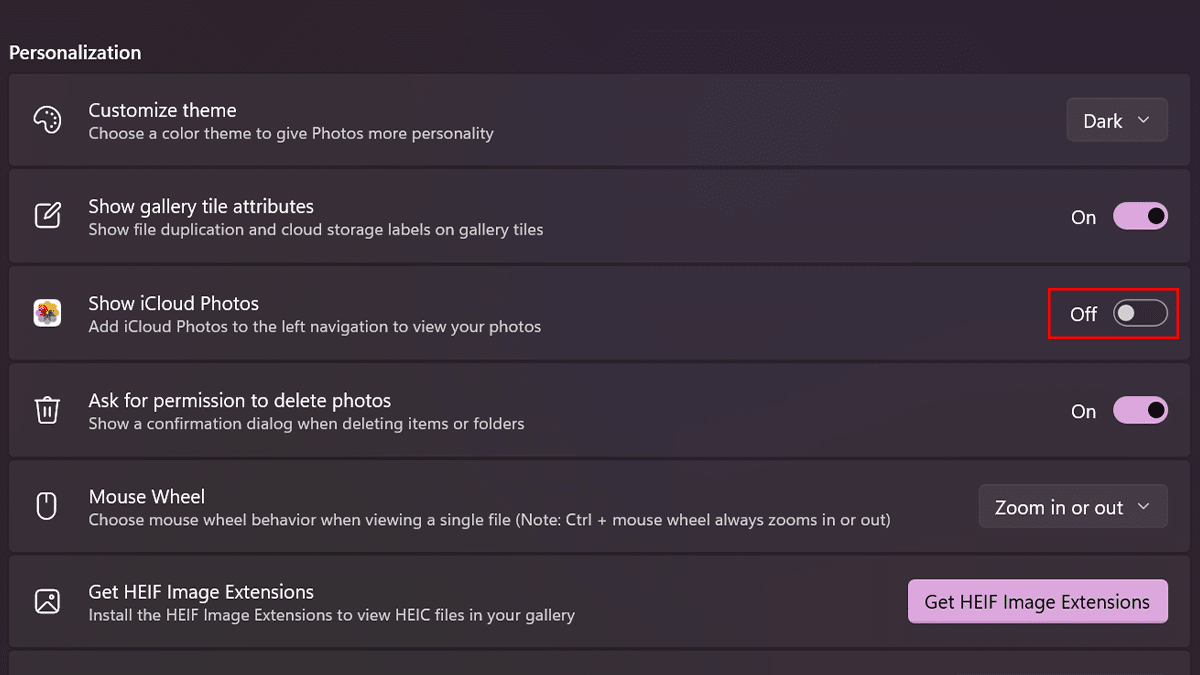
- Under the “Personalization” section > toggle off the “Show iCloud Photos” switch.
- Under the “OneDrive Accounts” section > toggle off the “OneDrive” switch.
- Quick note: If you hide the OneDrive folders it will remove the “Pictures” folder if connected to the cloud storage service from the “Folders” settings page.
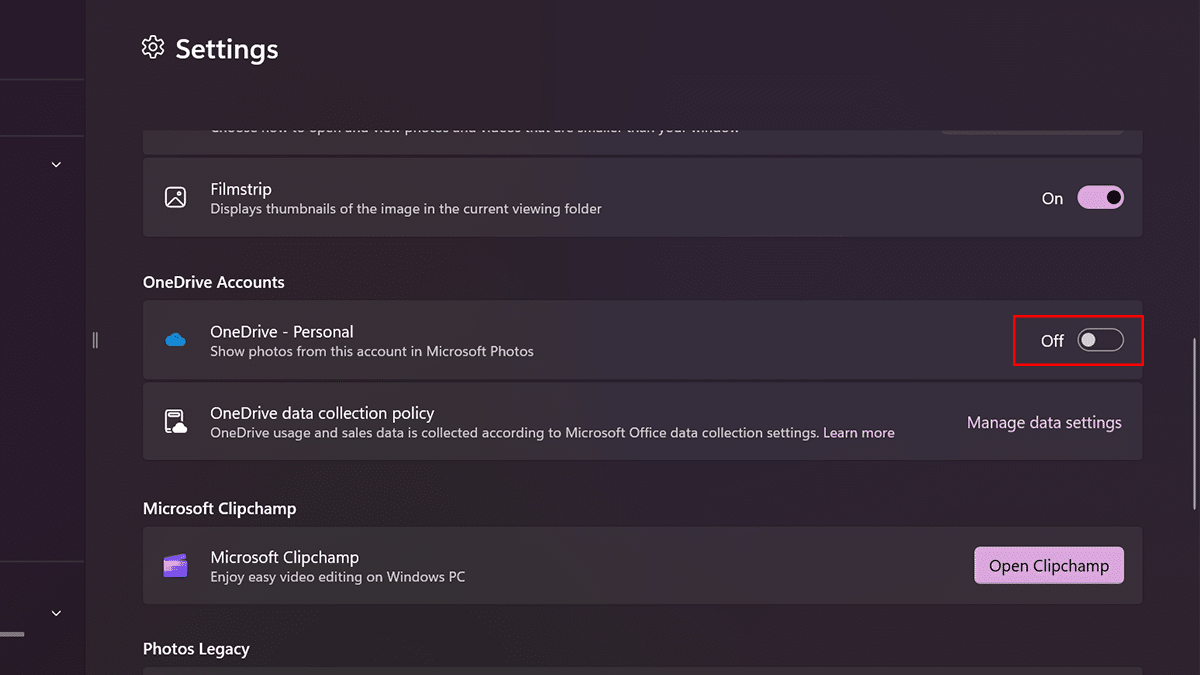
- Quick note: If you hide the OneDrive folders it will remove the “Pictures” folder if connected to the cloud storage service from the “Folders” settings page.
- When done, the cloud storage services will no longer show pictures and videos in the Photos app.


Read more:


