DNS cache in Windows 11 is a temporary storage that saves websites’ IP addresses that you have recently visited. This allows your computer to connect to those websites more quickly the next time you visit them.
Sometimes when a particular website isn’t loading because an app that requires access to the internet is not working, using networking tools like “ping” or “nslookup” show the wrong destination IP address in the result, there is probably a problem with the local Domain Name System (DNS) cache.
When flushing the DNS cache records from the system can help since you will be resetting the cache and starting over with a new database.
In this guide, we will show you two ways to clear the cache using Command Prompt and PowerShell.

Here is how to flush the DNS cache in Windows 11
How to flush DNS cache using Command Prompt
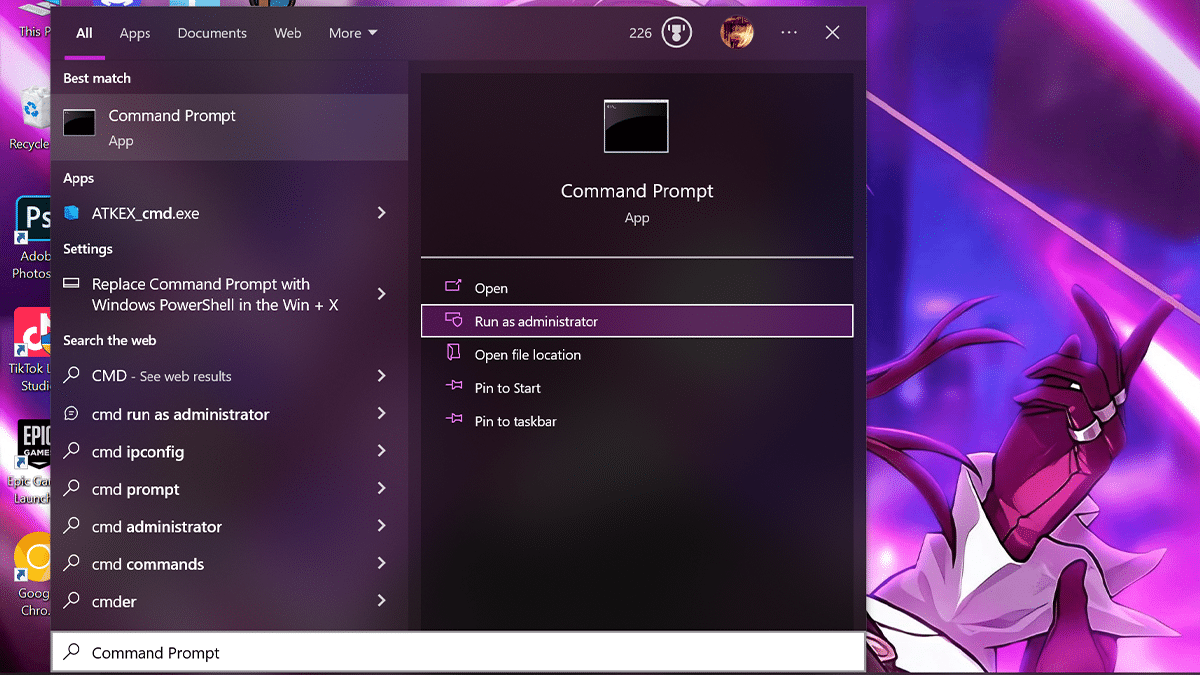
- Open Start > search for Command Prompt > select the Run as administrator option.
- Type the following command to flush the DNS cache > press Enter on the keyboard.
ipconfig /flushdns
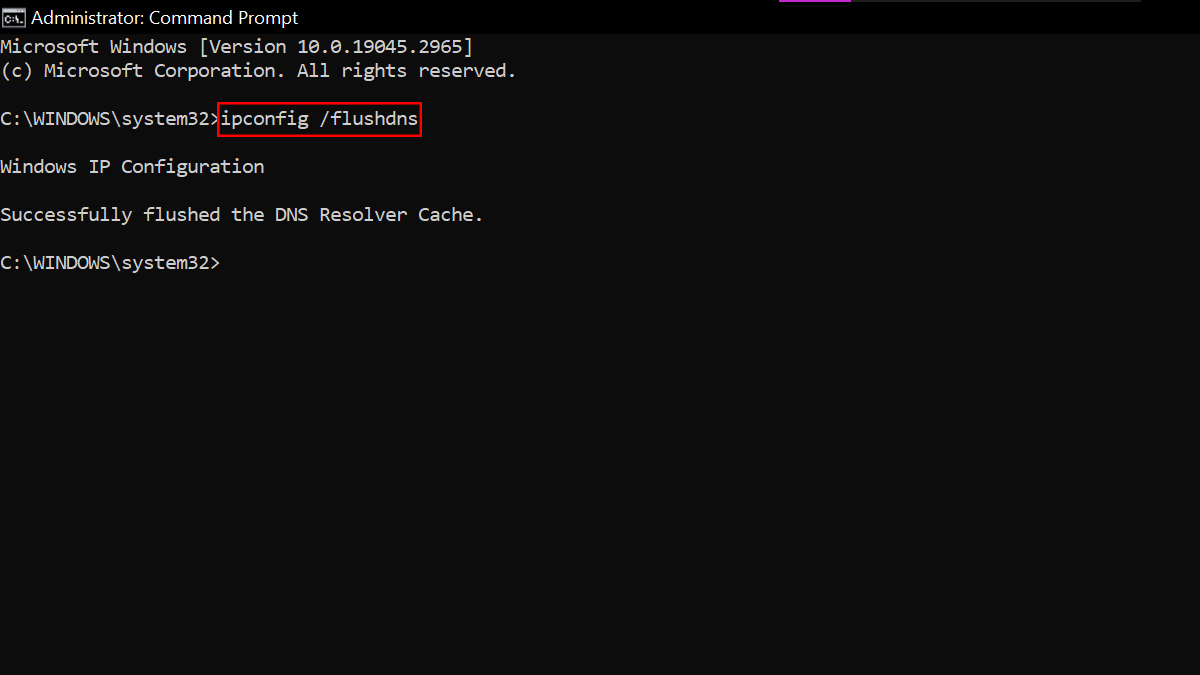
- When done, the next time the system or an application tries to access the network, a new DNS lookup process will occur to cache the information again.


How to flush DNS cache using PowerShell
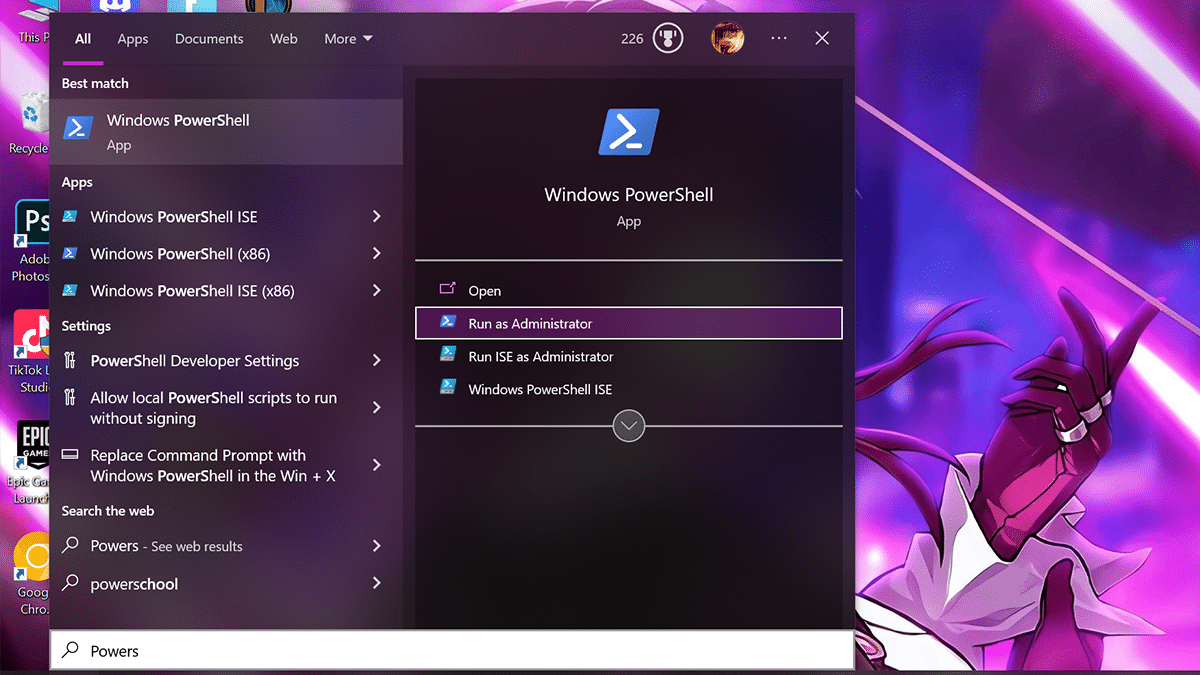
- Open Start > search for PowerShell > select the Run as administrator option.
- Type the following command to flush the DNS cache > press Enter on the keyboard.
Clear-DnsClientCache

- When done, the PowerShell command will clear and reset the DNS records cached on the device.

Read more:
- How to backup files to OneDrive in Windows 11
- 3 easiest ways to check graphics card details in Windows 11
- 3 ways to find your PC’s model number on Windows 11
- How to debloat Windows 11 from junk apps
- How to enable color theme on new tab image in Chrome
- How to disable notifications in Windows 11
- How to get Google Bard extension in Chrome


