Apple introduced Ping, the music based social network, with iTunes. While opinion on it may vary, if you don’t like Ping and you don’t want to deal with another social network, you can simply disable it.
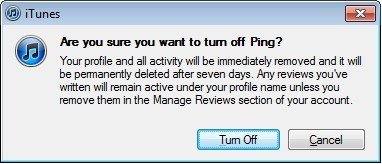
If you turn off Ping, all your profile information will be permanently removed after seven days. Apple is giving a turn-off-Ping remorse period to their users. Even if Ping is deactivated, the reviews that you would have posted will remain with your profile name until you remove them yourself from the manage reviews section of your account.
Here’s how you can turn off Ping:
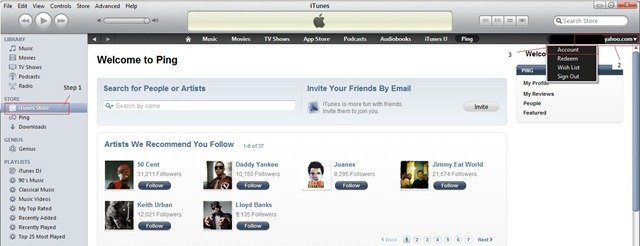
- After opening the iTunes, open the iTunes Store

- Click on the small arrow next to your iTunes profile to open the menu.
- Click on Account from the list. If you are not signed in then first you have to sign-in to your iTunes Account.
- When the Apple Account Information page opens, click on the Turn Off button in the Ping section to turn off Ping.

- ‘Are you sure you want to turn off Ping?’ Click Turn Off to proceed.

- Click Done when you are finished.
[via gilsmethod]
Been looking for this, many thanks.
Been looking for this, many thanks.