In the latest iOS 17.2 update, Apple has finally released the Journal app. Designed for you to document your thoughts, feelings, trips, and other events and activities, the Journal app works as a reflective outlet that lets you take care of your mental health.
Furthermore, the app recommends topics to write on based on your activities and can be locked to protect Journal entries from prying eyes.
If writing about daily and special moments helps in your mental health journey, then the Jounral app is a great tool. Here is how you can use it.
Here is how to use the Jounral app to make entries, view recommendations, and more
First, make sure that your iPhone is upgraded to iOS 17.2 or later to use the Journal app.
How to create a journal entry
- Open the app, and tap on the “+” GIF.
- The UI opens with the day’s date, and features various tabs to create an entry in any one or combination of the following forms:
- Text via typing or dictate your entry by tapping on the microphone on the keyboard.
- Capture a picture or record a video. If you want to save the photos and vidoes captured from the app to the Photos library, then go to Settings app > Journal > turn on ‘Save to Photos’ option.
- Add an image or video from the Photos Library. In the Settings app > Journal > Photos to allow the app to include location and captions with photos.
- Record a voice note
- Add location. You will have to tune on Location sharing in the Settings app > Journal > Location.
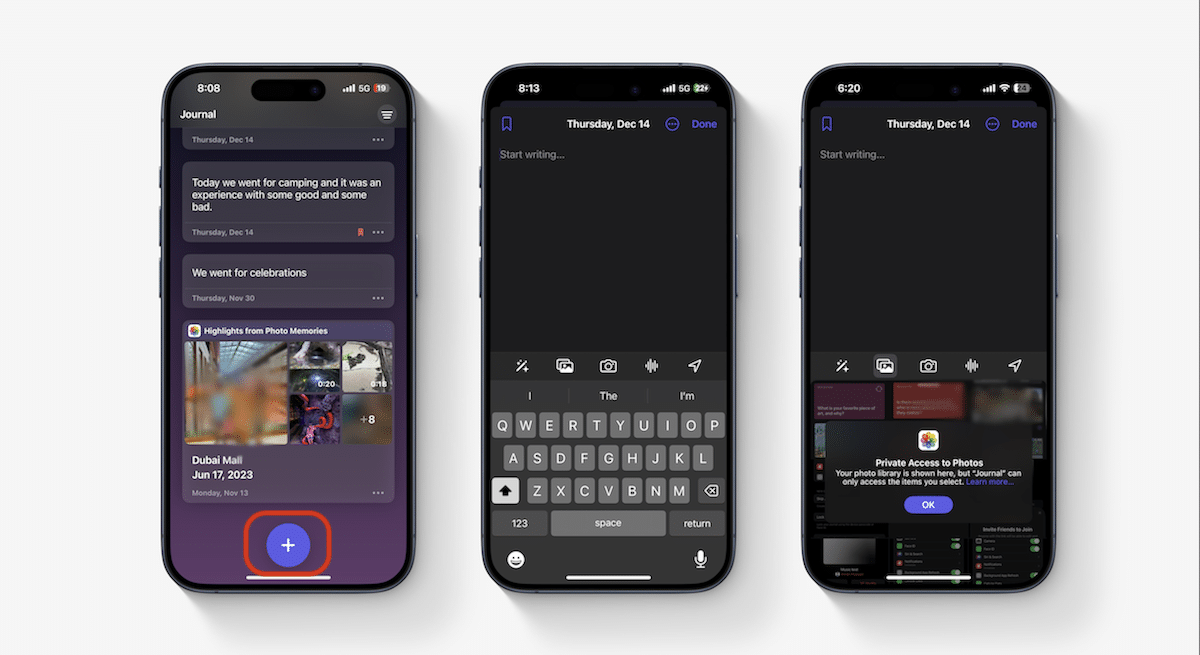
- Tap on the pen tab to see recommendations. You will first have to turn on notifications to receive suggestions.
How to customize the date of a journal entry
Although a new entry is logged with the current date, you can change it easily.
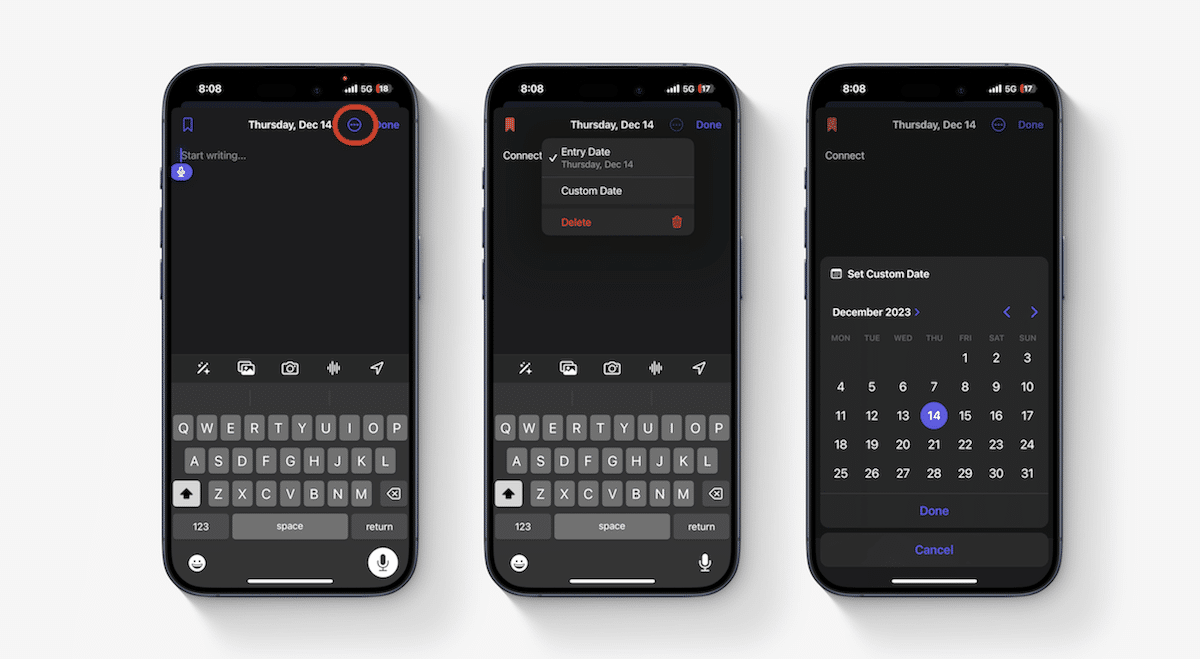
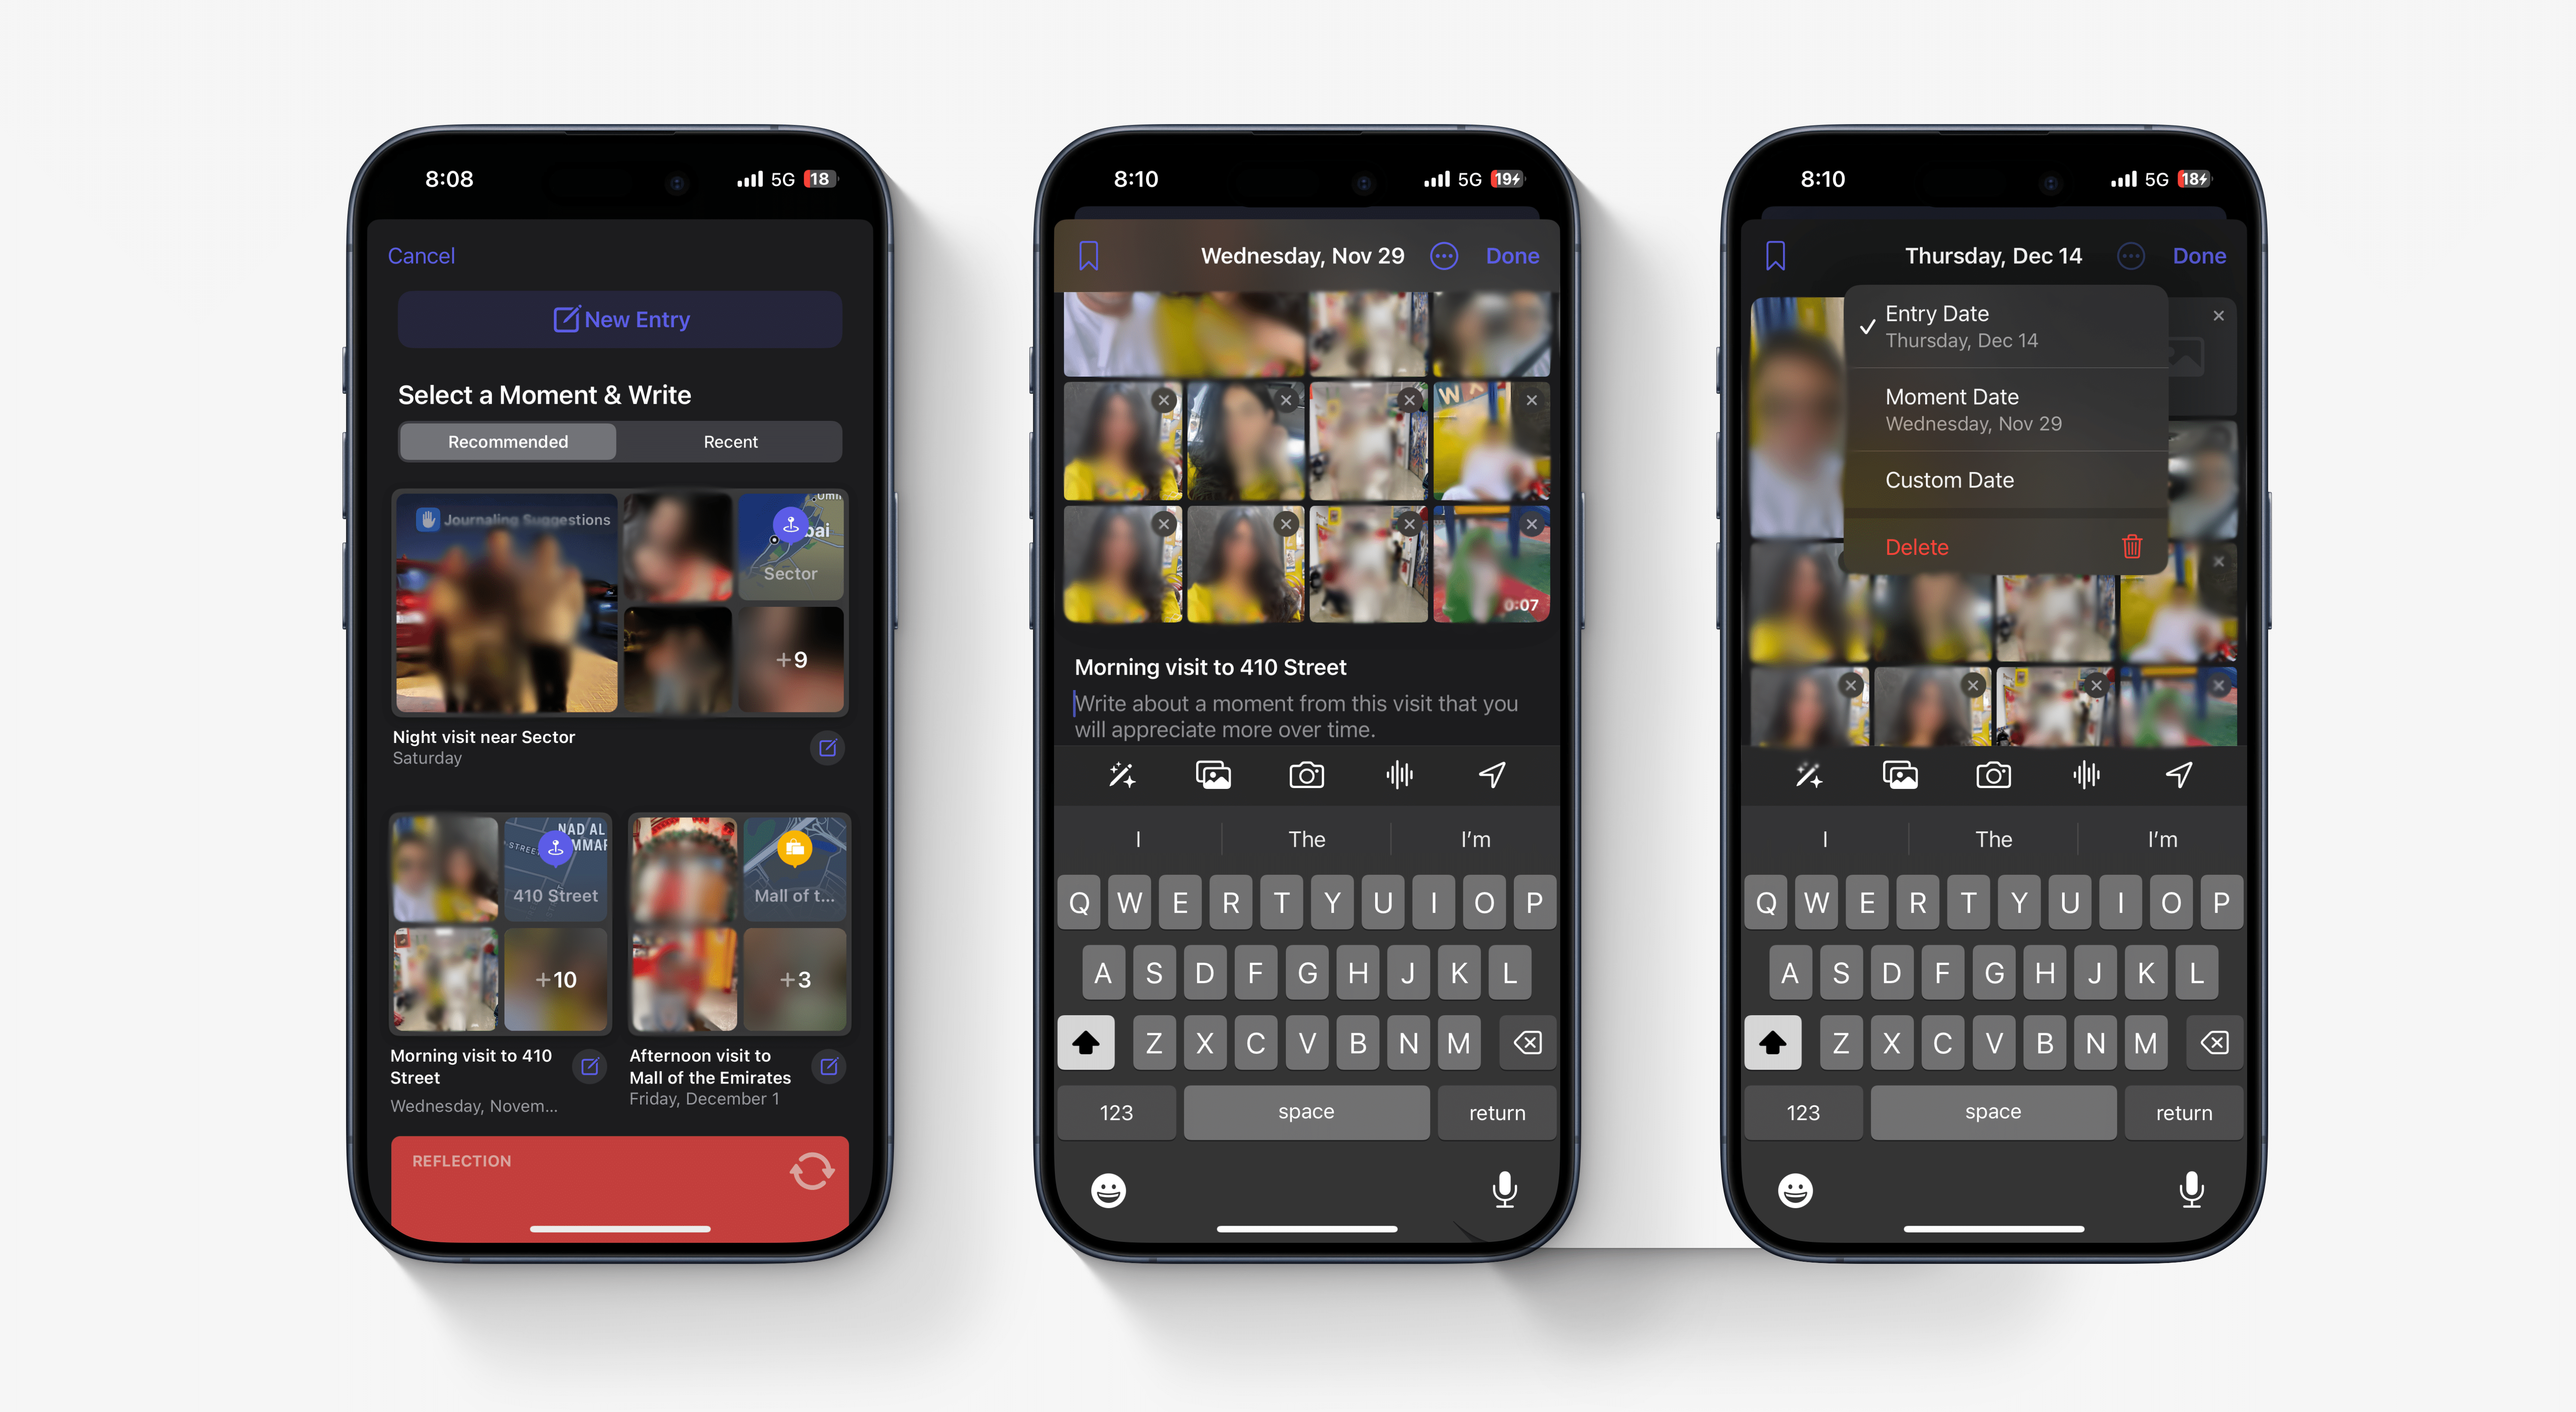
- Tap on the three dots menu.
- Select the ‘Custom Date’ option.
- Set your desired date and tap Done.
How to Bookmark a journal entry
If you have created an entry on a special event and want to easily find it, then you can Bookmark it.
- You can Bookmark entries in any one of the following ways:
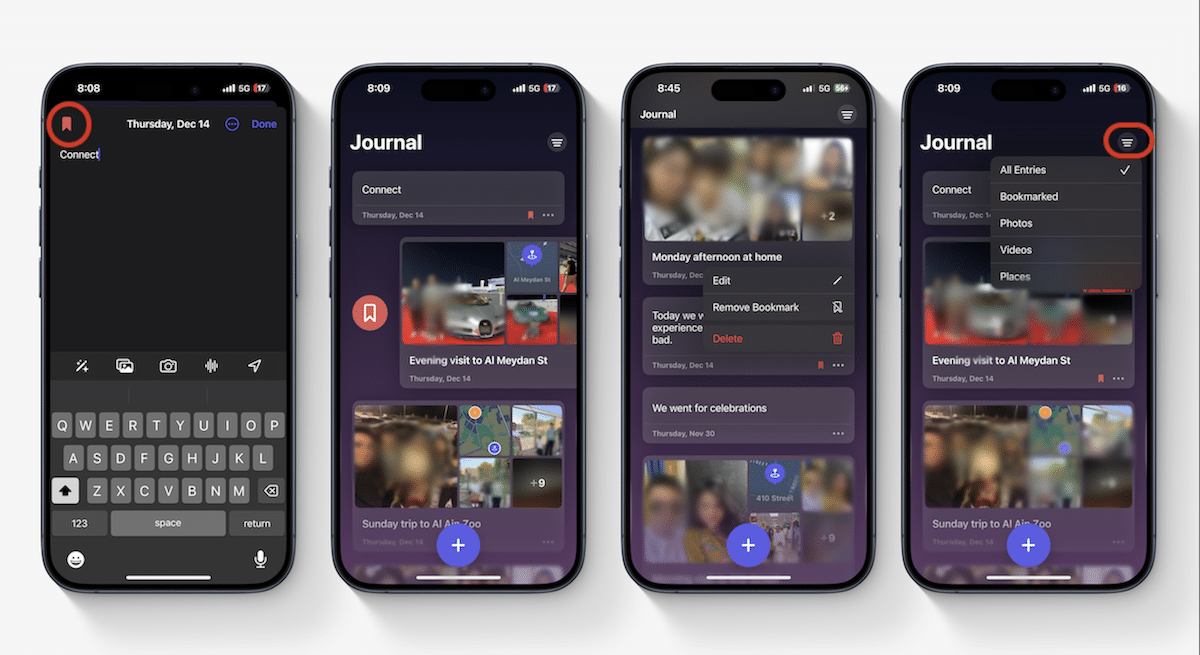
- Before closing an entry, tap on the Bookmark GIF in the top left corner.
- In the Home UI, tap on the three-dot menu on an entry and select Bookmark
- Swipe right an entry in Home, and tap on the Bookmark icon.
- In the Home tab, the bookmarked entry appears with the red bookmark sign.
- To view all Bookmarked entries, tap on the filter GIF in Home and select the “Bookmarked” option.
How to view recommendations in the Journal app
For days when you are experiencing writer’s block or want a fresh idea to explore, the app features a “Recommended” section. Keep in mind that the app will only show recommendations or suggestions when the ‘Skip Journaling Suggestions” option is turned off which it is by default.
- Tap on the “+” GIF at the bottom of Home.
- Under the ‘Select a Moment & Write’, tap on the “Recommended” tab.
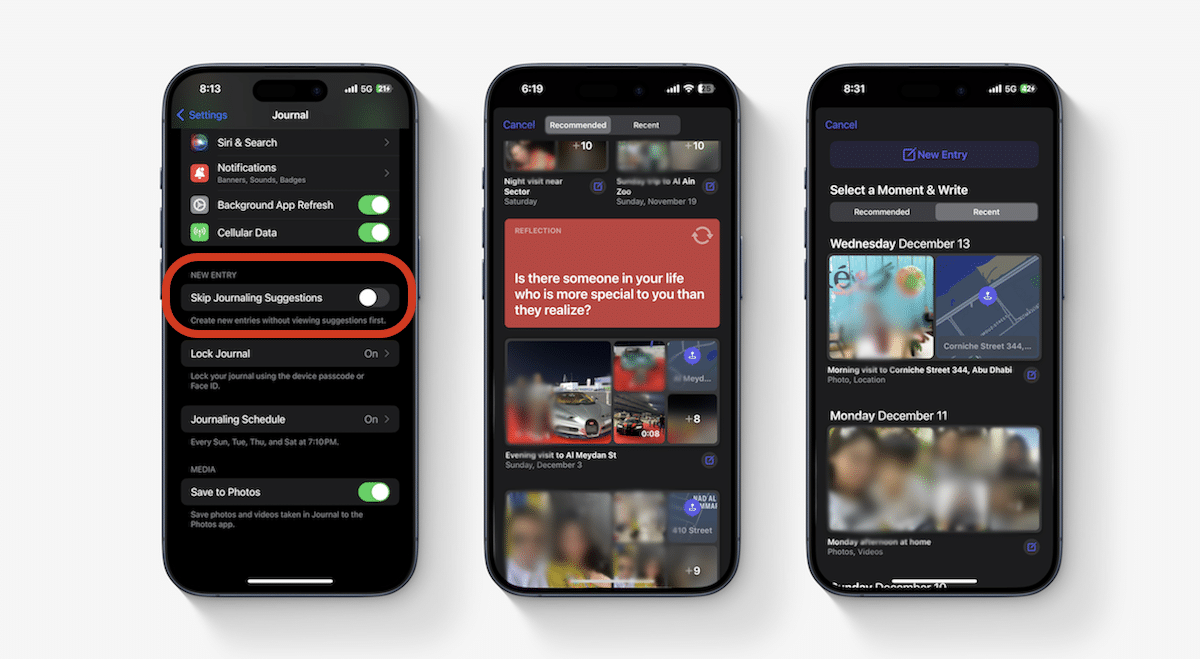
- The section displays groups of pictures of different days or activities (recent and old) from the Photos app, Reflection questions, locations you visited, and contacts you connected with to write on.
- To write on any of the recommended topics, simply tap on the compose icon under each group of photos and on the Reflection.
- When writing about photos from an activity, you can choose which pictures to include in the entry.
- If you want to view recommendations from recent events or activities, tap on the Recent section. Like the Recommended section, the Recent section also displays the group of photos and visited locations but does not feature Reflections.
When you don’t want to write without viewing recommendations, turn on ‘Skip Journaling Suggestions’ via Settings app > Journal > turn off Skip Journaling Suggestions.
How to lock the Journal app on your iPhone
As the Journal app records your personal insights, thoughts, and feelings, it is wise to lock the app to prevent anyone else from accessing them.
- Open the Setting app and tap on Journal.
- Tap on the “Lock Journal” option.
- Enter your iPhone’s passcode.
- As an additional security layer, enable Face ID.
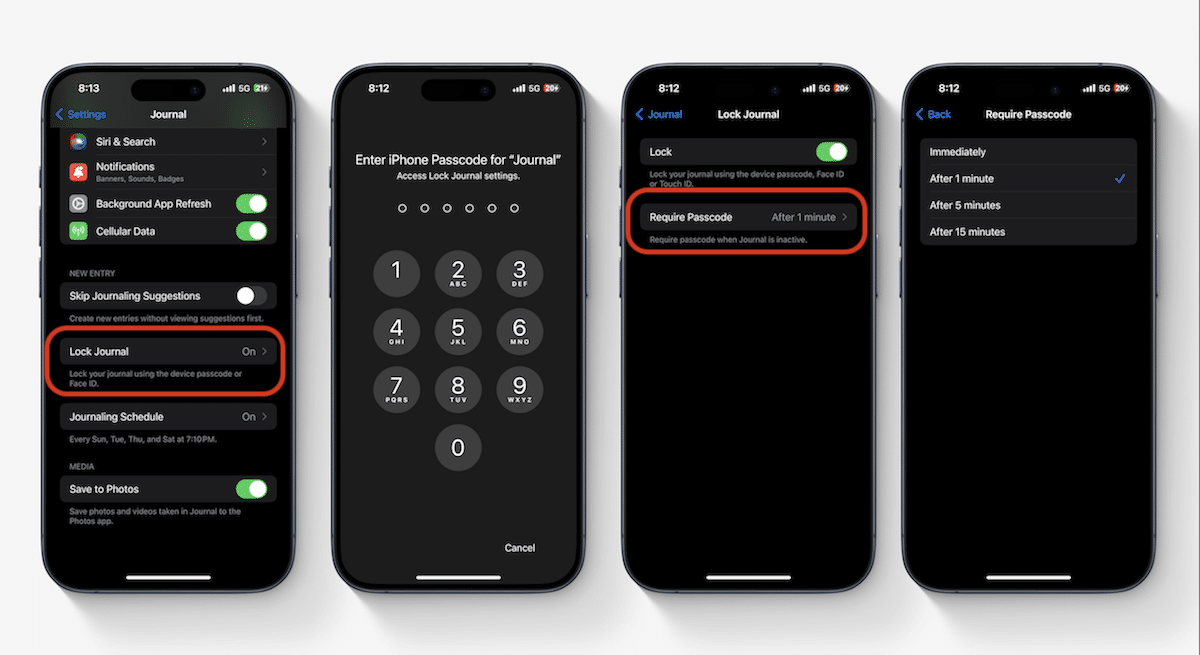
When you open the app for the first time after updating your iPhone to iOS 17.2, you will see a Lock Journal app splash screen. But if you have missed the opportunity to lock the app then, you can always do it from the Settings app.
How to schedule journal entries
If you love journaling but tend to forget, then you can schedule journal entries. This feature will help you set a time in the day to write your entry and keep your daily schedule.
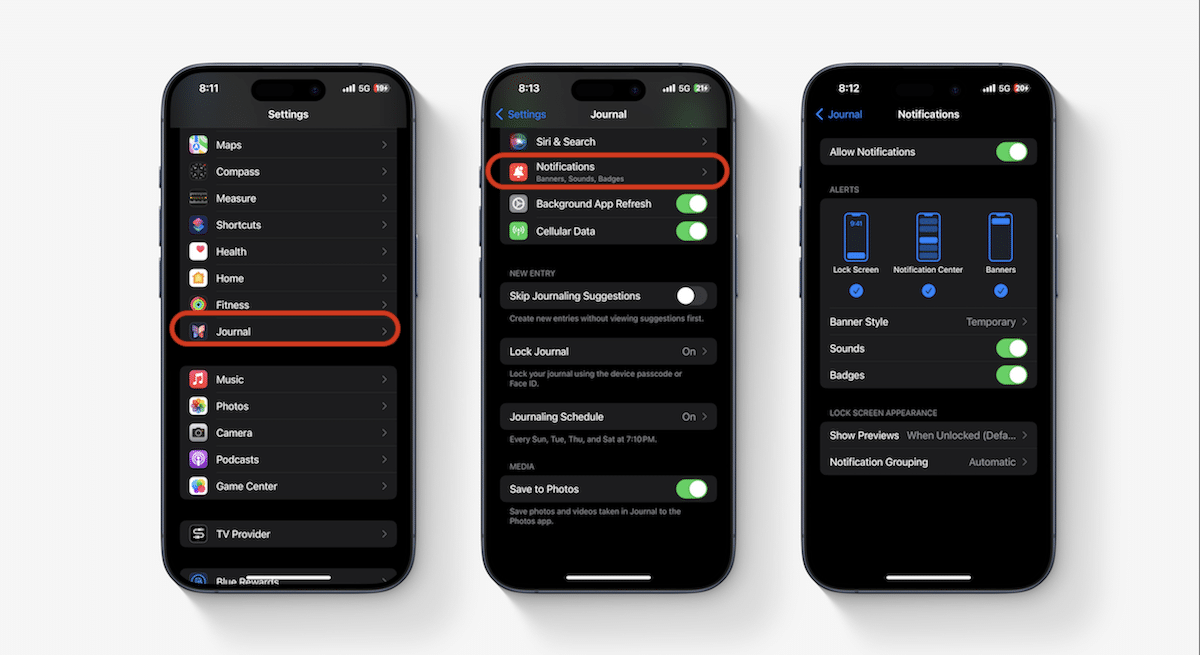
- Open the Settings app > Journal.
- Tap on Notifications and enable Allow Notifications.
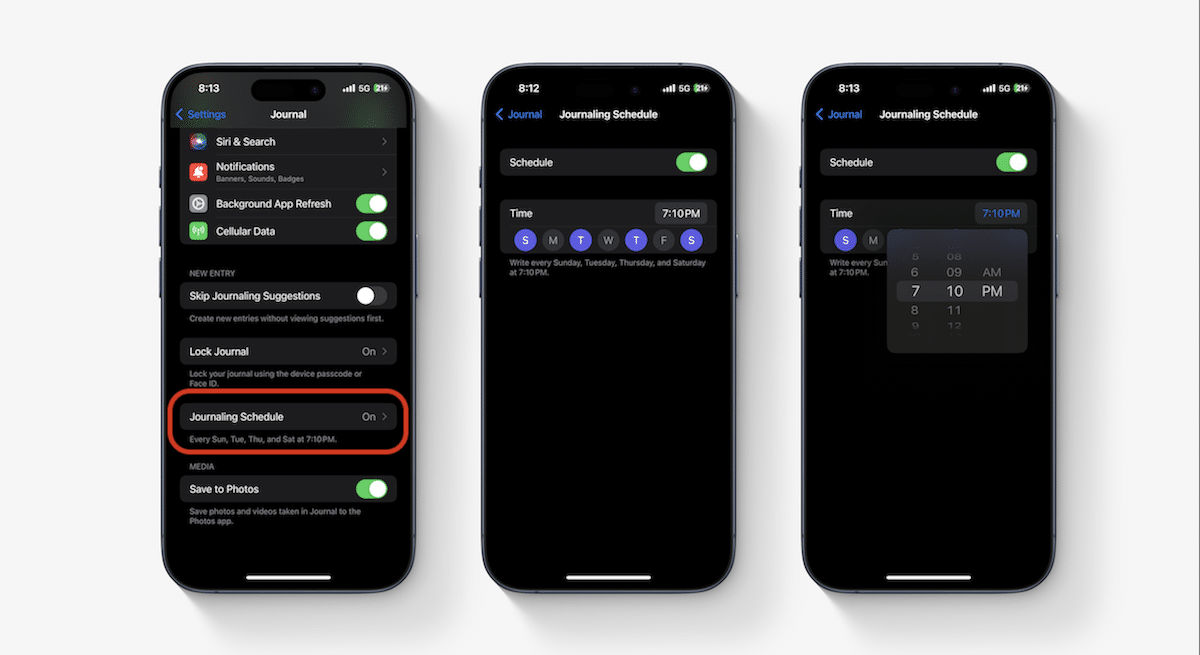
- When go back to Journal settings and tap on the “Journaling Schedule” option.
- Turn on the Schedule toggle.
- Tap on the days of the week to get Journaling reminders on those days.
- Tap on the clock to set the time.
