Archive files are a great way to compress and store files, making them easier to share and manage. Two of the most popular archive formats are 7-zip and TAR. Previously, Windows users had to rely on third-party tools to create these types of archive files.
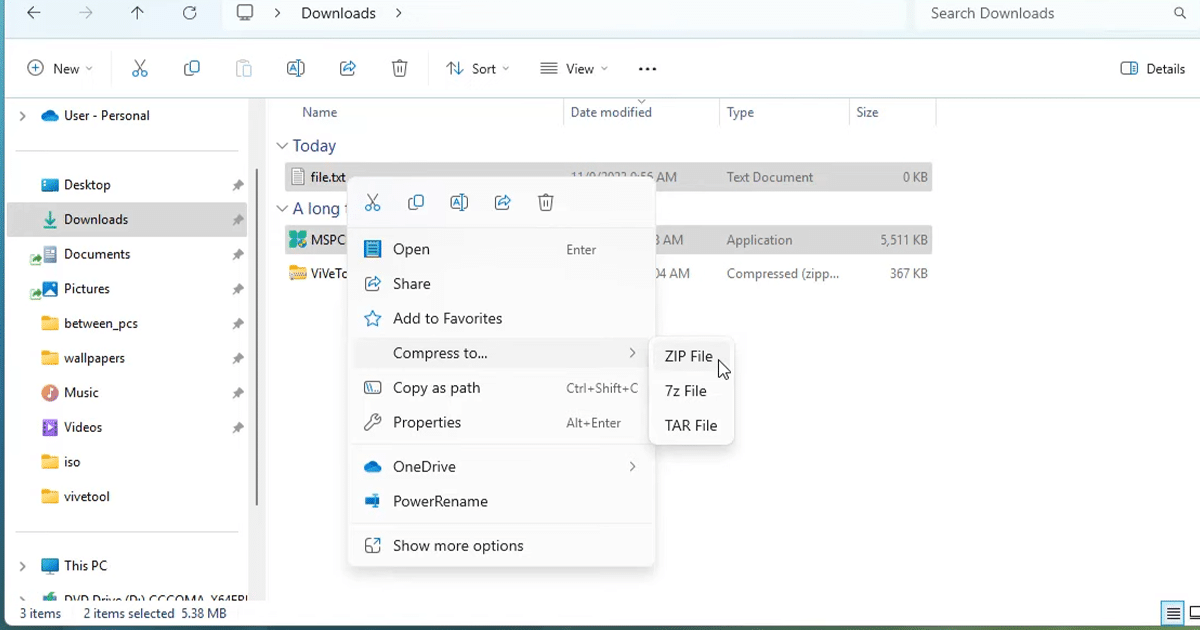
Now in Windows 11 Build 25992 and higher, Microsoft has added native support for 7-zip and TAR archive creation.
This is a major welcome change, as it makes it easier and more convenient for Windows users to work with these popular archive formats. 7-zip and TAR archive files are often used to compress and distribute software, data, and other files. They are also commonly used to create backups and archives of important files.

Windows 11 now lets users create 7-zip and TAR archive files
Microsoft notes that support for creating archival files, including for 7-zip and TAR, is now available for testing. This means that Windows users can now create 7-zip and TAR archive files without having to install any additional software.

There are several benefits to using 7-zip and TAR archive formats:
- Compression: 7-zip and TAR archive formats can compress files more effectively than ZIP files. This means that you can create smaller archive files without losing any data.
- Encryption: 7-zip and TAR archive formats support encryption, which means that you can password-protect your archive files to keep them secure.
- Platform independence: 7-zip and TAR archive files can be opened and extracted on a variety of platforms, including Windows, macOS, Linux, and Android.
How to create a 7-zip or TAR archive file in Windows 11
To create a 7-zip or TAR archive file in Windows 11, simply follow these steps:
- Right-click on the file(s) or folder(s) that you want to archive.
- Select “Compress to“.
- Select either “7-Zip archive (.7z)” or “TAR archive (.tar)“.
- Enter a name for the archive file and select a location to save it.
- Click “OK” to create the archive file.
Read more: