A lot of people complain that their certain VPS provider isn’t up to the mark as their WordPress blog host. The problem is that most bloggers think that just using a VPS is the solution to all their problems but the fact is, it is not, in its un-optimized state. There are a few tricks one needs to pull to be able to get the maximum benefits from their servers. One of them is installing an OpCode cache. What is an OpCode cache and why do you need it? Read more after the break.

An OpCode cache stores compiled PHP scripts in the server’s memory so when some user visits your blog, the scripts are already compiled and all that’s needed is the files to be served to the user. We all know that memory access is much faster than disk read/write so this saves a lot of time while serving pages. An OpCode cache comes in handy, particularly when you have a lot of Rams available. For instance, iTD is hosted on a Media Temple VPS server with 2GB of RAM. Before using an OpCode cache, most of the RAM used to lie around free while the website used to load very slowly. After installing an OpCode cache, coupled with the W3 Total Cache, the website load time increased tremendously.
Before starting, keep in mind that this guide has been written using a Media Temple VPS and instructions for your service might vary. Also, try this at your own risk. We’re not responsible in any way whatsoever if you mess it up. We will be using APC ( Alternate PHP Cache ) as it’s compatible with most servers, free and open source. There are others available too but APC will be built into PHP with version 6 so it seems like the best choice.
Now that we have this out of the way, let’s begin.
1. Enable Root Access and Developer Tools
First of all, you need to enable root access so you can use SSH. You should also enable developer tools because you’ll need to use commands like ‘make’ which won’t work otherwise.
2. Install APC
Now you need to download either WINSCP or Putty to login to your server using SSH. Once logged in, input the following commands one by one: [See how to use SSH here]
Navigate to the source folder:
- cd /usr/local/src/
Now we have to download APC:
- wget http://pecl.php.net/get/APC-3.1.6.tgz [latest stable version at the time of writing]
The package will download. Now we have to unpack the file:
- gunzip -c APC-3.0.10.tgz | tar xf –
Navigate to the folder where we unpacked it
- cd APC-3.1.6
Prepare build environment:
- /usr/bin/phpize
- ./configure -enable-apc -enable-apc-mmap \-with-apxs2=/usr/sbin/apxs -with-php-config=/usr/bin/php-config
Install APC
- make
- make install
Now we have to add this module to the PHP.ini file:
- Type vi +/extension_dir /etc/php.ini
- Press i
- Press enter
- type extension = ‘apc.so’
- Press ESC and type :wq to save and exit (or type :q! to quit without saving if you want to start again)
Now you have to restart Apache which can be done through the command line as well:
- service httpd stop
- service httpd start
Now your work on the server is done. All you have to do now is to install W3 Total Cache plugin in WordPress and tell it to use APC. I won’t go through the steps on how to install a WordPress plugin because if you’ve completed the previous steps, you’re an advanced user.
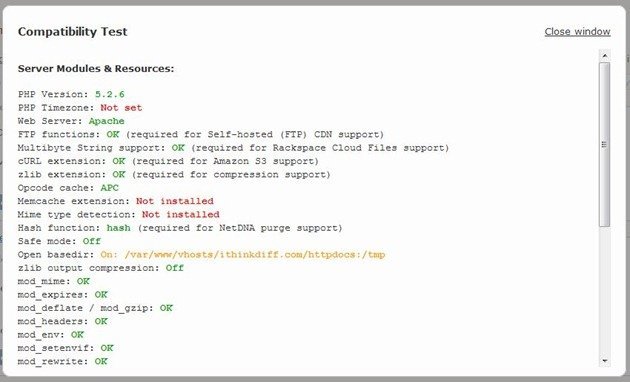
Before enabling anything, check if OpCode cache is installed by doing a compatibility test from the W3 Total Cache plugin page in WordPress dashboard.
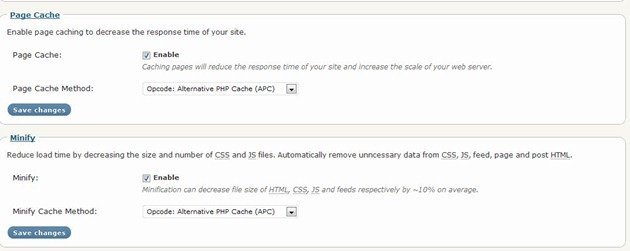
It’s possible that a different configuration might work better for you, but here’s what I use:
Database Cache and Object Cache are left unchecked while Browser Cache is enabled.
That’s all you need to do and visitors should see a decrease in the load time of your website right away. There’s more that needs to be done to speed up your website even more by spending some money and depending on your traffic but I’ll cover that in another post soon.

4 comments