In Windows 11, users can remove a static IP address and switch to a dynamic network configuration in multiple ways, including Settings, and Control Panel.
A static IP address is a permanent IP address that is assigned to a device on a network. This means that the IP address will not change, even if the device is rebooted or moved to a different network.
Here are a few reasons why you might want to remove a static IP address in Windows 11:
- To troubleshoot network problems: If you’re having problems connecting to the network, removing the static IP address and letting your computer get a dynamic IP address from your router can sometimes help.
- To make your computer more portable: If you frequently move your computer between different networks, using a static IP address can be a hassle. By removing the static IP address, your computer will automatically get a new IP address whenever it connects to a new network.
- To improve security: Static IP addresses can make your computer more vulnerable to attack. By removing the static IP address, you’ll make it more difficult for attackers to target your computer specifically.
In this guide, we will show you how to remove a static IP address configuration to obtain a dynamic address in Windows 11.

Here is how to remove a static IP address in Windows 11
How to remove a static IP address using Settings
- Open Settings.
- Click on Network & Internet.
- Click on Ethernet or Wi-Fi, depending on which network adapter you’re using.

- Click the Edit button for the IP assignment setting.
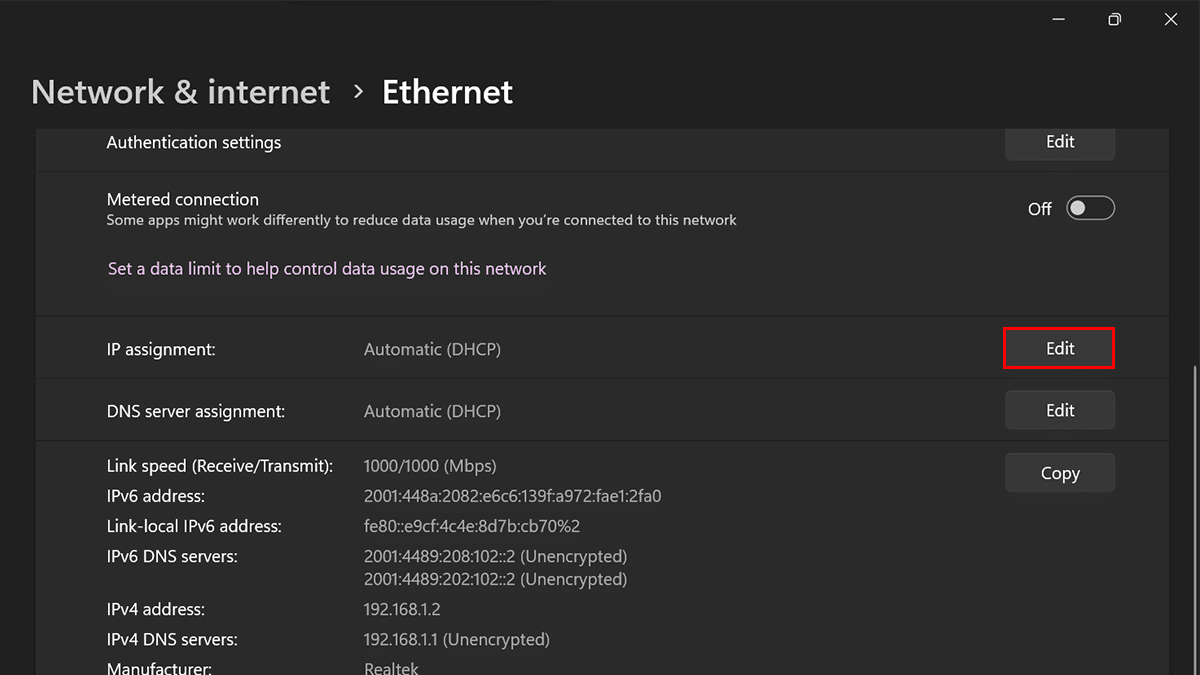
- Use the Edit IP settings drop-down menu and select the Automatic (DHCP) option.

- Click the Save button.
- When done, the networking stack configuration will reset, and the computer will now be using a dynamic IP address.


How to remove a static IP address using Control Panel
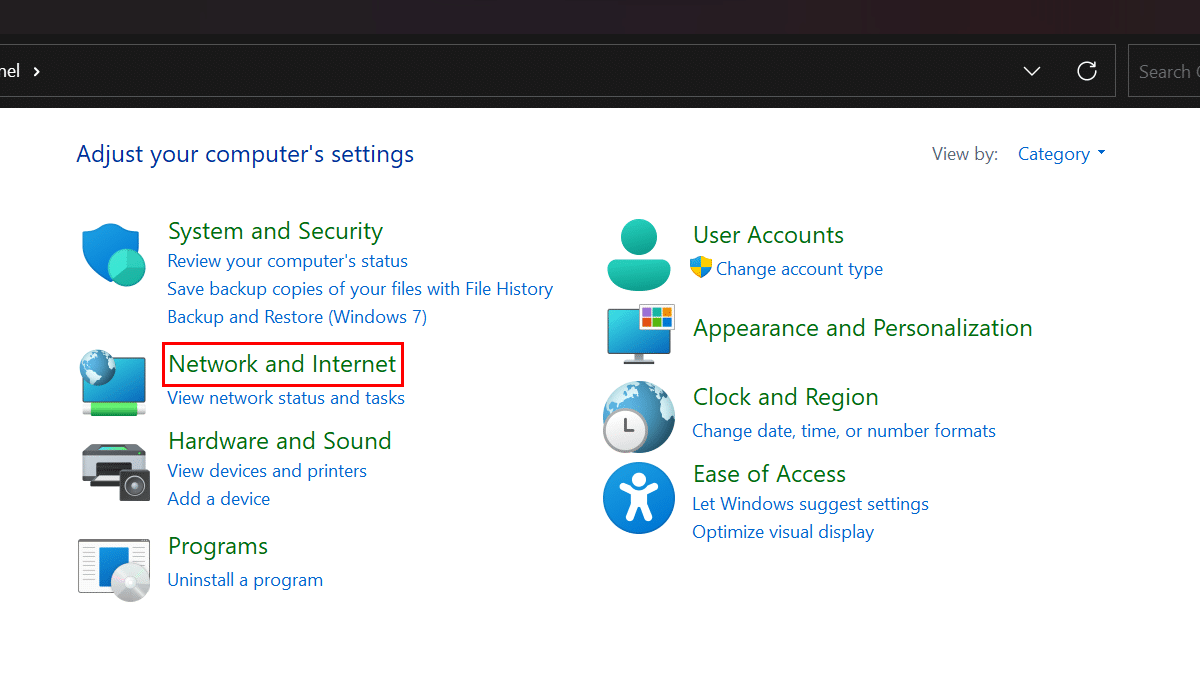
- Open Control Panel.
- Click on Network and Internet.
- Click on Network and Sharing Center.

- Click on the Change adapter settings option in the left pane.

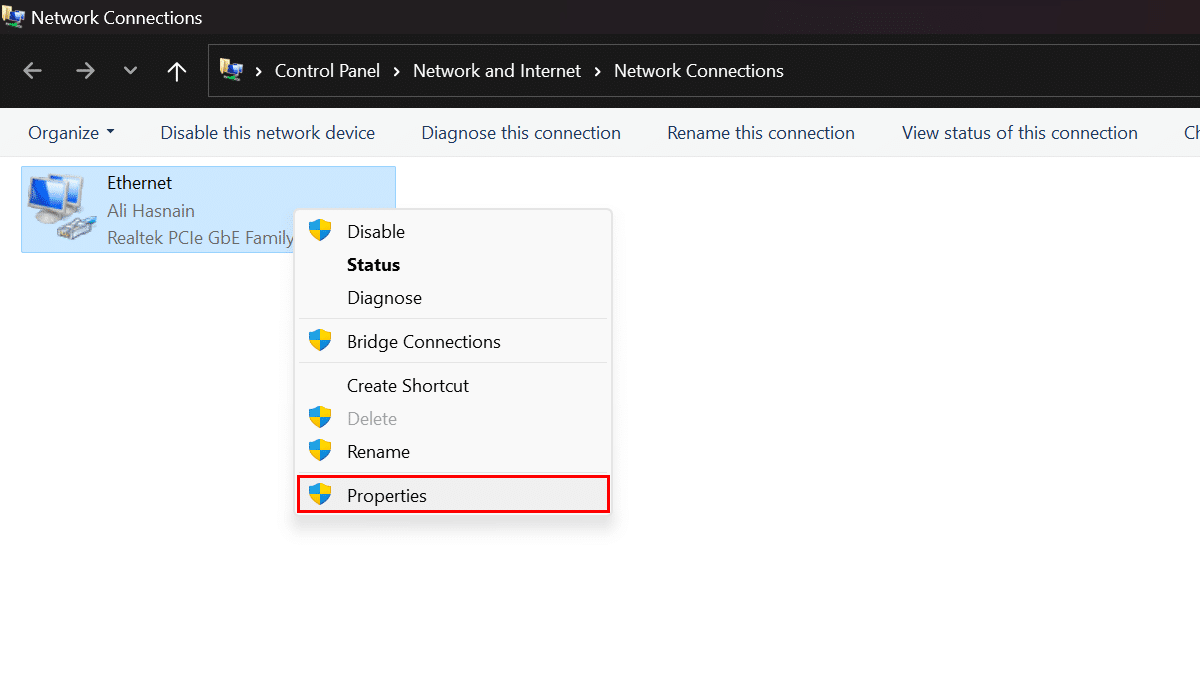
- Right-click the network adapter that you want to remove the static IP address from and select Properties.
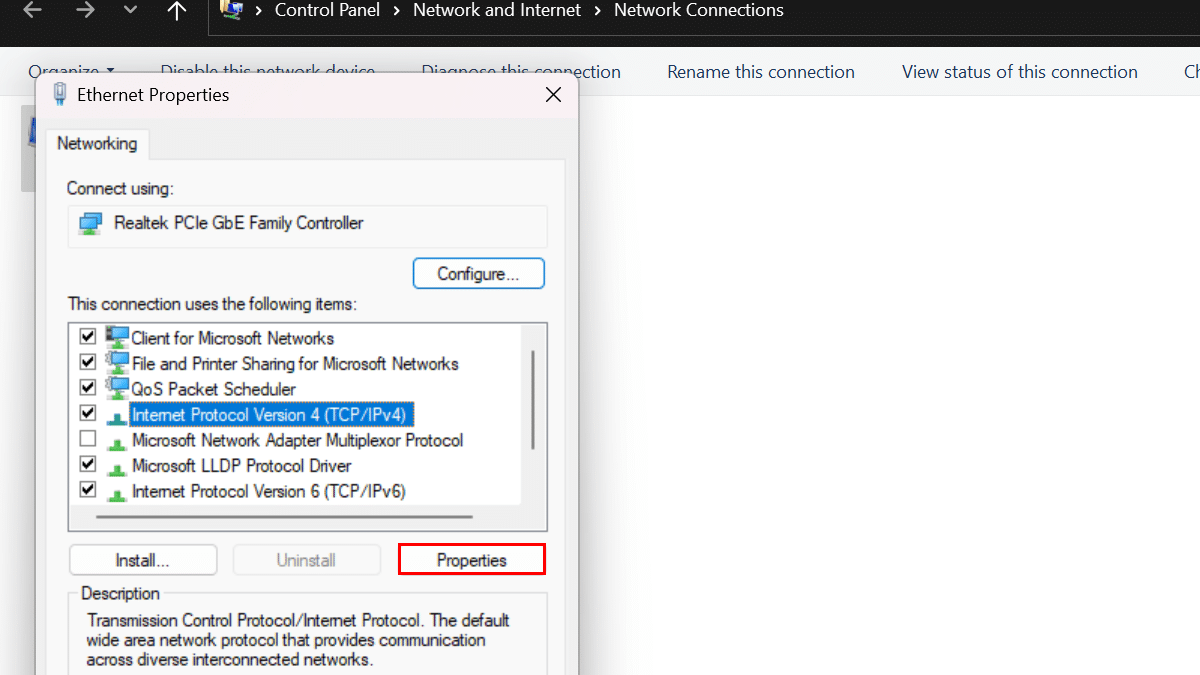
- Select the Internet Protocol Version 4 (TCP/IPv4) option and click on the Properties button.
- Select the “Obtain an IP address automatically” and the “Obtain the following DNS server address automatically” options.
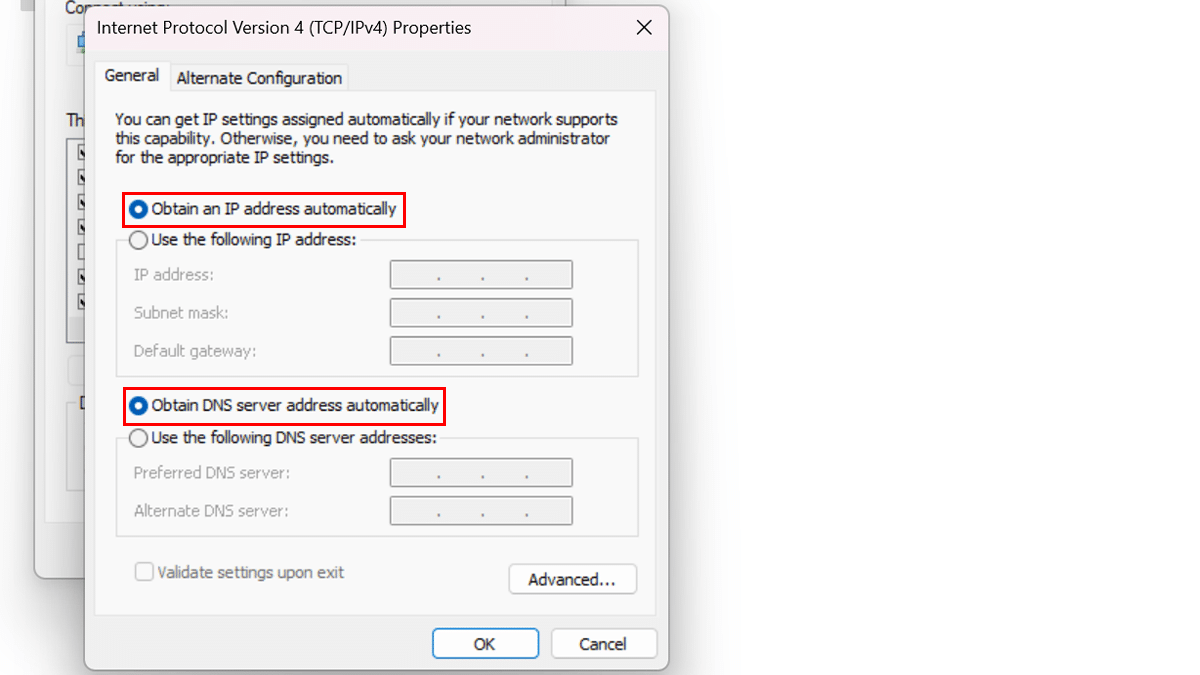
- Click on the OK button.
- When done, the Windows 11 statically assigned TCP/IP configuration will be removed, and your computer will use a dynamic IP address from your DHCP server.


Read more:


