Thanks to Nexus 5, Nexus 4 is not Google’s latest flagship smartphone anymore. While most users are scampering to upgrade to the snapdragon 800 powered beast that is the Nexus 5, a large number of users, including yours truly, are more than happy with the N4. While we currently wait for the stock Android 4.4 release, I decided to put together a small guide to help you root Nexus 4 and try out custom ROMs based on Kitkat.

Before you proceed, it goes without saying, backup all your important data. Also, this article is written assuming that you are somewhat technically sound so do not try this if you are not.
Root Nexus 4 on Windows
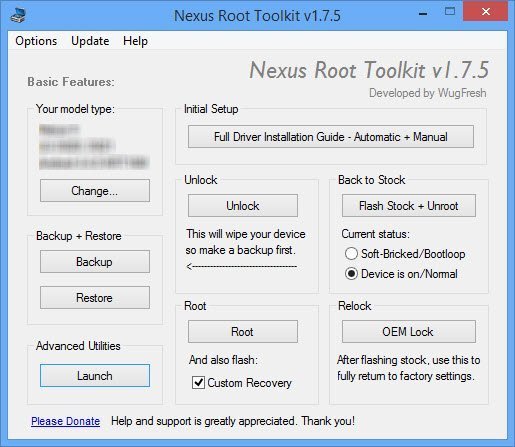
For Windows, the simplest method is to root your Nexus 4 or install the custom recovery on it is by downloading Nexus Root Toolkit. It is a very comprehensive app and lets you perform all maintenance functions via a single interface. It even guides you through installing or fixing drivers so that your phone connects properly on Windows.
Apart from rooting and recovery, it also allows you to backup and restore your phone, flash the stock firmware or unroot your phone or even lock/unlock the bootloader. Advanced features include taking screenshots of your phone, flashing and side loading files and images and much more. I would not recommend messing around with the custom functions unless you are a developer, though.

Root Nexus 4 on Mac
For Mac, rooting and installing custom recovery is almost as easy as it is for Windows. While there is not a single app available which does everything, there are a set of one-click toolkits available using which you can root/unroot, lock/unlock the bootloader, flash the stock firmware or install a custom recovery on your Nexus 4 phone.
The toolkits can be downloaded from androidrootz.com. Just make sure that you backup all your data from the phone as these toolkits erase all data by unlocking the bootloader. In case anything goes wrong, you would get stuck at the Nexus 4 X boot screen. In such a situation, just use the stock firmware one click toolkit and flash it. You can then proceed with rooting/installing custom recovery again.
In case you run into any issues, feel free to leave a comment below and I’ll be glad to help you out.