Services in Windows 11 are background programs that enable essential functionality to the operating system and other applications. They handle important tasks such as printer management, networking, and file sharing. These services usually commence automatically when Windows boots up, but can also be initiated manually.
Windows 11 has numerous services, each designed for a specific purpose. Among the most common types are:
- System services: These services are essential for the operation of Windows 11. They include services such as the Windows Update service, the File Explorer service, and the Task Scheduler service.
- Application services: These services are used by applications to provide specific functionality. For example, the Adobe Reader service is used by Adobe Reader to display PDF files.
- Device services: These services are used to manage devices such as printers, scanners, and network adapters.
Here are some of the benefits of managing services in Windows 11:
- You can improve the performance of your computer by disabling or stopping services that you do not need.
- You can troubleshoot problems with Windows 11 or other applications by starting, stopping, or configuring services.
- You can prevent malware from disabling or stopping essential services.
You can manage services in Windows 11 using the Services app. The Services app shows a list of all the services installed on your computer. You can use the Services app to start, stop, disable, and configure services.
In this guide, we will show you how to control services in Windows 11.

Here is how to manage Windows 11’s services
Before we start, it is important to note that disabling or stopping a service can affect the functionality of Windows 11 or other applications. Therefore, you should only disable or stop services that you know you do not need.
To manage services on your Windows 11 computer, follow these steps:
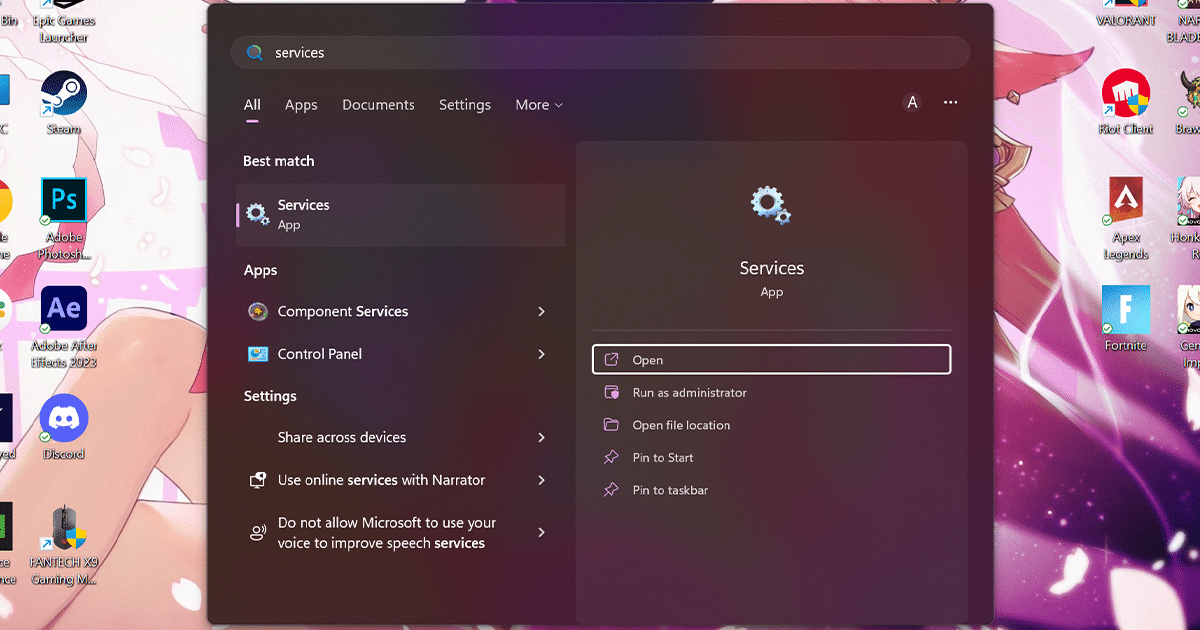
- Open Start.
- Search for Services and click the Open button.

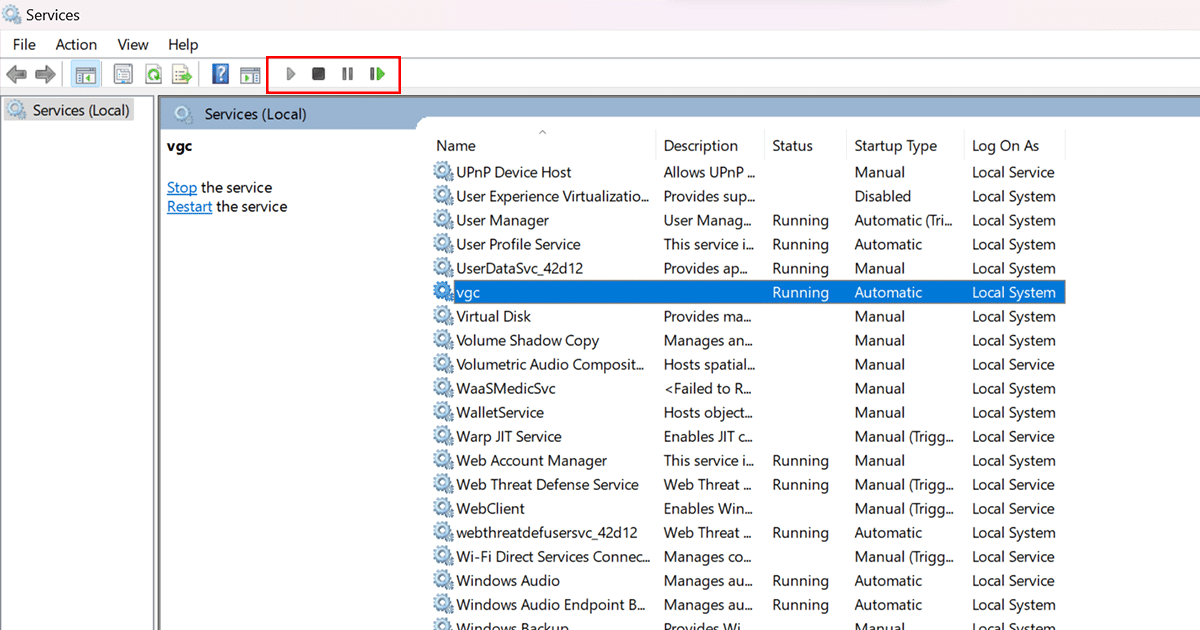
- Select the service.
- Click the Start, Stop, or Restart button to perform an action from the command bar.

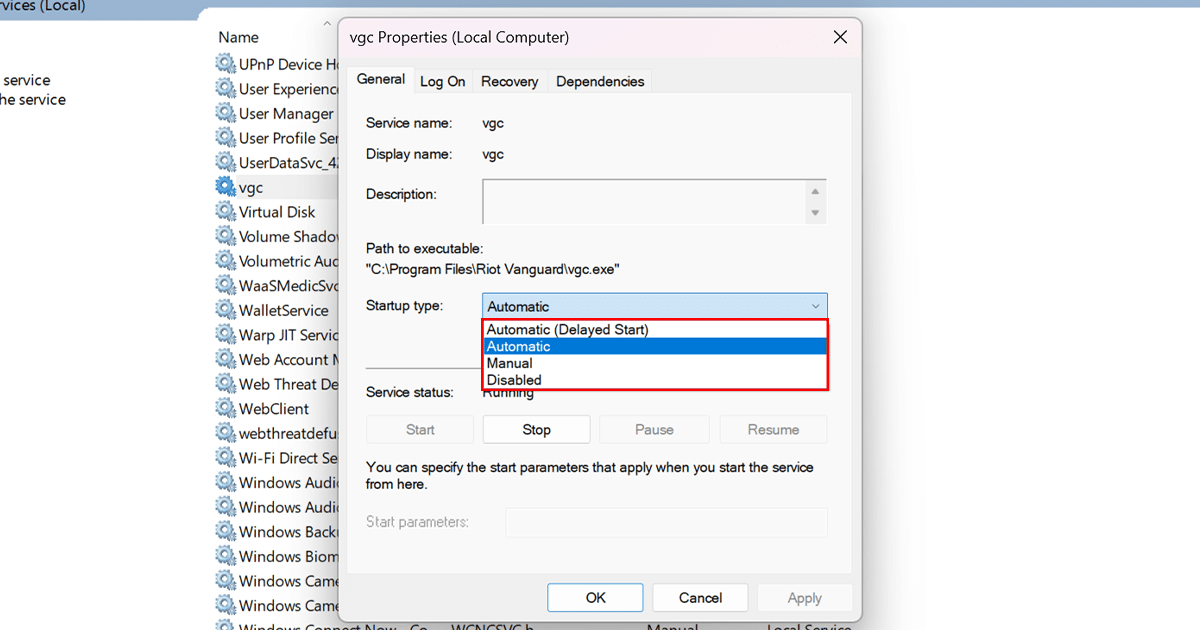
- Right-click the service and select the Properties option.

- Choose the startup type or the Disabled option to turn off the service from the “Startup type” setting.

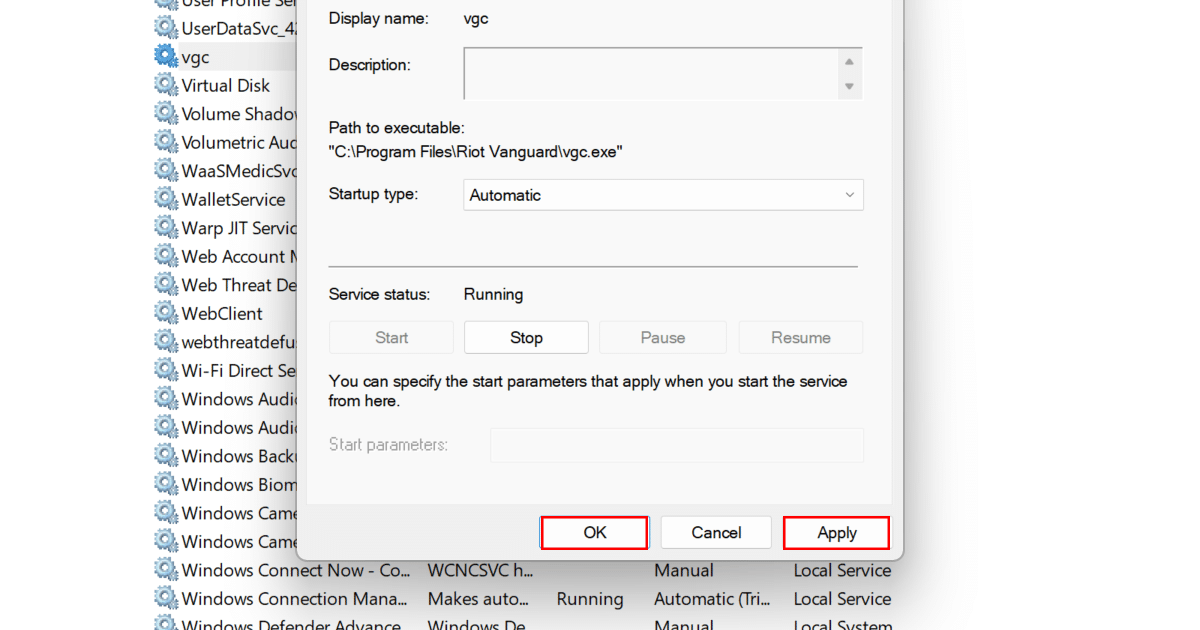
- Click the Apply and OK.

- When done, the app or system service will apply the action.
Read more: