Sometimes when you upgrade to a newer version of Windows 11, the setup process saves a copy of the previous version in the “Windows old” folder.
This is part of a safety mechanism in case the upgrade process goes wrong, the system will use the “Windows old” folder to undo the changes, and if the upgrade completes successfully the backup copy of the previous version will remain for the option to roll back if the new installation starts causing bugs and issues.
This is a useful feature but if your device works perfectly after the upgrade, you can safely delete the previous installation files to reclaim storage space. In this guide, we will show you how to safely delete the Windows old folder on Windows 11.

Here is How to delete the Windows old folder on Windows 11
How to delete Windows old files from Storage Sense Settings
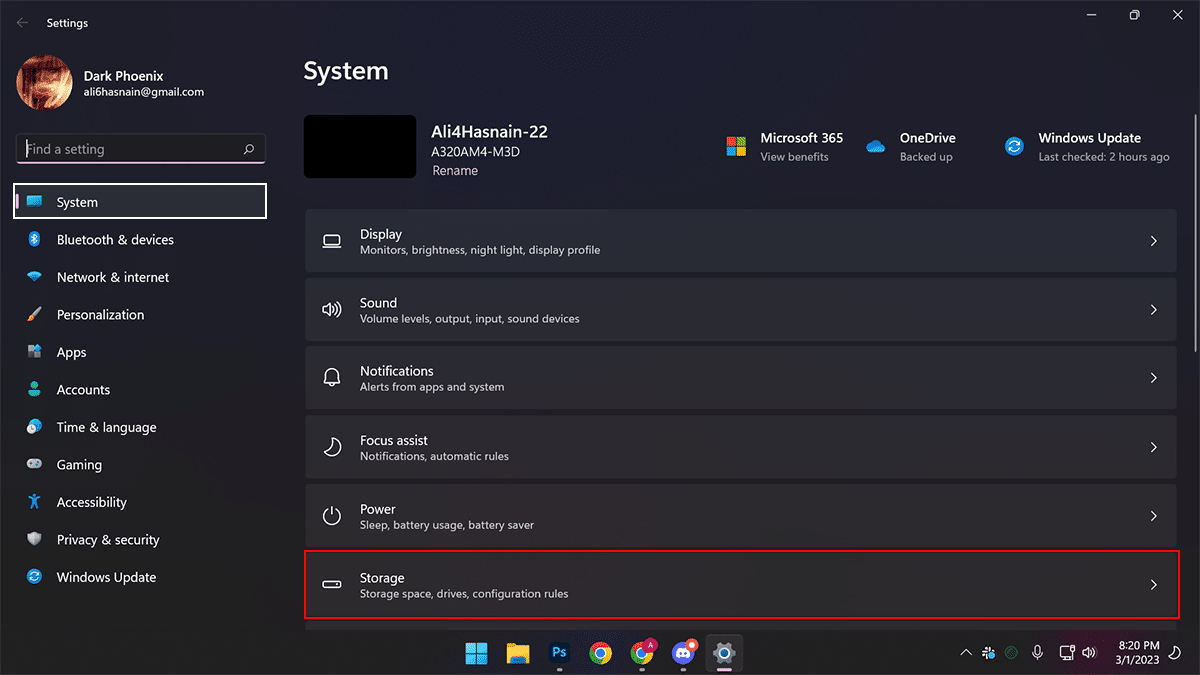
- Open Settings > Click on System > click on Storage.
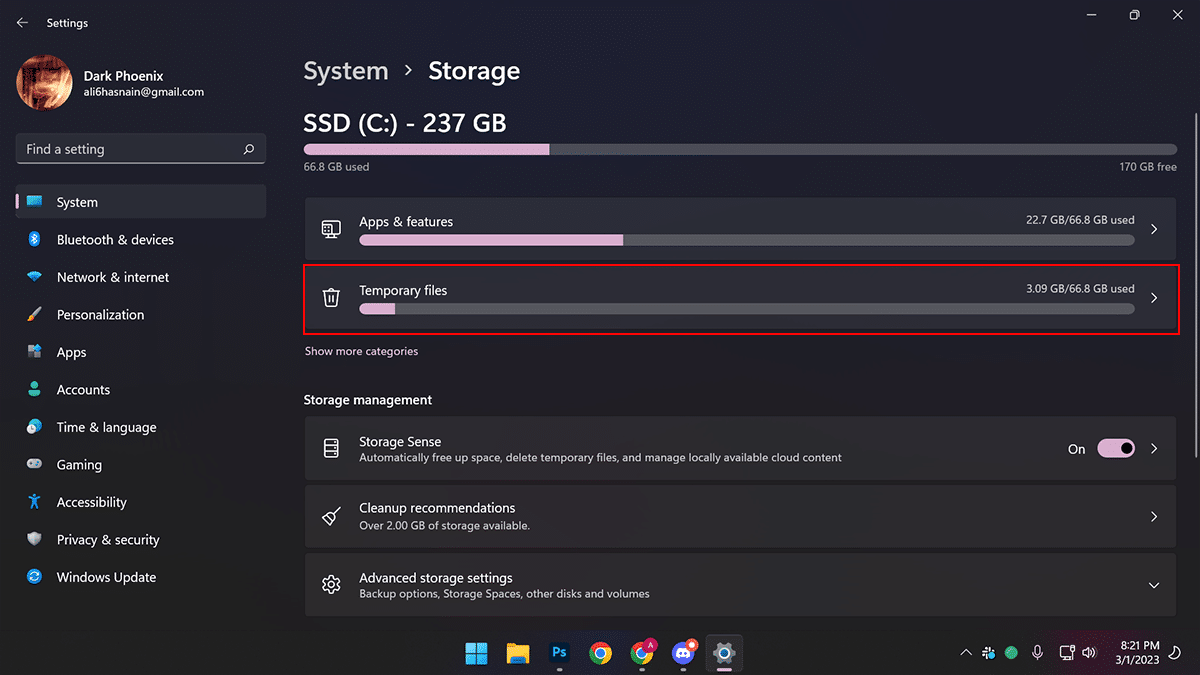
- Under the Apps & features option, click the Temporary files option.
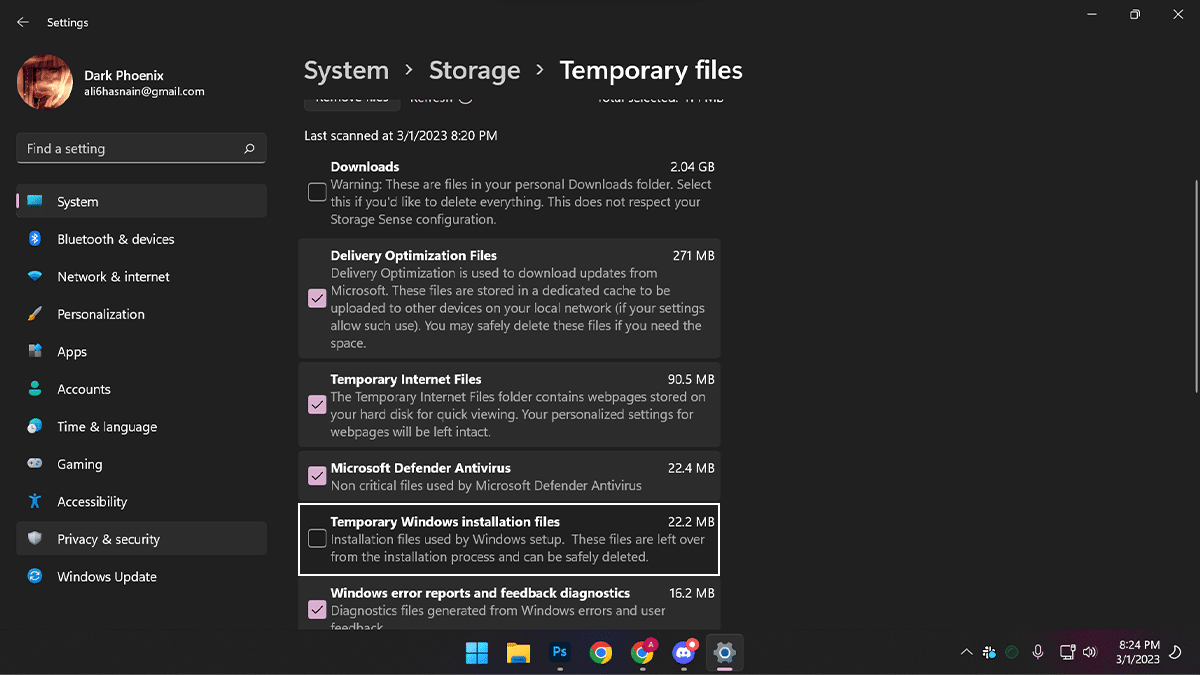
- Select the Previous version of Windows or Temporary Windows installation files check box.
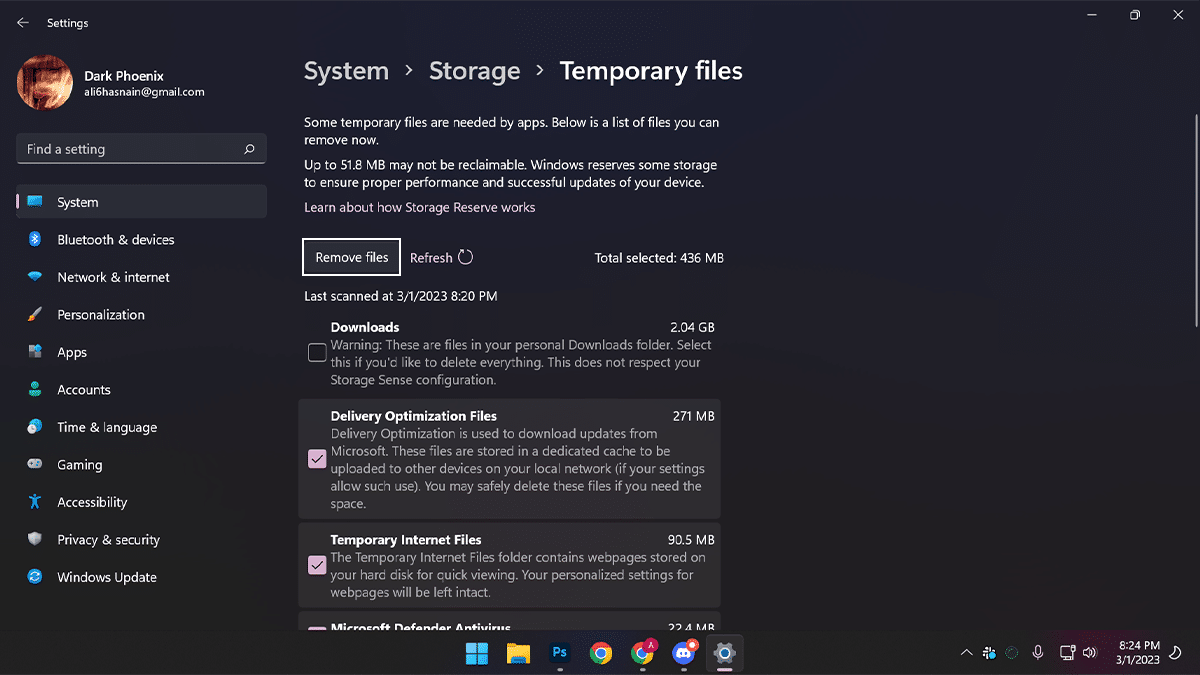
- Click on Remove files.


How to delete Windows old folders from Disk cleanup
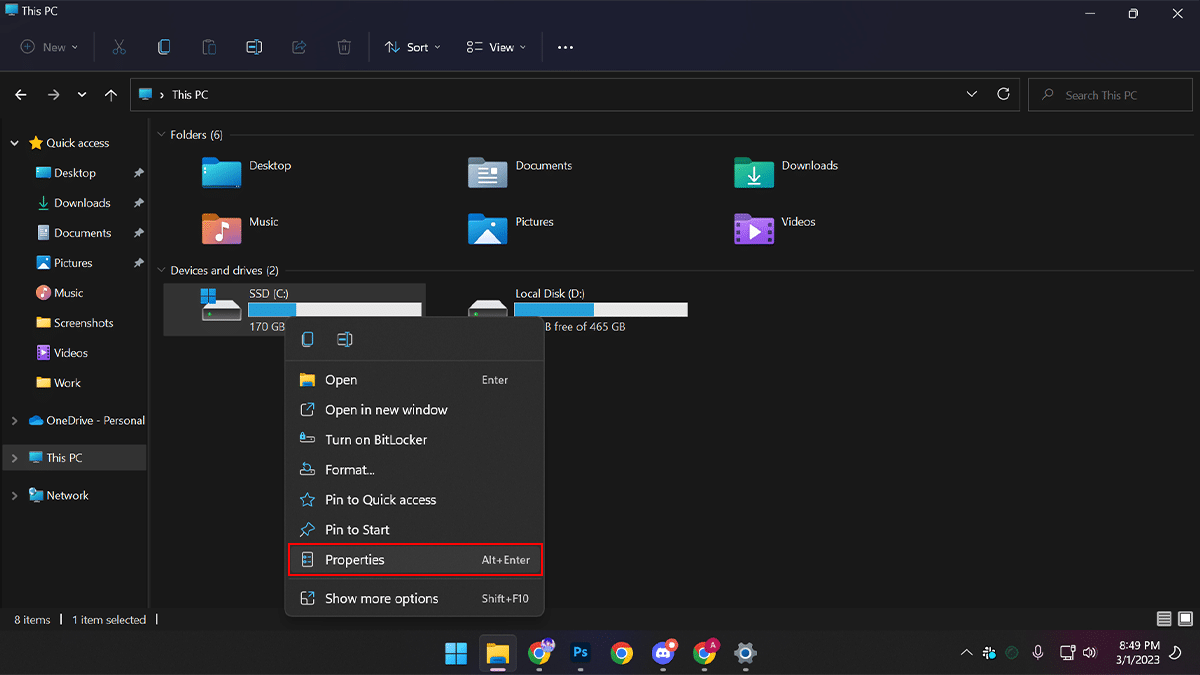
- Open File Explorer > click on This PC > under the Devices and drives > right-click the drive with the Windows 11 installation (usually the C drive) > click on the Properties option.
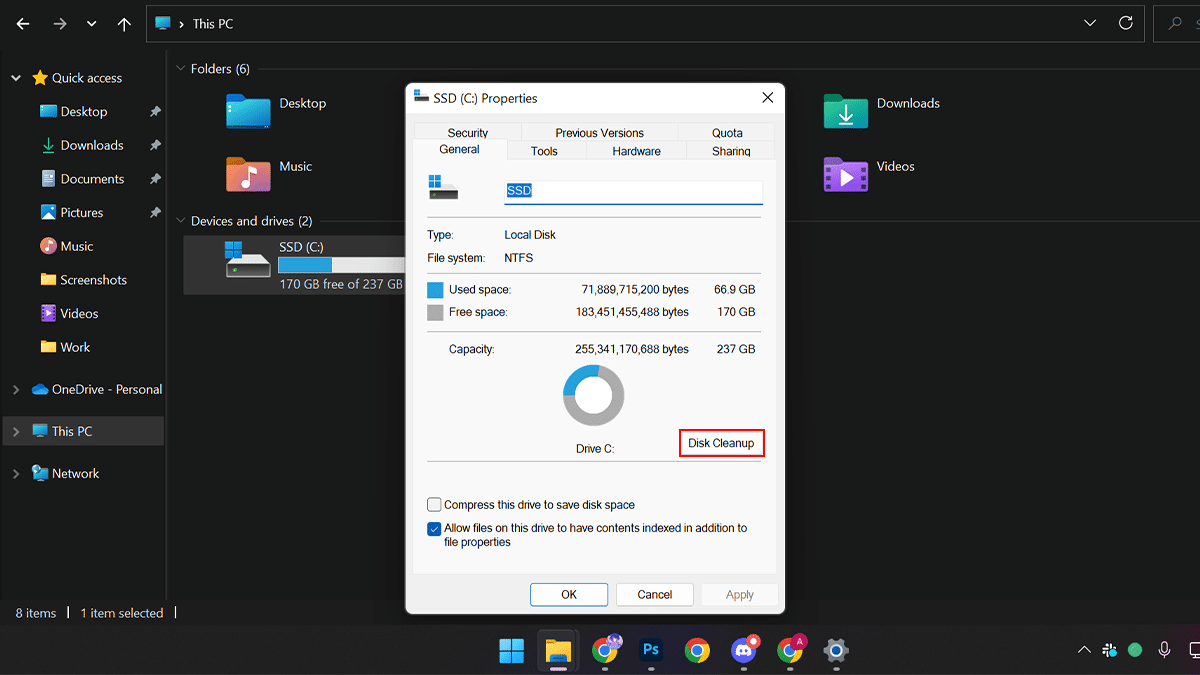
- In the General tab, click the Disk Cleanup button.
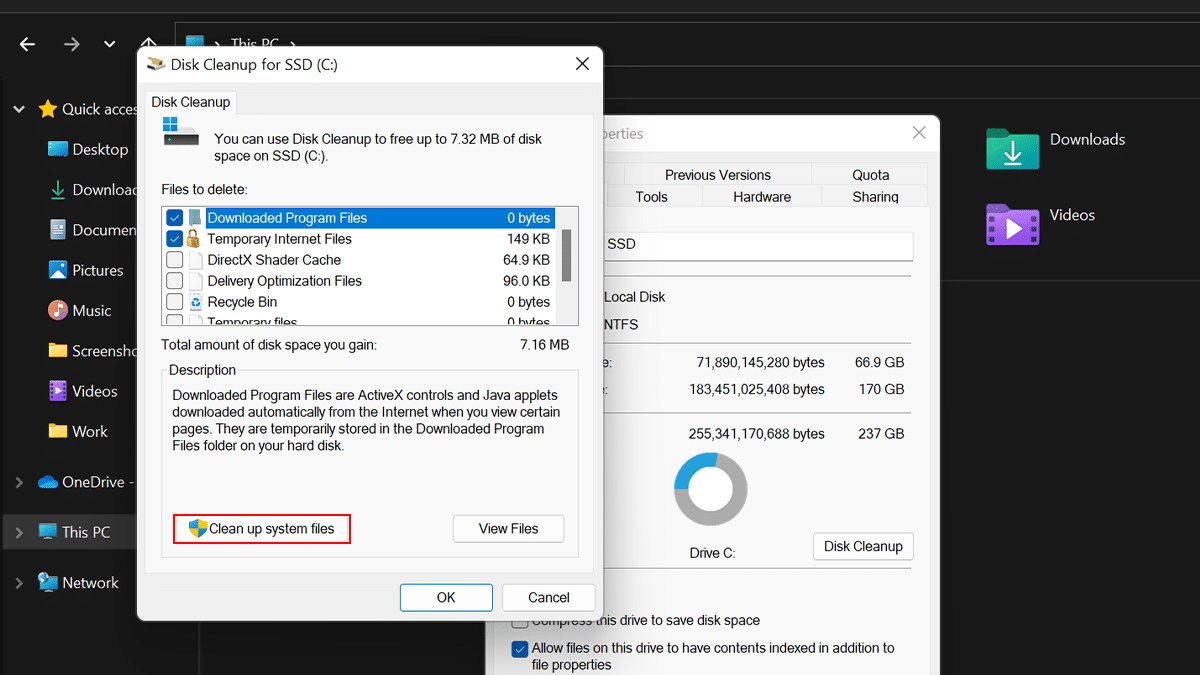
- Click the Cleanup system files button.
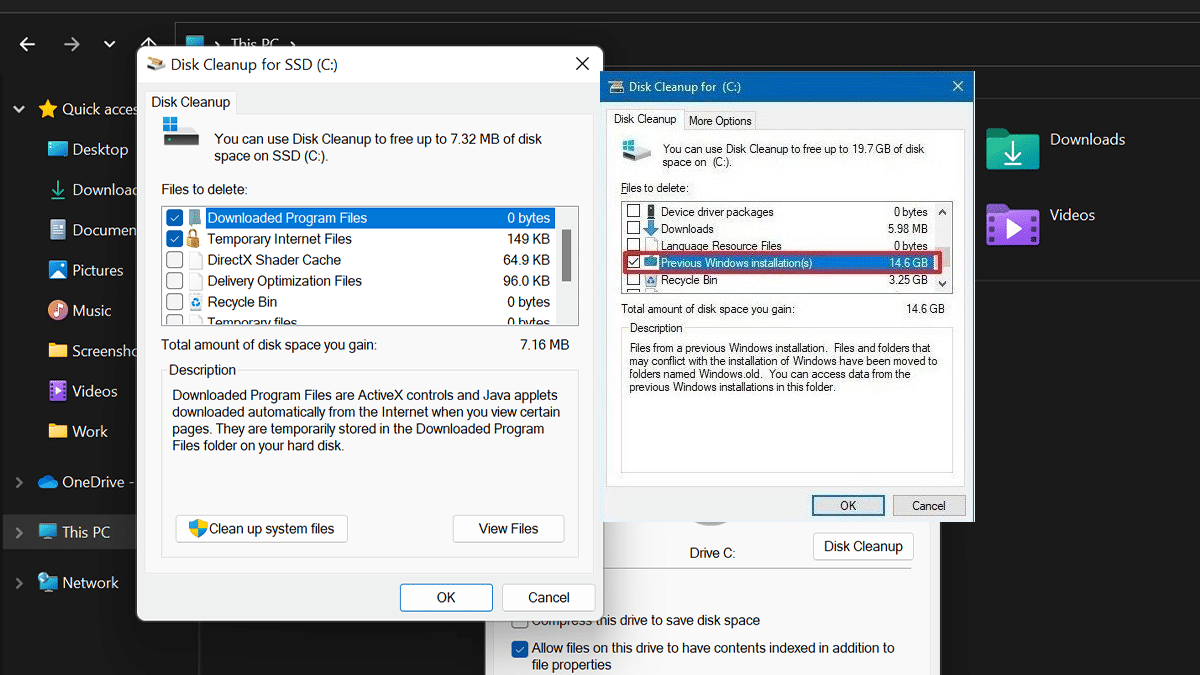
- Check the Previous Windows installation(s) option.
- Click the OK button > click the Delete Files button > and click the Yes button.


Read more:
- How to remap Windows 11’s keys or shortcuts
- How to install a Bluetooth adapter replacement on Windows 11
- How to add new fonts to Microsoft Office on Windows 11
- How to play a sound on AirPods to locate them
- How to reset AirPods without a phone
- How to find Wi-Fi and Ethernet connection speed on Windows 11
- How to change the ear tips of your AirPods Pro


