Windows 10 has a System Restore feature designed to store your PC’s working state as a “Restore Point” for your system when changes are detected. In case of any critical problem, such as after installation of a driver, update, or an app, system settings can revert your device to an earlier point when that problem did not exist, all without you loosing your important data.
The feature is disabled by default and must be enabled first to create restore points. We will walk you through the steps required to recover your device from problems that could affect your PC.
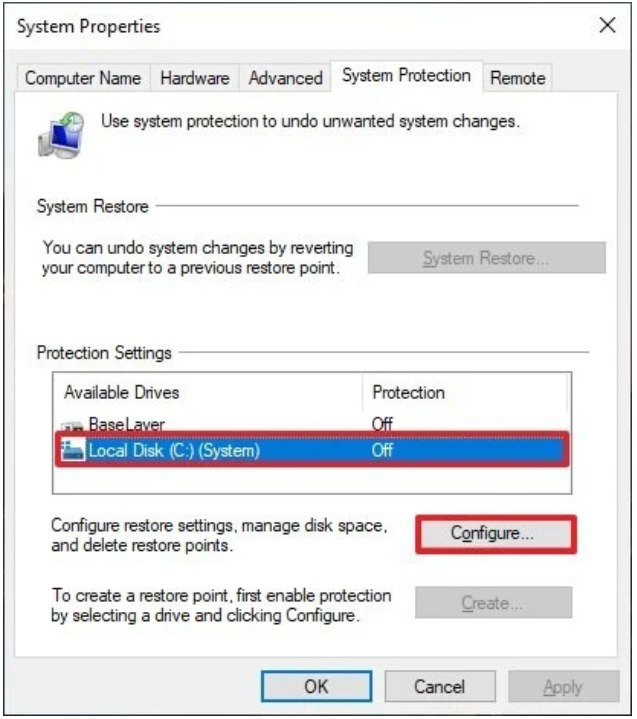
How to enable System Restore:
As the feature is not enabled by default, it can be enabled by following these steps:
- Open Start menu
- Search for “Create a Restore Point” and open the result displaying system properties.
- Select System Protection > System Drive > Configure.
- Select Turn on System Protection.
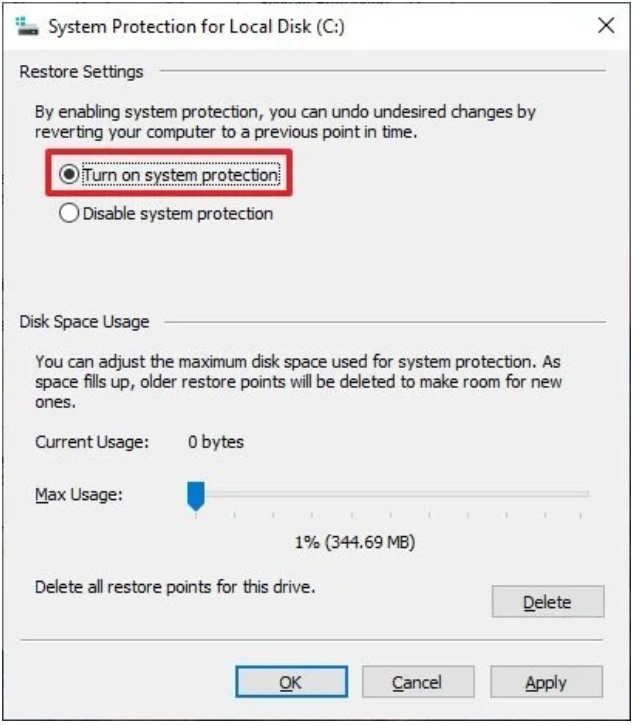
- Click Apply.


Once these steps are followed, Windows will automatically create a restore point when adding a new update or any important changes are made.
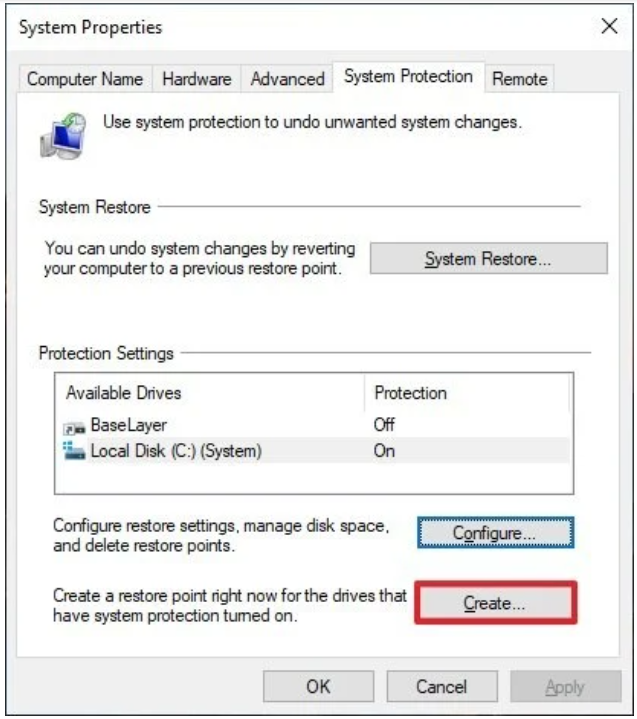
How to create a System Restore Point
If you are about to make changes to your system settings, it is recommended that you manually create a restore point on your device.
- Open Start menu
- Search for “Create a Restore Point” and open the result displaying system properties.
- Select System Protection > Create.
- Type a descriptive name for your restore point and click Create.
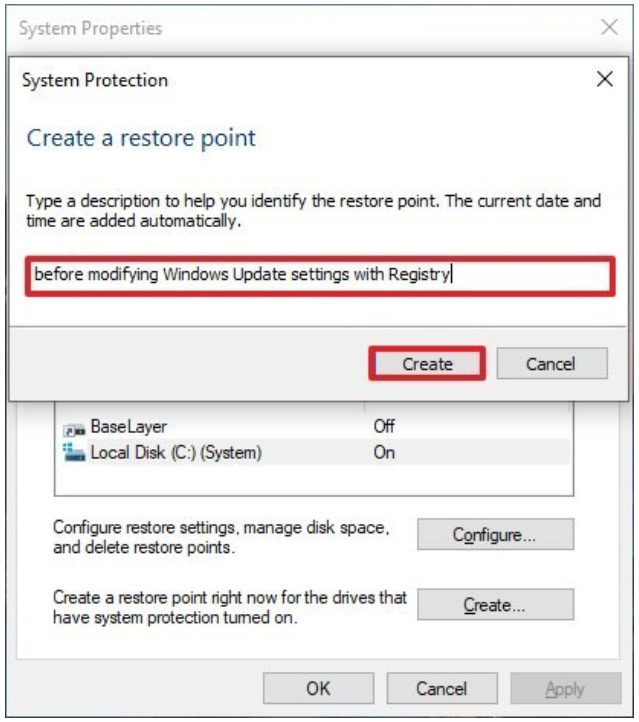
- Click Close.


After these steps are completed, you will have a way to restore Windows if any new changes end up messing up your PC.
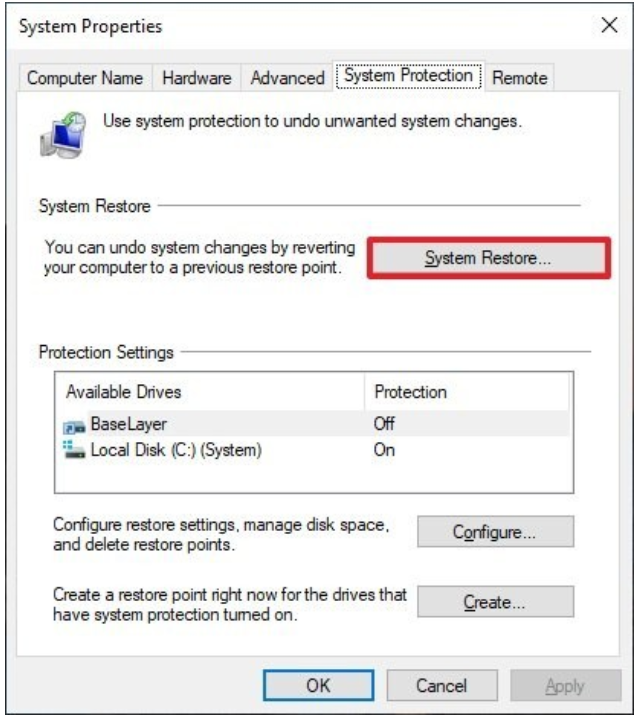
How to recover using System Restore
Windows can be restored as long as you have access to your desktop. You can revert changes by following these steps:
- Open Start menu
- Search for “Create a Restore Point” and open the result displaying system properties.
- Select System Protection.
- Click on System Restore.
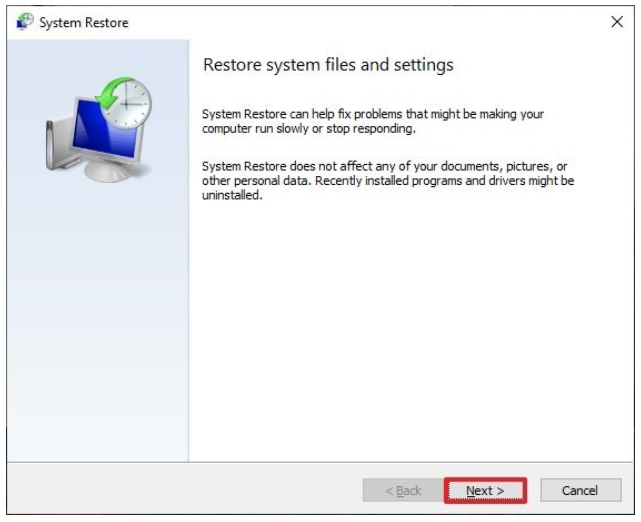
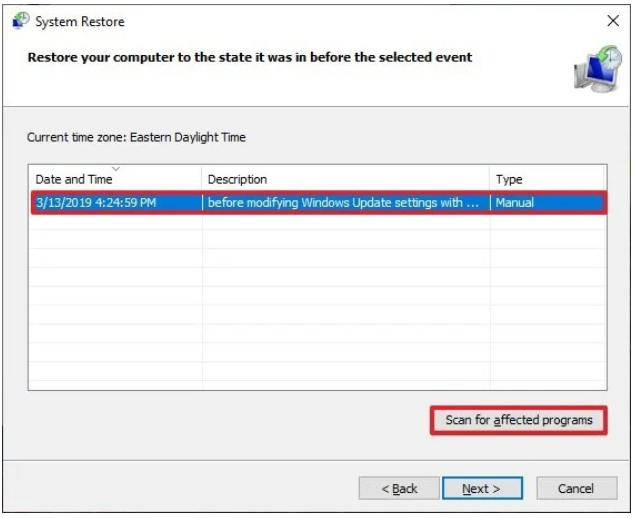
- Click on Next and select a restore point that you want to use.
- Apps added after restoring will be displayed if you click on “Scan for affected programs”.
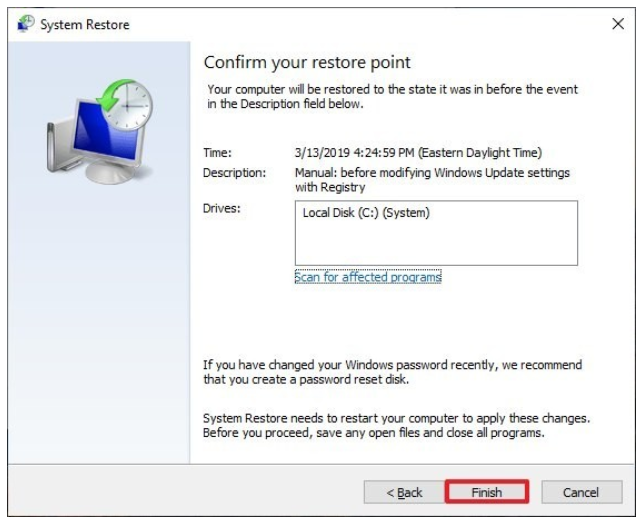
- Click on Close > Next > Finish.


The feature was announced a long time ago and these instructions can also be used to access this feature in Windows 7 and Windows 8.1. However, users must keep in mind that this feature is not a replacement for backup or any other options that may reset your PC to its default factory configuration. This means that that if your hard drive faces issues or unrepairable file corruption, you will not be able to recover your data and may end up losing files.
See Also:


3 comments