In Windows 11, users can enable the “System Protection” feature to create restore points on a regular basis.
Restore points are snapshots of your computer’s system files and settings. If you make a change to your computer that you don’t like, you can use a restore point to revert your computer to its previous state.
Usually, System Protection is enabled by default for the C: drive, which is the drive that Windows is installed on. If the feature is disabled, users can enable it for drives, such as your data drives using Control Panel.
What are the benefits of System Protection in Windows 11:
- You can restore your computer to a previous state if you make a change that causes problems: This can be helpful if you install a new program that conflicts with your existing software, or if you make a change to your system settings that causes your computer to become unstable.
- You can use System Protection to troubleshoot problems with your computer: If you’re having problems with your computer, you can use System Protection to restore your computer to a point in time before the problems started. This can help you to identify the cause of the problem and to fix it.
- You can use System Protection to protect your data from accidental changes: If you accidentally delete a file or make a change to a setting that you don’t want, you can use System Protection to restore your computer to a point in time before the change was made. This can help you to recover your lost data.
System Protection is a valuable feature that can help you to protect your computer from problems and to recover your data if something goes wrong. It is a good idea to enable System Protection and to create regular restore points.
In this guide, we will show you how to enable System Protection on Windows 11.

Here is how to enable System Protection in Windows 11
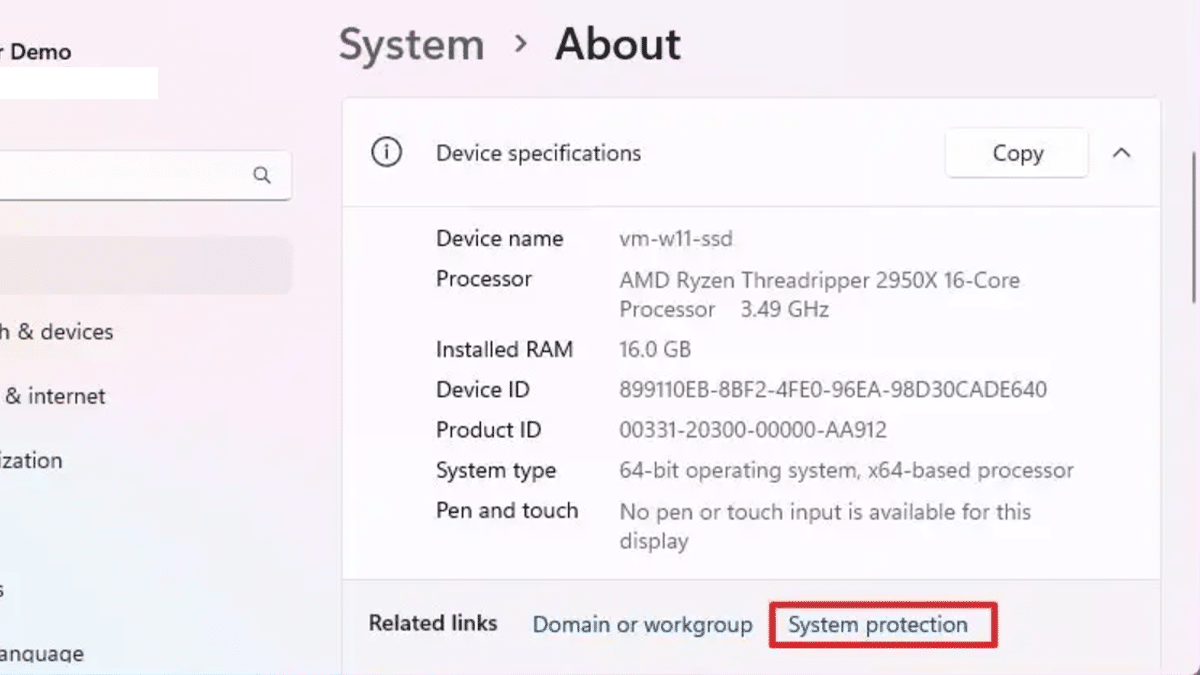
- Open Settings > click on System > under the “Device specifications” section > click the System protection option.
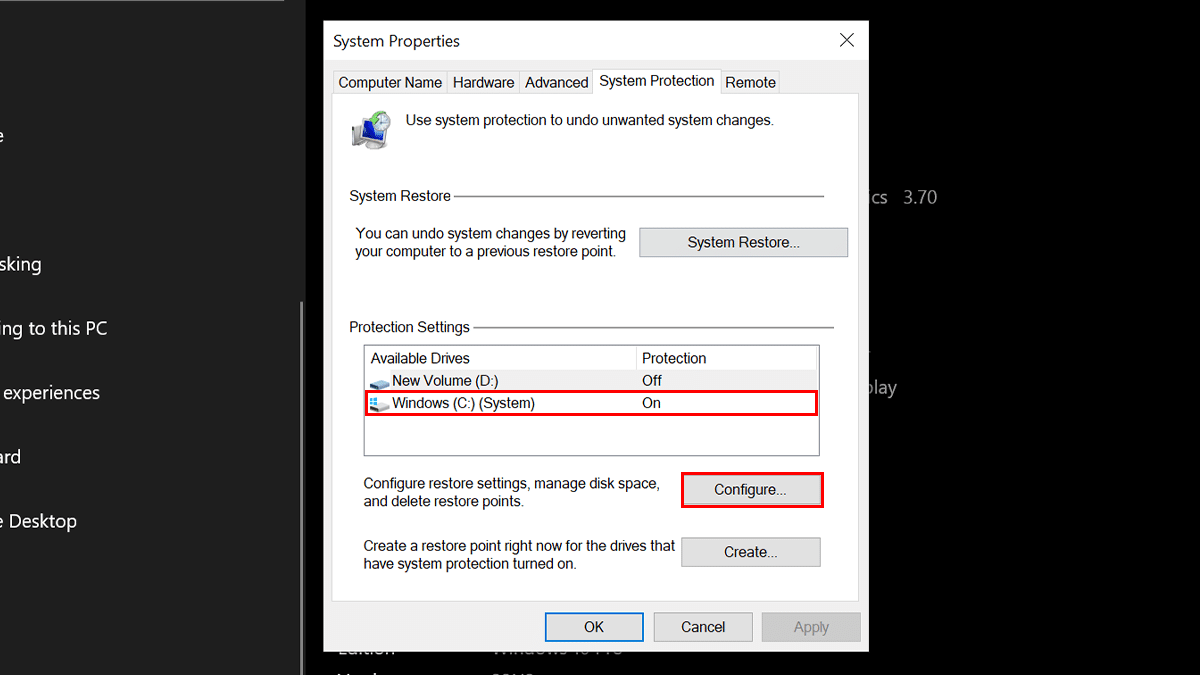
- Under the “Protection Settings” section > select the system drive (C) > click the Configure button.
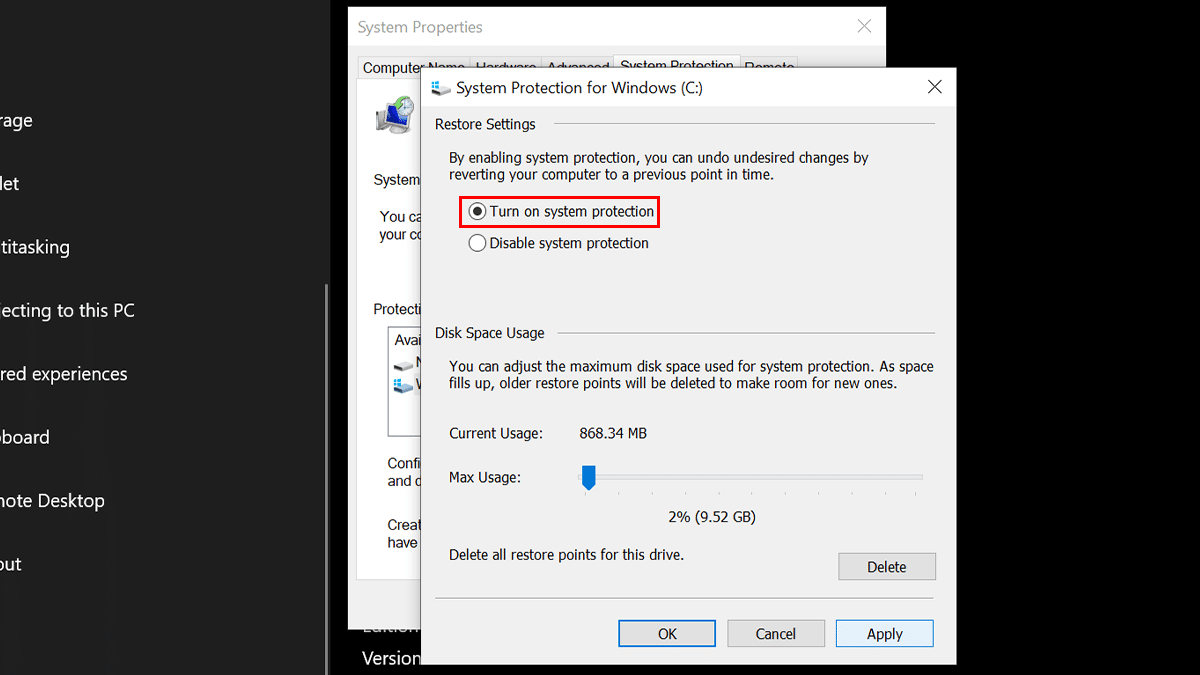
- Select the “Turn on system protection” option to enable the drive protection feature.
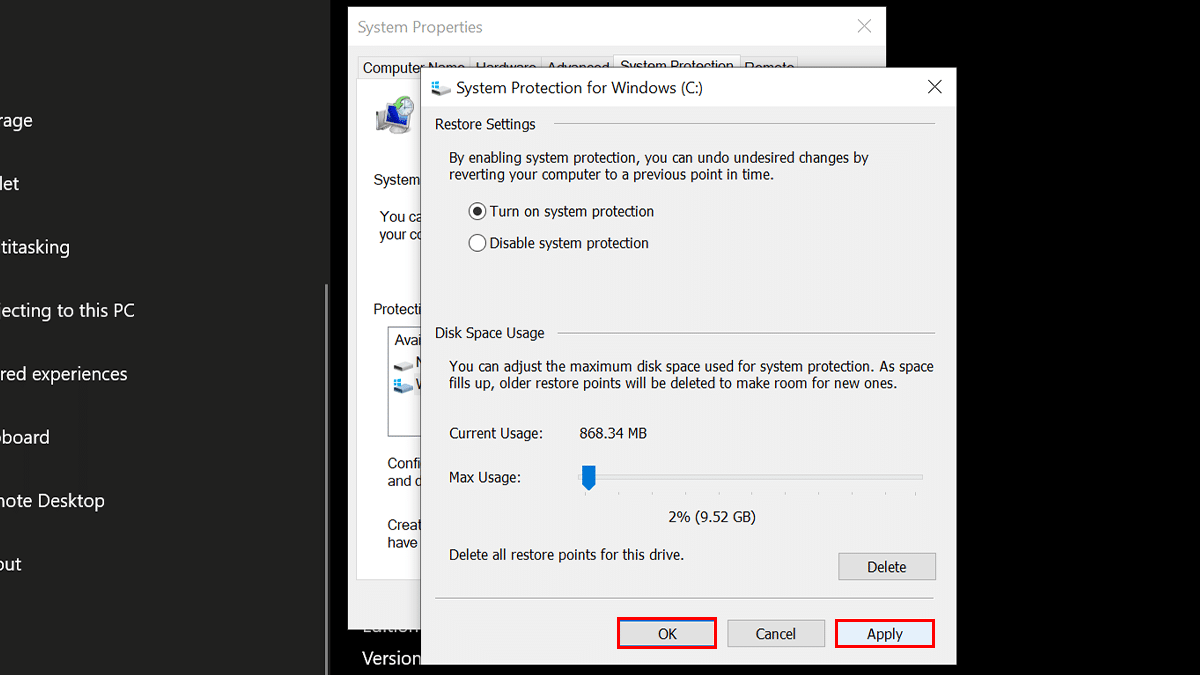
- Click the Apply button > click the OK button.
- You can repeat the same method to enable System Protection for other drives.
- When done, the system will be able to create restore points to recover the computer in case of problems with system updates, applications, or misconfiguration.


Read more:


