Users with multiple out devices like stereo speakers and gaming headsets can connect both to the system and configure the system to make one of them the default.
Although audio devices are virtually plug-and-play on Windows 11 and sometimes we still need to manage the settings to ensure that sounds play correctly.
In this guide, we will show how to manage your sound settings and improve with Spatial sound, mono audio, and configure special sound features to improve the audio quality.

Here’s how you can manage your sound settings on Windows 11
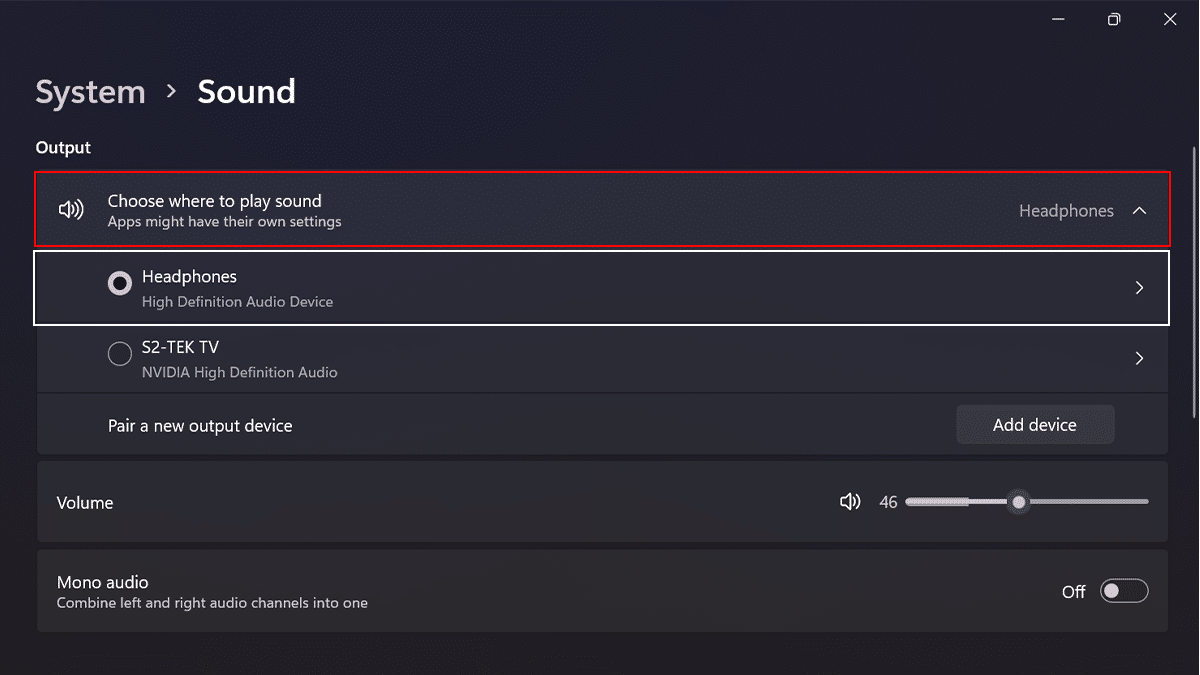
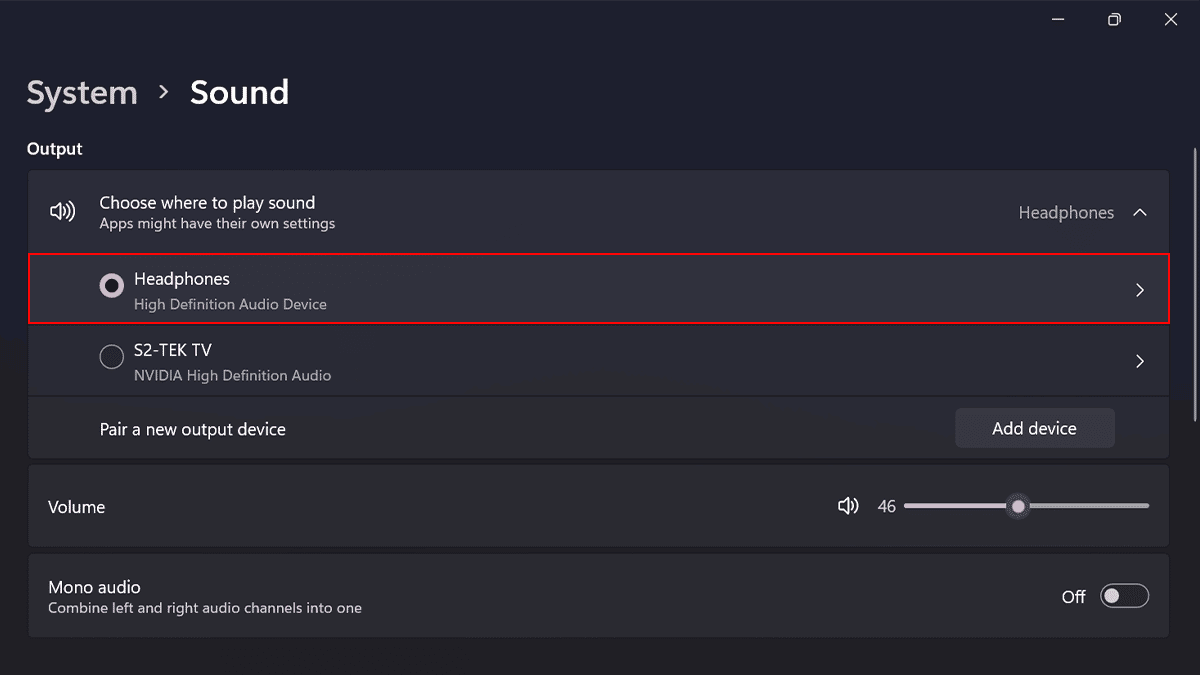
How to change the default audio output
- Open Settings > click on System > click the Sound.
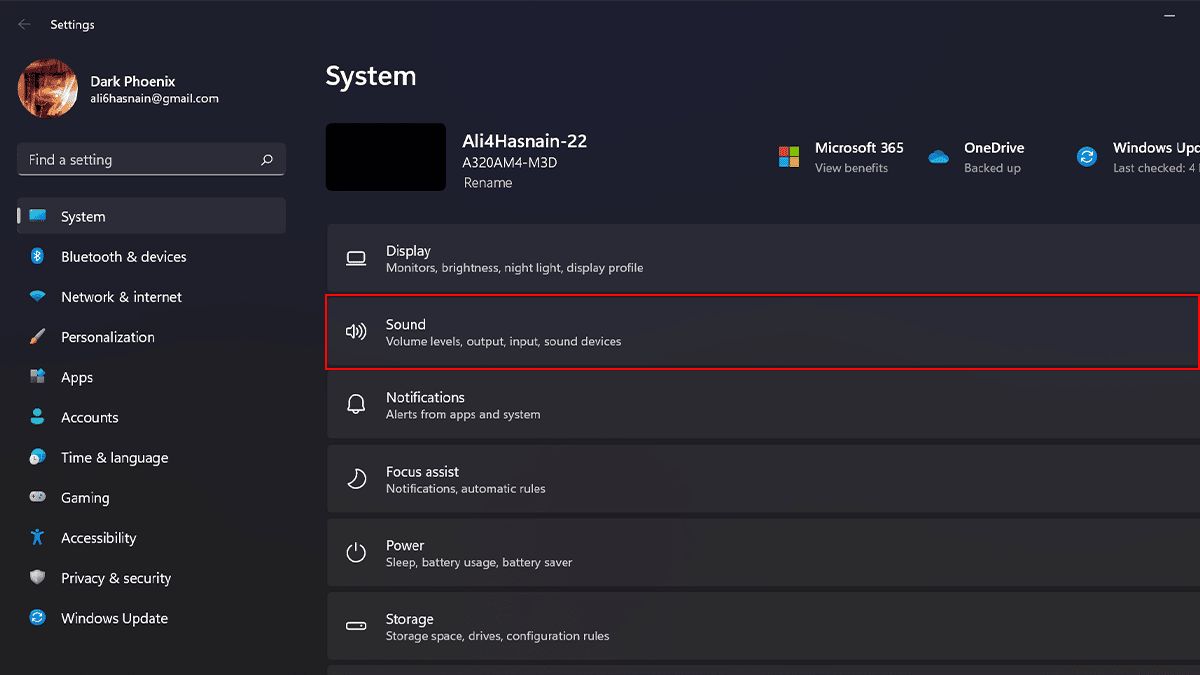
- Under the Output section > click the Choose where to play sound setting > select the speakers, headphones, or headsets whichever you use.


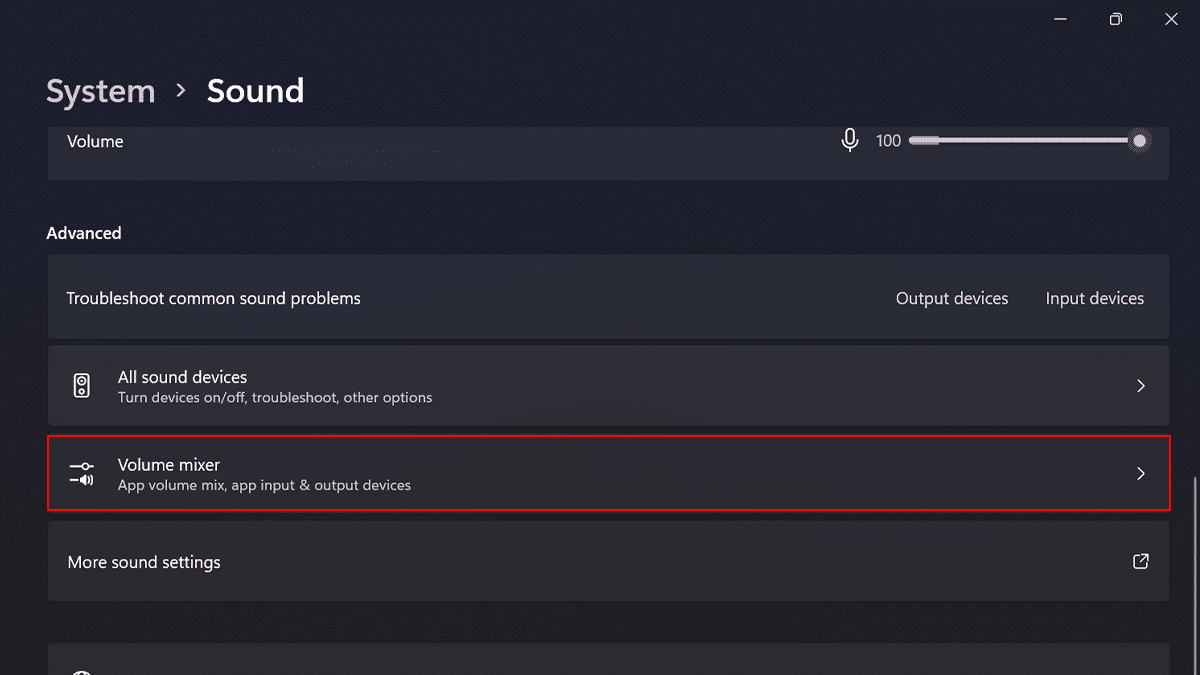
How to choose the default output per application
- Open Settings > click on System > click the Sound.
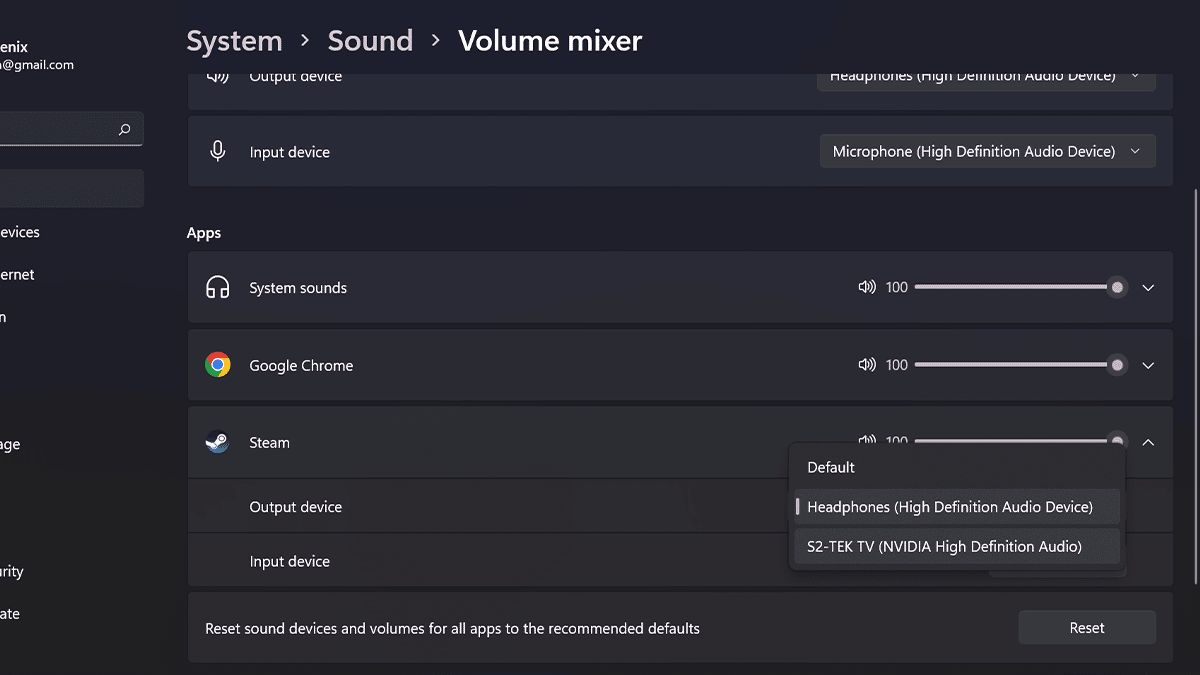
- Scroll down > under the Advanced section> click the Volume mixer setting.
- Under the Apps section > select the app > use the Output device setting to select a different output device, whichever you want to use.


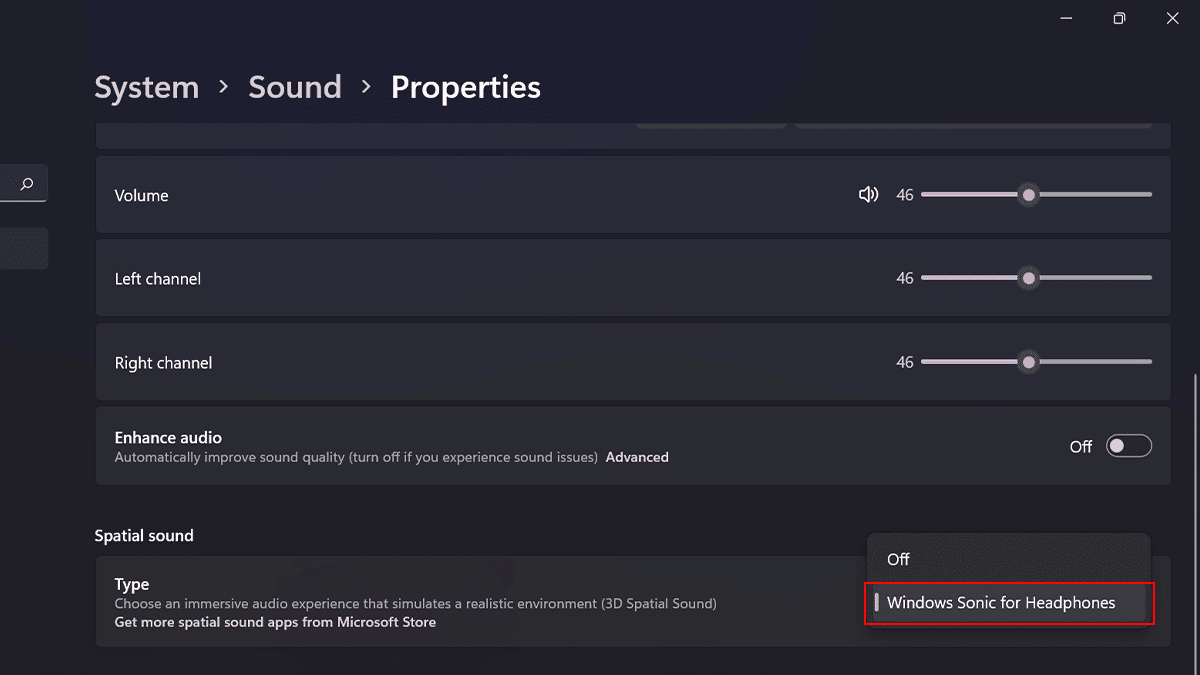
How to enable spatial sound
- Open Settings > click on System > click the Sound.
- Under the Output section, click the Headphones settings.
- Select the Windows Sonic for Headphones option in the Spatial audio setting.


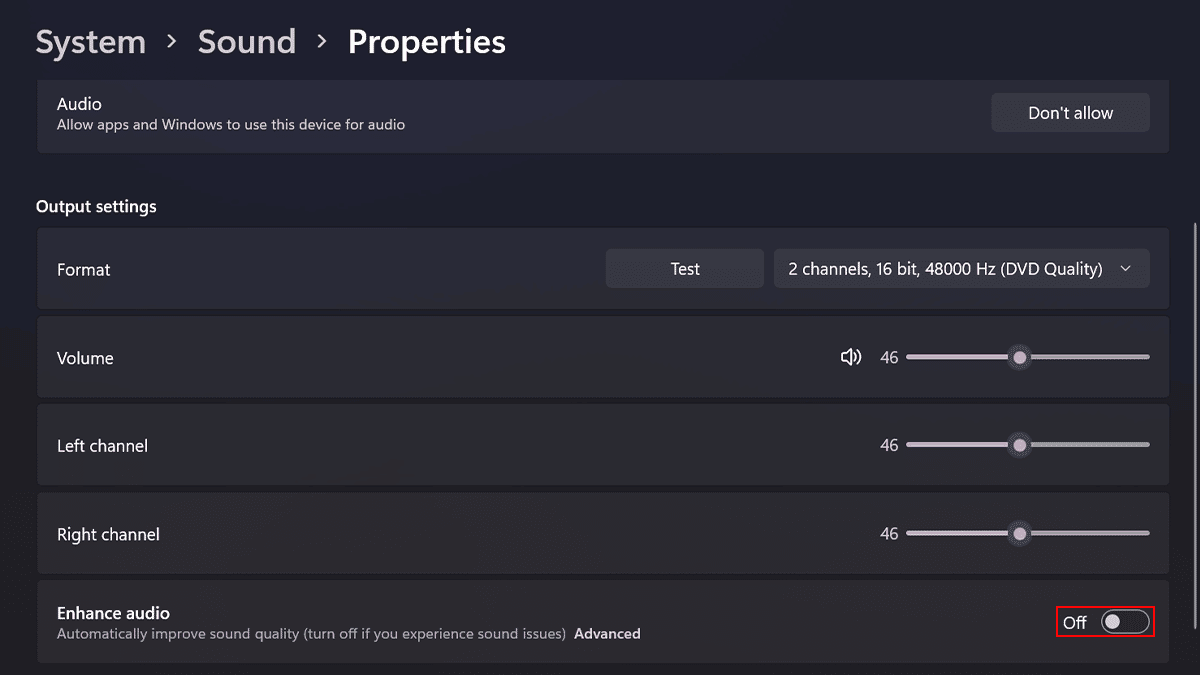
How to enable enhanced audio features
- Open Settings > click on System > click the Sound.
- Under the Output section > click the Headphones settings.
- Under the Output settings section > toggle on the Audio enhancements.

Read more:
- How to disable the Taskbar search box on Windows 11
- How to reset audio settings to defaults in Windows 11
- How to add and remove Recycle Bin from the taskbar in Windows 11
- How to change the ear tips of your AirPods Pro
- How to use the emojis keyboard feature on Windows 11
- How to password protect a folder on Windows 11 without Installing any third-party apps


