Here is how you can install Windows 11 in Parallels on an M1 Mac using workarounds to bypass hardware checks for TPM 2.0. This guide only applies to Windows 11 on ARM.
Microsoft has released Windows 11 as an early preview for enthusiasts. While the new update features a fresh coat of paint, it also features some new hardware requirements such as newer processors and TPM 2.0, which are going to leave older PCs in the dust. This also means that virtualizing Windows 11 will not be as simple as old versions for now, until apps like Parallels release compatible updates. At the time of writing, Parallels does not support virtual TPM 2.0 on M1 Macs, but luckily, we have been testing some workarounds to bypass these hardware checks and get Windows 11 up and running on an M1 Mac.

What do you need to get started with Windows 11 installation on M1 Mac?
Before you proceed with this guide, it goes without saying that you will need the following:
- M1 Mac (we have tested this guide on macOS Monterey beta too)
- Windows 11 on ARM ISO (download from here by signing up to Windows Insider Program and switching to the Dev channel)
- Parallels (Make sure that Parallels is updated to the latest version)
Getting started with installing Windows 11 in Parallels on M1 Mac
Although Parallels provides an automated installation feature where you just point it to the Windows ISO file and it handles the rest, we are not going to use it. We have to use the manual installation process.
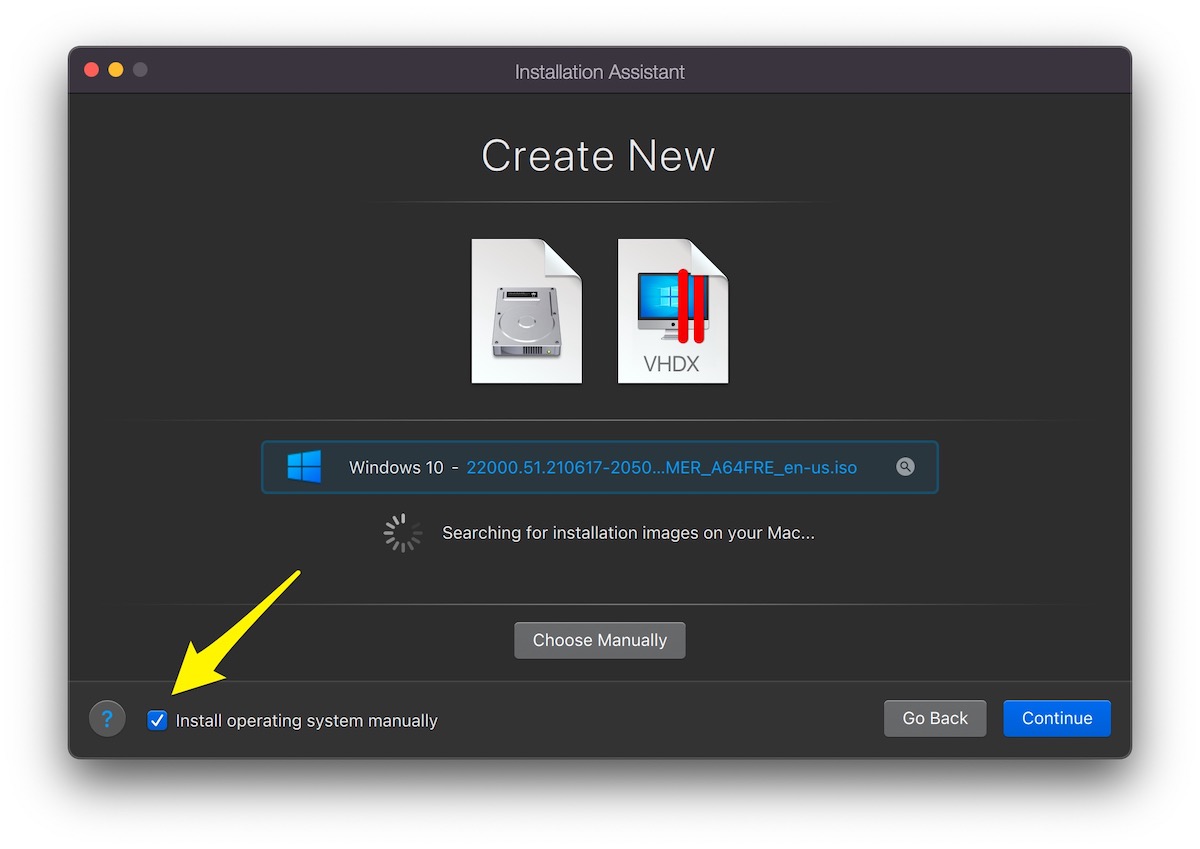
- When you open Parallels Desktop and go to File > New, you will be explained various details on how M1 Macs can only virtualize ARM operating systems and so on. Keep clicking next until you reach the below Installation Assistant screen. Select the Windows 11 on ARM ISO file that you downloaded earlier and select the little check box at the bottom left which says ‘Install operating system manually’.
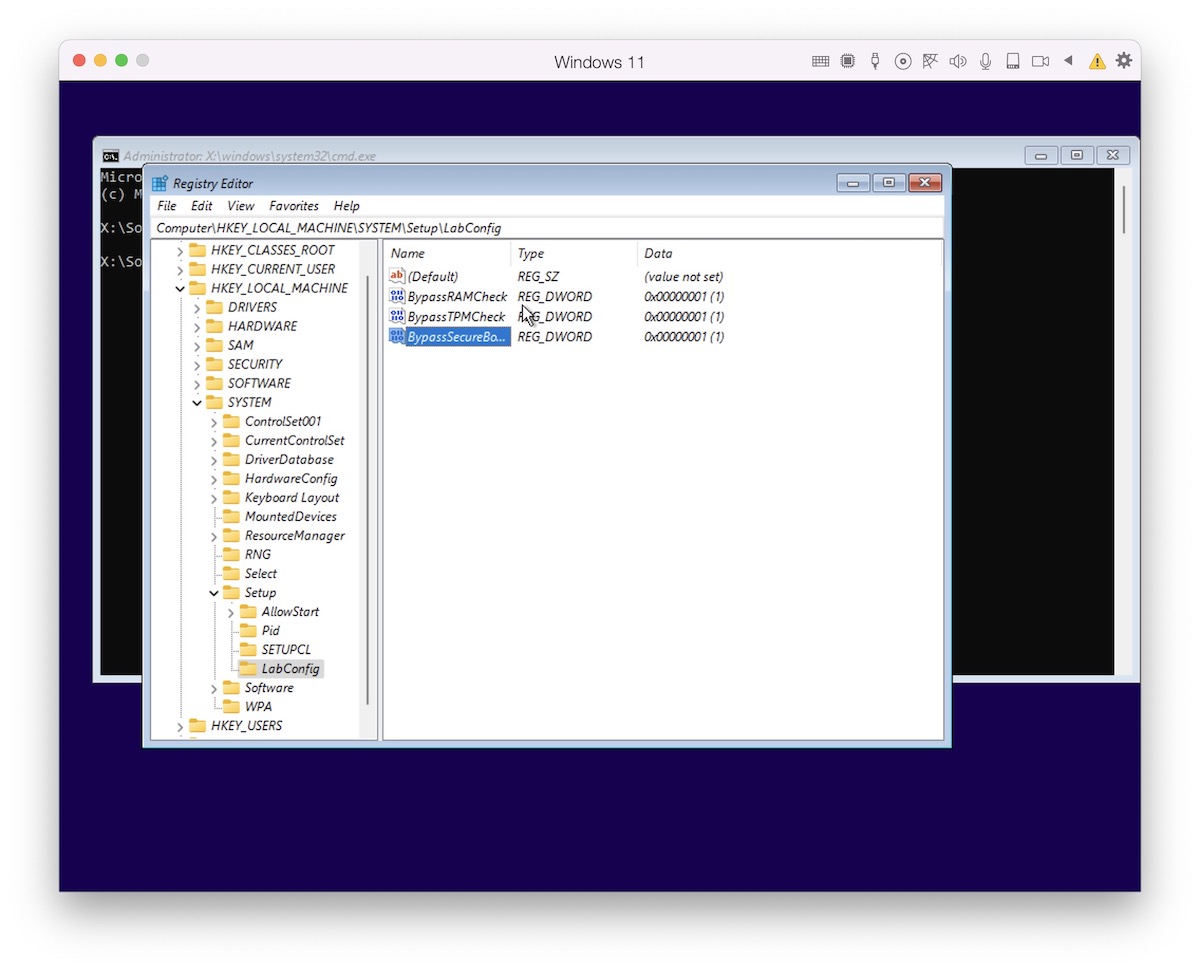
- When the installation wizard starts from the ISO file, press Shift + F10, and type regedit.exe. What you are doing here is opening up the Windows Registry editor. Navigate to HKEY_LOCAL_MACHINE\SYSTEM\Setup\LabConfig folder and create the following DWORD entries (right-click in the empty space, and go to New > DWORD (32-bit) Value. Make sure to double click and assign them the value ‘1’ afterwards.
-
- BypassRAMCheck
- BypassTPMCheck
- BypassSecureBootCheck
-
- Once you are done updating values, you can close the registry editor and command line, and continue with the Windows 11 setup as normal.


Due to these registry values, the installation will not stop you due to the various hardware checks. If you had not done the registry updates, the installation would tell you that you do no the needed TPM 2.0 chip. Although Parallels has a virtual TMP chip for its apps for Intel Macs, the functionality is not yet available on M1 Macs.
Enjoy trying out Windows 11 on your Mac!


1 comment