Screenshots are a huge and useful part of our lives, whether we’re making it into a meme, saving a moment, sending it to a friend, or any other thing. For someone who has taken a good number of screenshots in iOS will be familiar with the preview that appears in the lower-left corner after you take a screenshot.
At times, it is exactly what the user requires – one tap on the preview, crop the screenshot, annotate it or forward it from there. But when someone is required to take screenshots after screenshots, it becomes a sort of nuisance. You can follow our guide to take screenshots in iOS without the preview.

How to take screenshots in iOS without the pop-up
As of right now, there is not a certain way to avoid the previews in the current version of iOS. You should be able to do so in iOS 14.5. The reason is that Apple has not included a convenient switch that users can toggle off to avoid screenshot thumbnails like there is on macOS. The preference was added to the Shortcut apps so Apple might not even know that they included an option to avoid the screenshot preview.
There are 2 requirements to achieve this. Firstly, the Shortcuts app. It is preinstalled on iOS and iPadOS but if someone has deleted it, they can get it back from the App Store. The second is the requirement for iOS 14.5 beta or later or iPadOS 14.5 beta 2 or later.
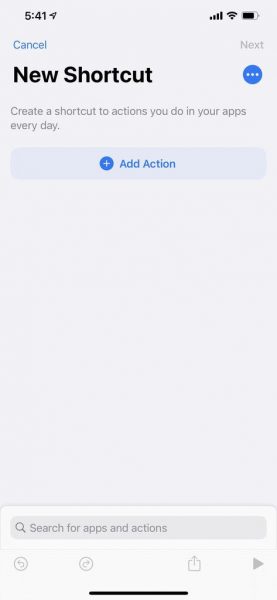
- Open Shortcuts app
- Go to My Shortcuts.
- Tap the ‘+’ in the top right to start a draft.
- Tap Add Action button or the search bar.
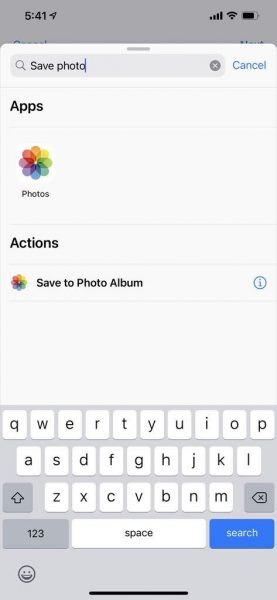
- Search and select Take Screenshot.

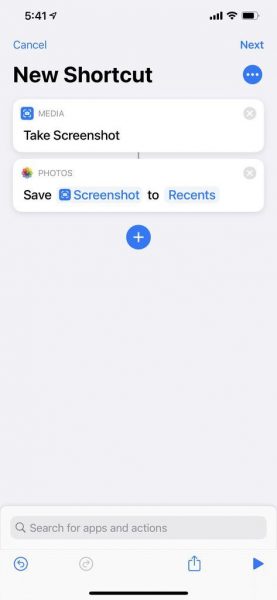
- Now the shortcut has been made, but it will not do anything for itself because we did not add any instructions. So, tap the ‘+’.
- Search for and select Save to Photo Album. By selecting this, all screenshots in iOS will save to Photos.
- Tap Next, enter a name for your shortcut, tap Done to finish it up.


Now in order to take a screenshot, you only need to press the shortcut’s card even though that is not very convenient. Users could say the name of their shortcut to Siri, and it will take the screenshot for you.
There is also another step that you can perform to perfect the act. Apple included a new accessibility feature in iOS 14 called Back Tap. It lets you trigger actions by tapping the back of your iPhone either two or three times. You can assign your shortcut to it, taking screenshots in iOS with much ease.
- Open Settings.
- Go to Accessibility.
- Tap Touch.
- Find your way to Back Tap.
- Choose Triple Tap or Double Tap for your shortcut.
Upon doing this, users can easily take screenshots in iOS using Back Tap. If it is the first time for you to take screenshots with this feature, users will see a prompt on the screen asking if they want to take a screenshot, just tap OK to allow it. This will only appear the first time.
We hope this guide was helpful for you to take screenshots in iOS. Let us know in the comments below!
Read More:
- How to label Bluetooth device type On iOS 14.4
- How to set alerts for different sounds around you on iPhone
- How to change the keyboard on your iPhone
- How to mirror iPhone screen to web browsers
- How to reduce background noise when recording voice memos on iPhone
- How to unlock iPhone with Apple Watch while wearing a face mask


1 comment