Microsoft Word can help guarantee inclusive language in your professional communications by being able to check your document for biases regarding age, gender, and more. This feature is not turned on by default. Here is a simple guide on how to check for inclusive language on Word to ensure bias-free communication.
The inclusive language feature is only accessible in the version of Word that comes with a Microsoft 365 subscription.
How to turn on the option to check for inclusive language on Microsoft Word
If you do have Word 365, you might already be familiar with the built-in correction software it comes with: Editor. Not only can Editor show you corrections and suggestions for grammar and vocabulary, but it can also help the content in your document to be inclusive.
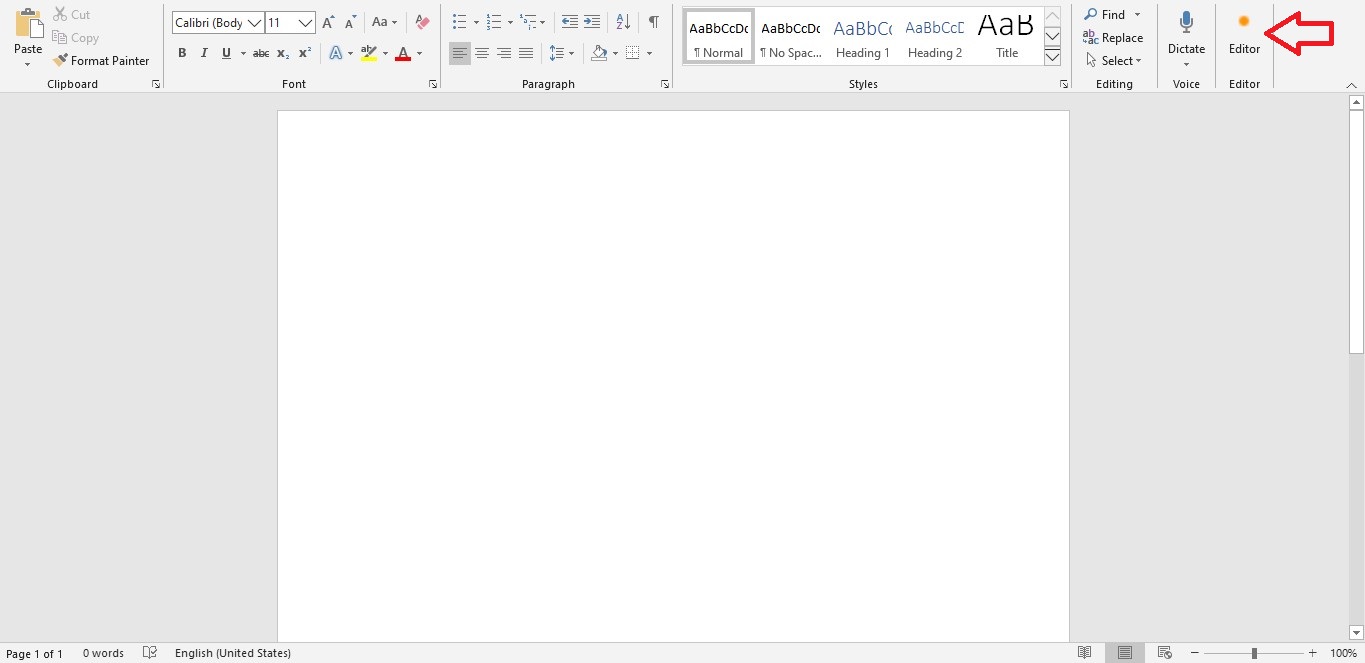
- First, open a new Microsoft Word document. Then, from the Home tab, click on Editor and select Settings from the drop-down menu.
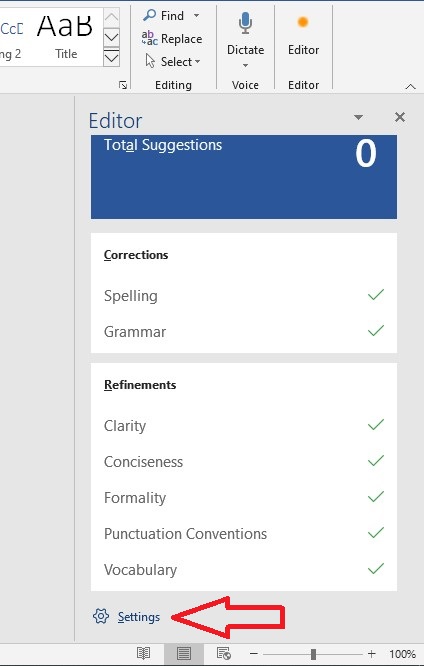
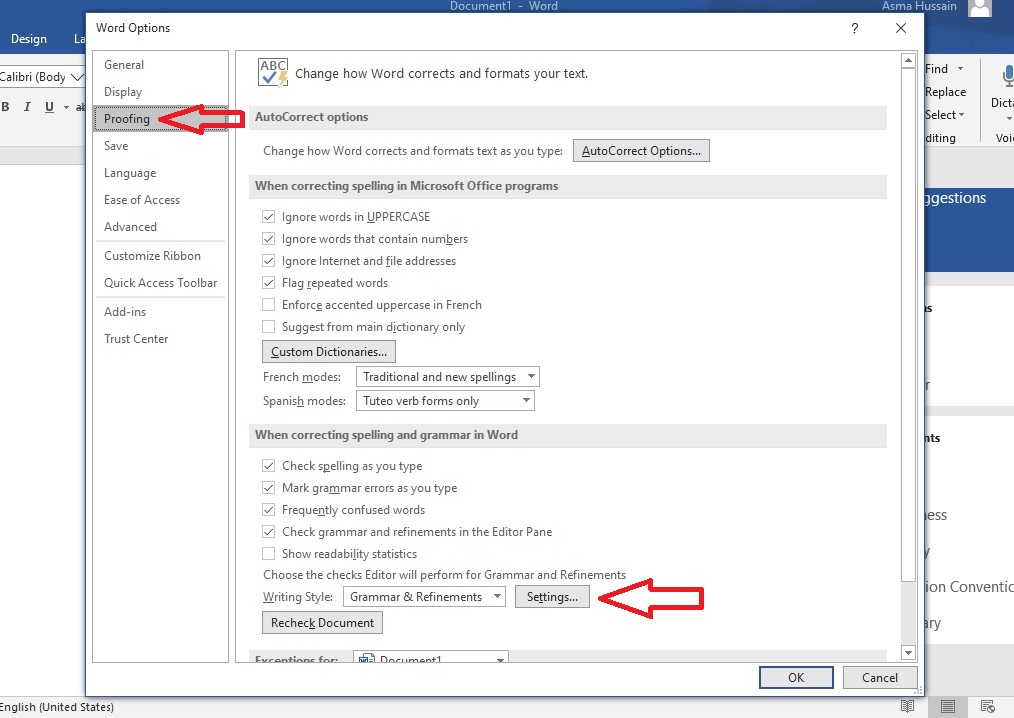
- Once you open the menu, select Proofing, and click on Settings.
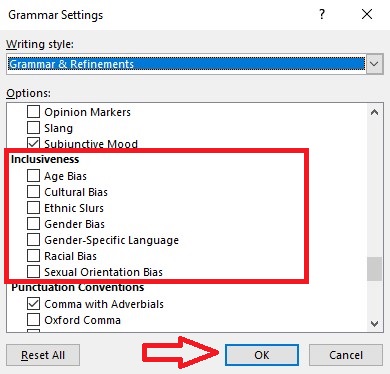
- Scroll down till you get to the Inclusiveness section. Now, select all the checkboxes that you want Word to check in your document to guarantee inclusivity.
- Now whenever you write something on word that can be considered non-inclusive, Word will notify you and suggest alternatives.
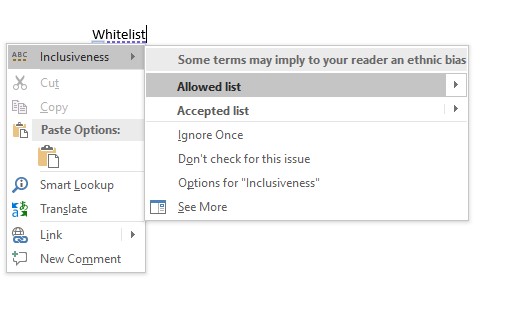
Though this feature can be helpful, it is not very polished. The software helps catch more common slurs but has trouble identifying non-inclusive language all the time. It can help you in identifying gender bias, racist and ethnic slurs in your document. But it is not helpful if you want to check for slurs related to disabilities and mental health in your Word document.
This feature is mainly just present to help you catch the more obvious non-inclusive language that may be present in your content. Hopefully, this helps you out. Good Luck!
Read Also:
1 comment